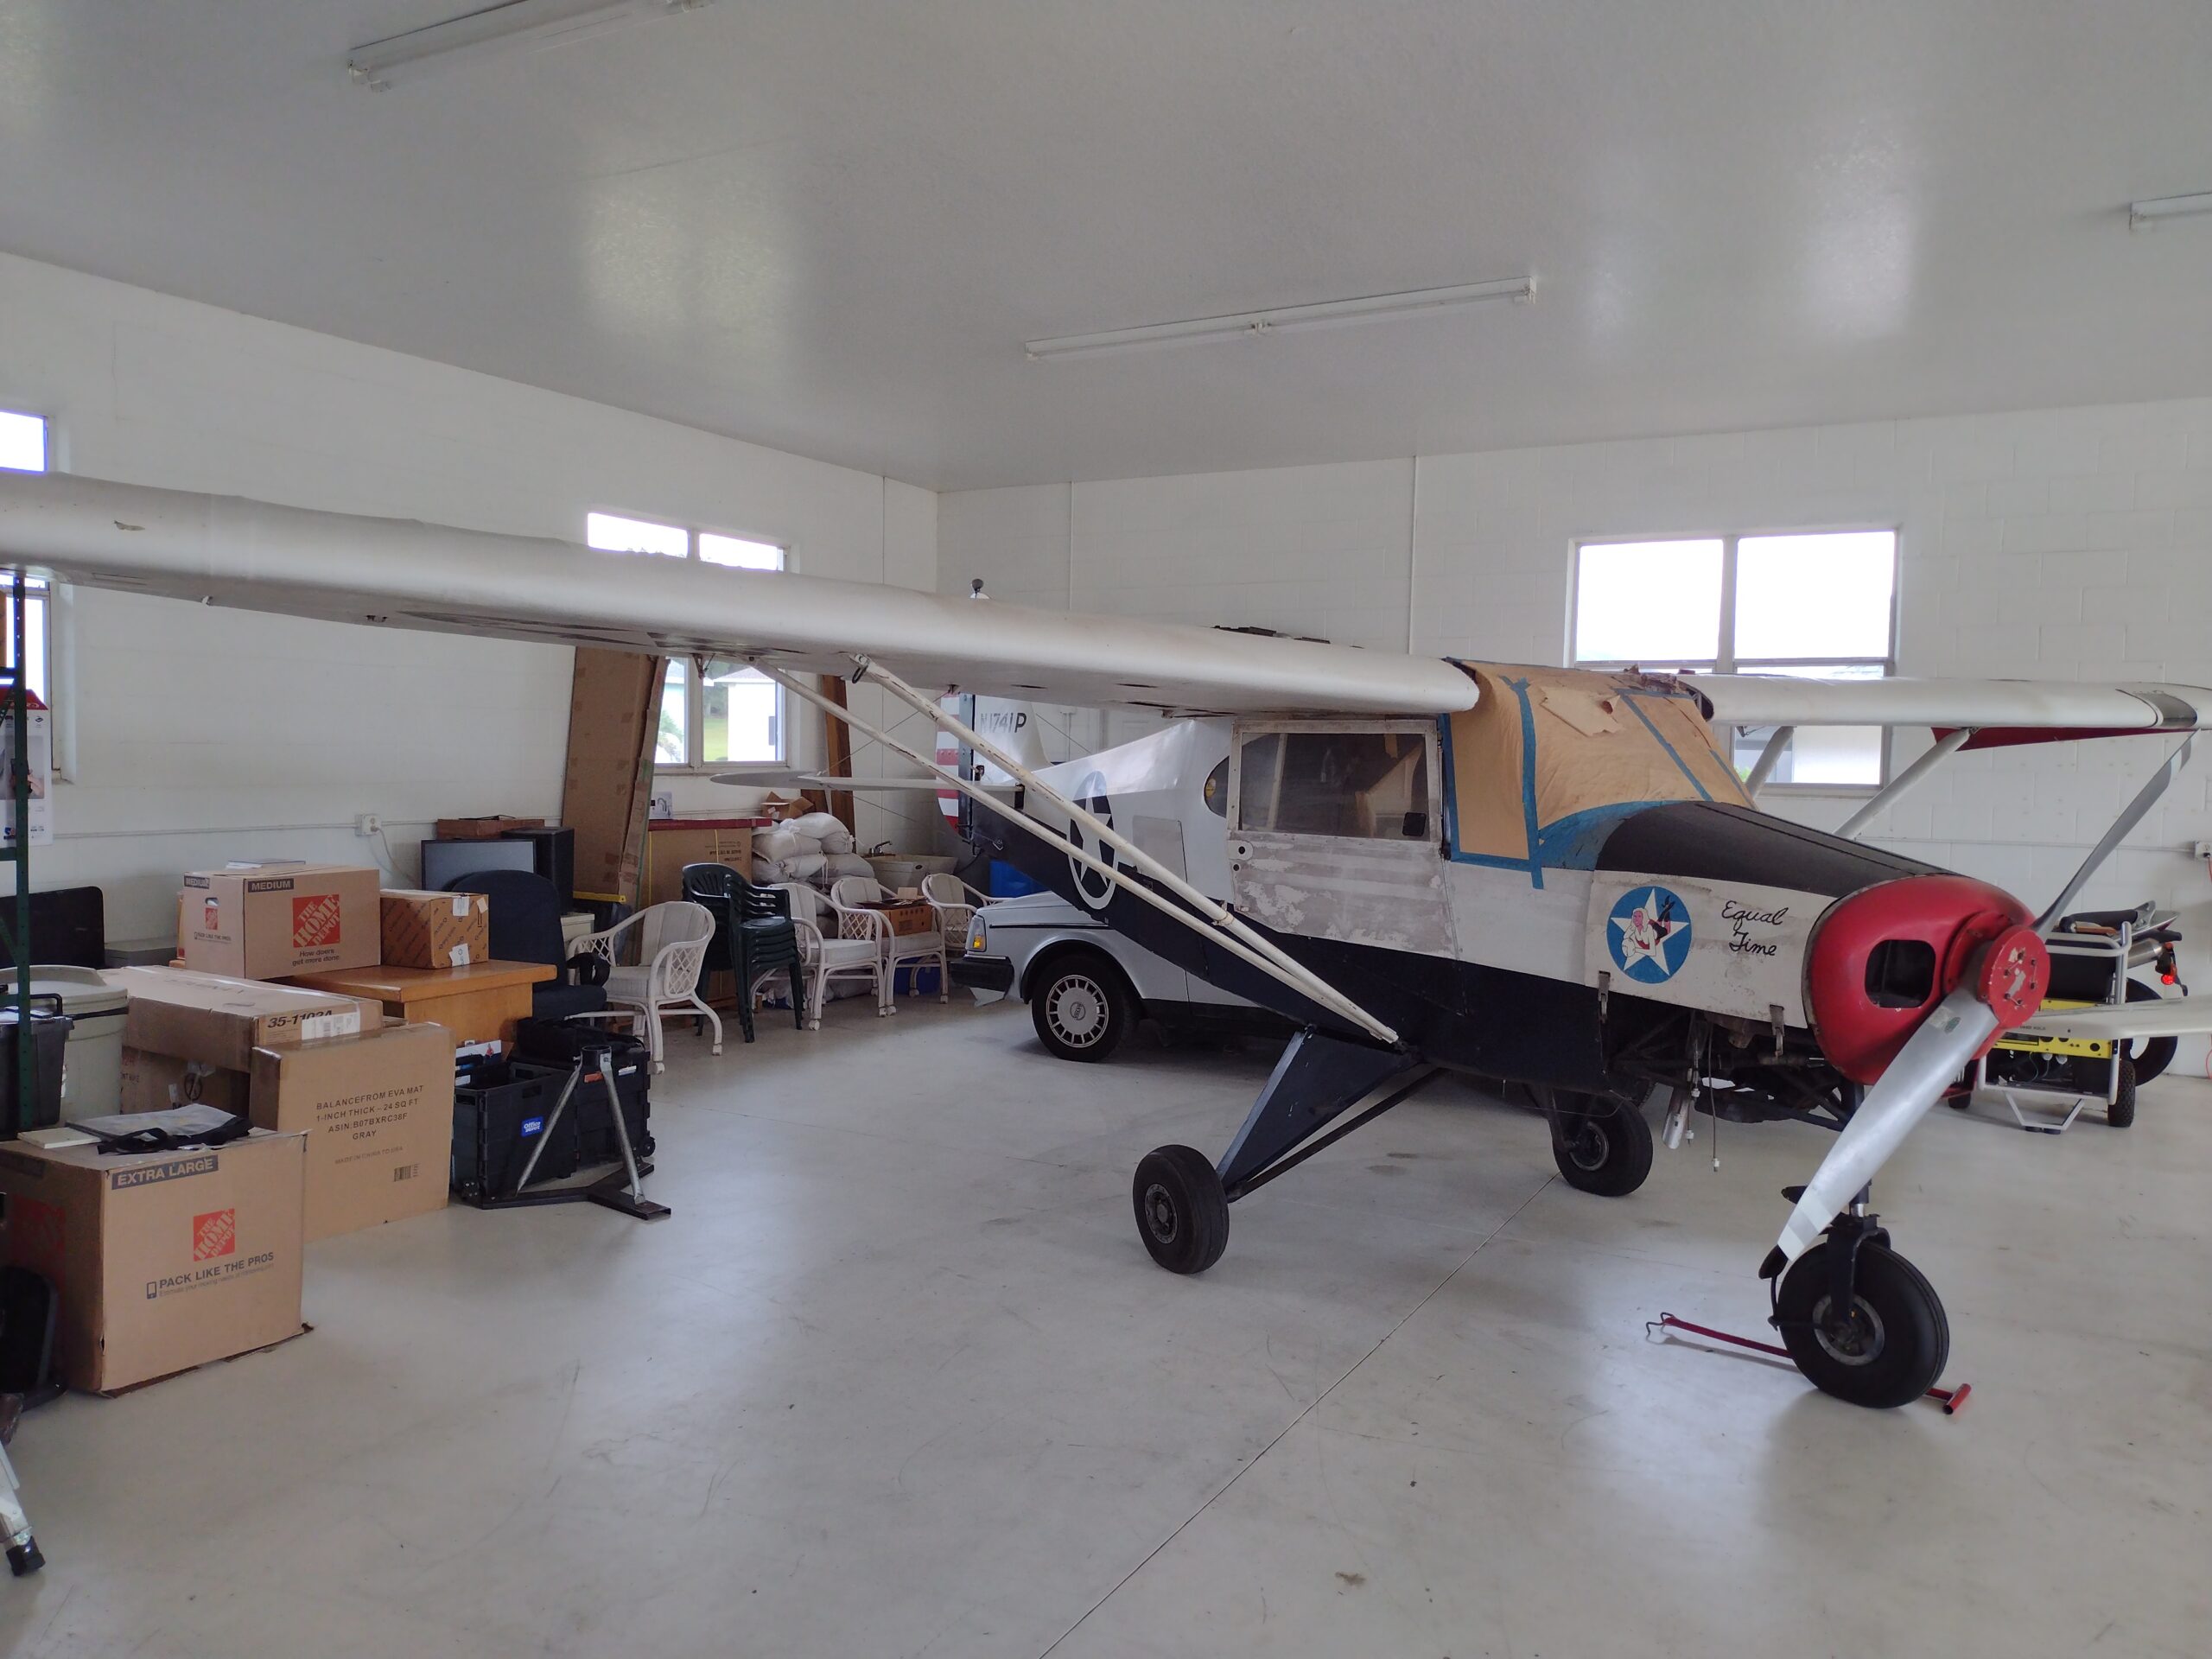
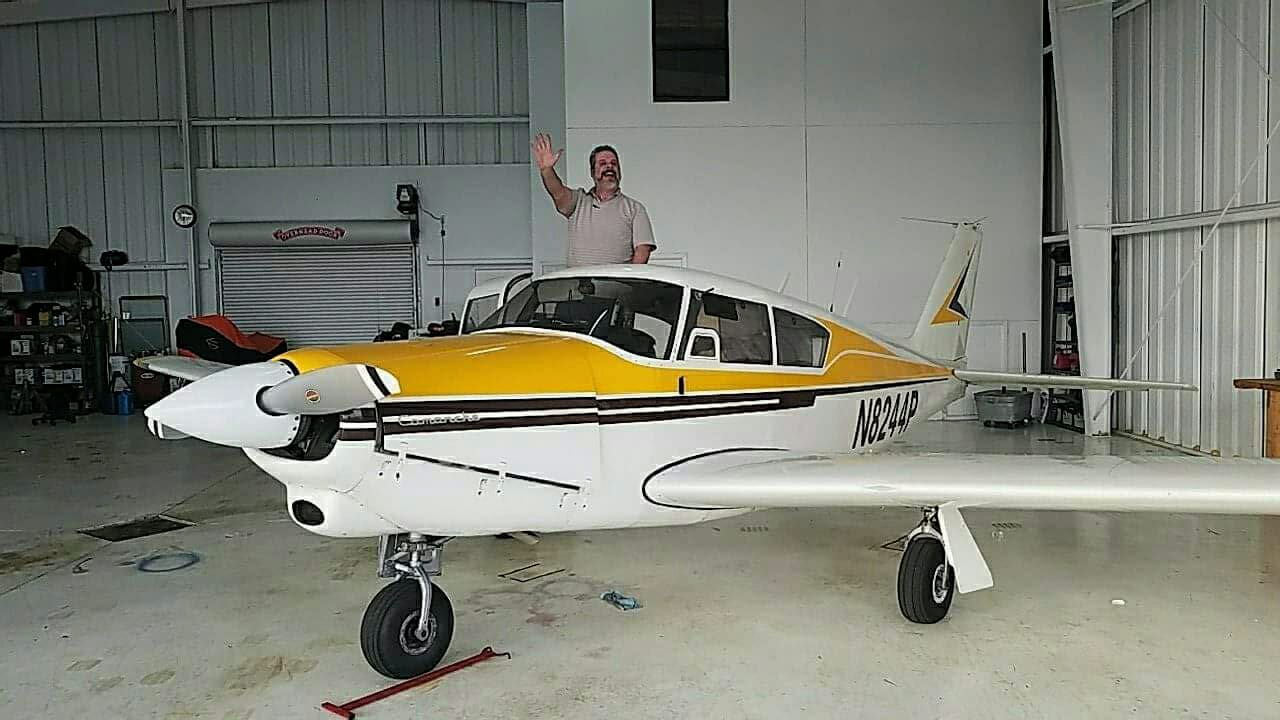
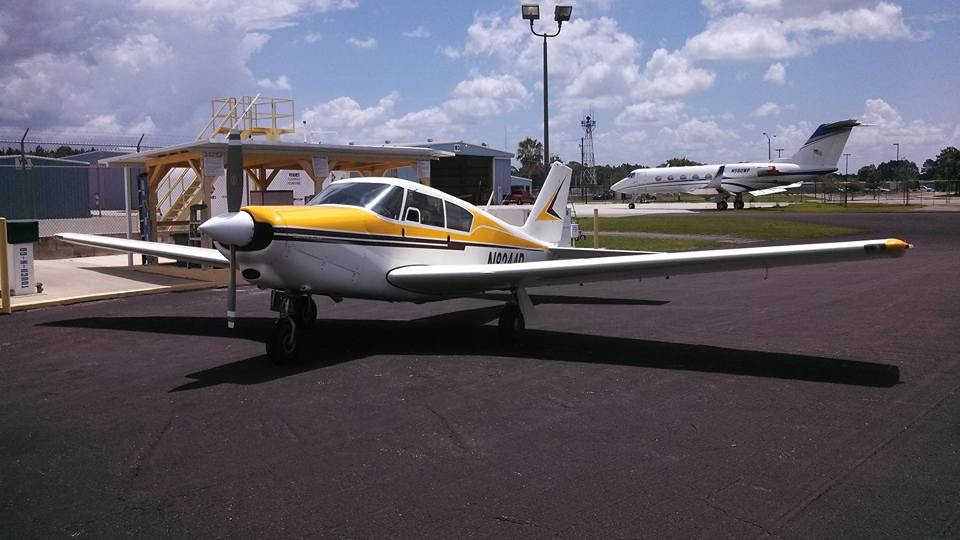
I recently purchased a 1955 Piper Tri-Pacer that was headed for the scrap pile. It sat unloved for almost thirty years in the back of a hangar. It was covered in dirt and had mouse holes in the headliner.
Can it be saved? I am not sure just yet. The air frame on this aircraft are tube and fabric, They are prone to rust and corrosion. The engine is a Lycoming O320 with about 900 hours on it. It has not run in a long time there is great concern about corrosion inside the engine.
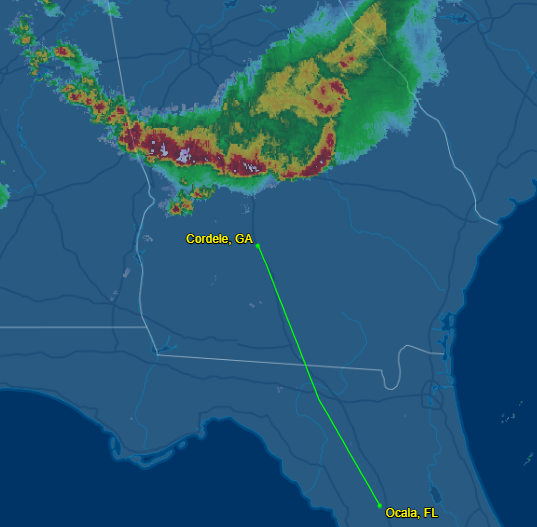
On Saturday July 21st I launched in my PA24 180 horsepower Piper Comanche from Jim Taylor field with the intent of flying to Oshkosh Wisconsin with a few stops in between. The first leg of the flight would take me from Ocala to Carrollton Georgia, west of Atlanta, for a quick rest and refuel.
A check of the weather showed a line of under developed storms spread out across the southeasterly moving cold front. The gaps between the storms was wide and the cells were not really generating much as of yet. As we continued to the northwest I kept an eye on the line of storms, so I could pick a gap to pass through them. However as the morning went on, the gaps closed and the few storms combined into a solid squall line.
A squall line is a line of thunderstorms that form at or about the front edge of a cold front. They tend to include very strong rain, hail, lots of lightning, and a phenomenon know as straight-line winds. A straight-line wind acts much like a plow blade and come down and out in front of the storms at tremendous speed and force. For a small airplane like mine this meant almost certain destruction if I was caught aloft in these winds.
Calculating the speed at which the storm was moving towards me, combined with my forward speed, I found the Crisp County Cordele airport (KCF) to be a good spot to set down. I pushed the throttle in a bit and accelerated the plane forward. It would certainly be better to be on the ground and under cover when this line of storms passed over.
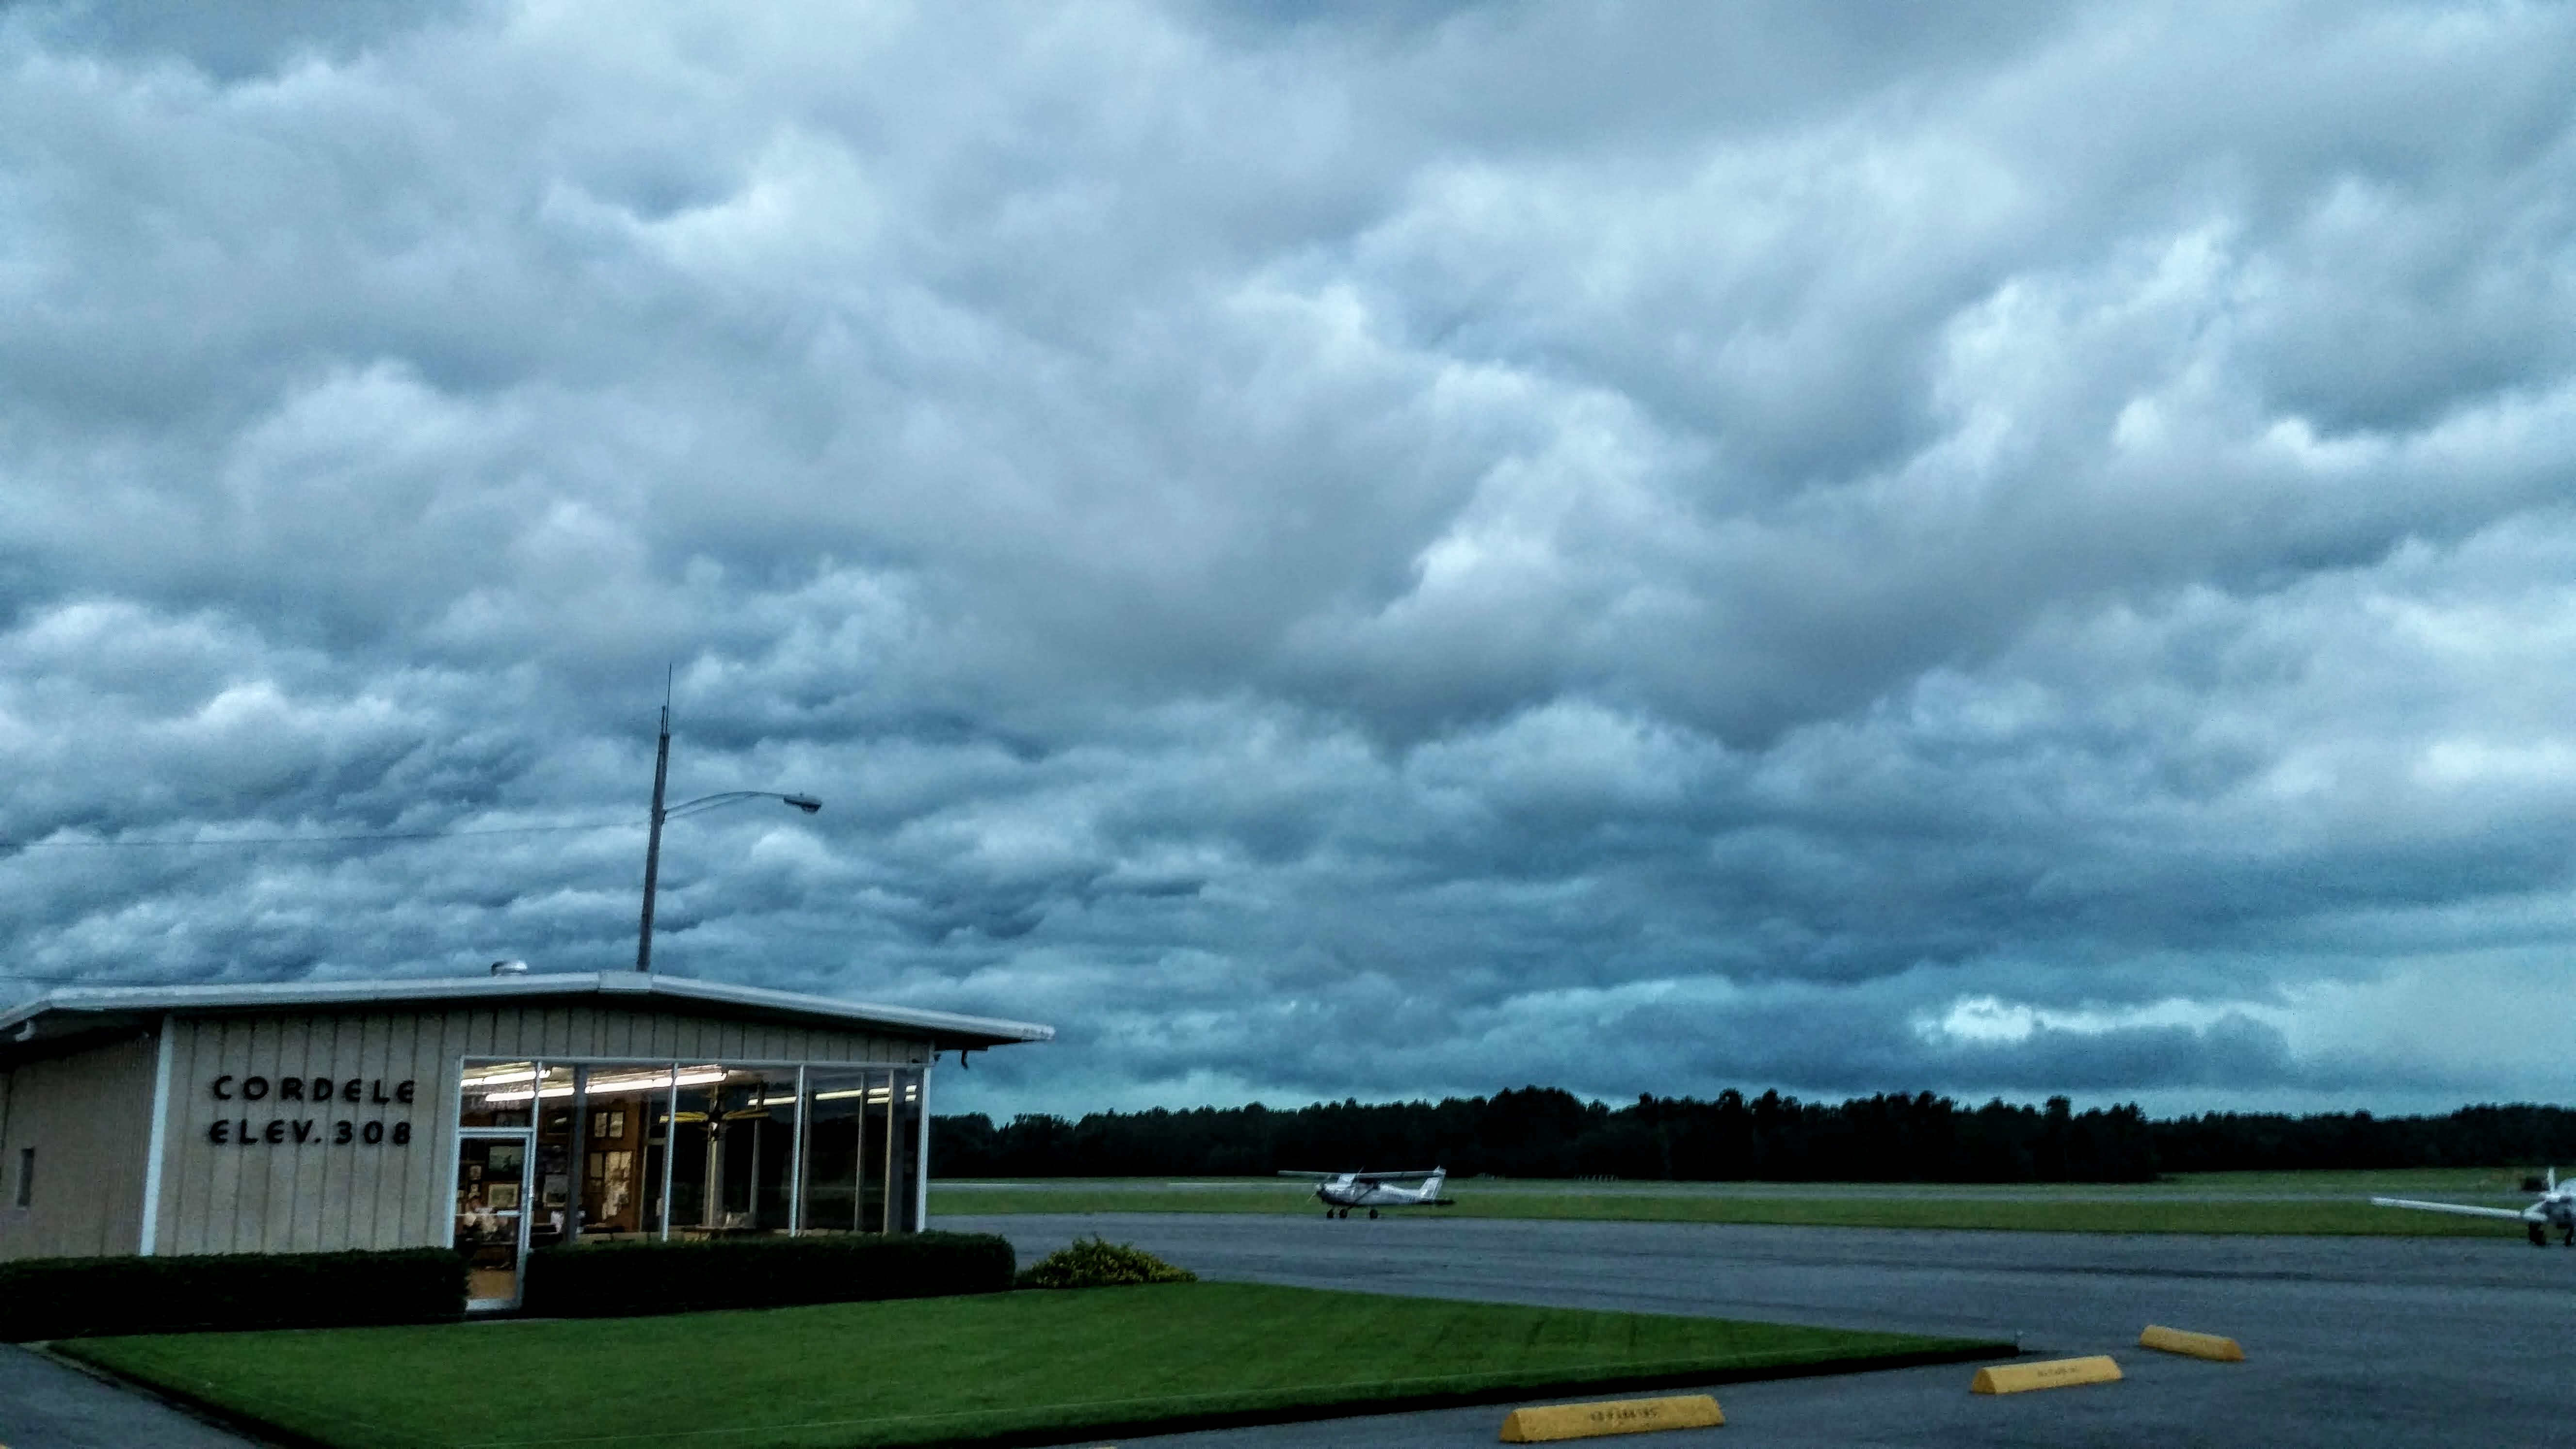
We approached Cordele and I called the airport radio and requested a spot under cover. I could see the purple tops, which made me worry about hail damage. The airport FBO attendant was very accommodating and offered an open T-Hangar close to the main building. We landed just ahead of the storm by maybe five minutes. The sky to the north was full of black clouds rippled and engorged with moisture. We got the plane on the ground, installed the gust locks, pushed into a T-hangar next to the FBO, and strapped it down. Just about then the wall of water appeared at the far side of the airport. It was closing fast. I snapped this picture just before we ran inside.
As can be seen from the photo the sky went dark, as if the sun had gone down. It was about ten o’clock in the morning, yet it felt like late in the evening. We borrowed the crew car and went into town to get a few supplies and ride out the storm. We stopped at a local Wal-Mart for some camping essentials and did a quick video.
The storm blew with a mighty fury for about an hour and dumped lots of rain. Overall this was a good decision to stop and wait it out. The squall line is by far the most deadly and dangerous weather for our little planes. My best unsolicited advice is to never ever fly though a squall line. Instead get on the ground before the storm and wait it out. Let the storm pass, wait a bit longer until the skies clear up and then continue.
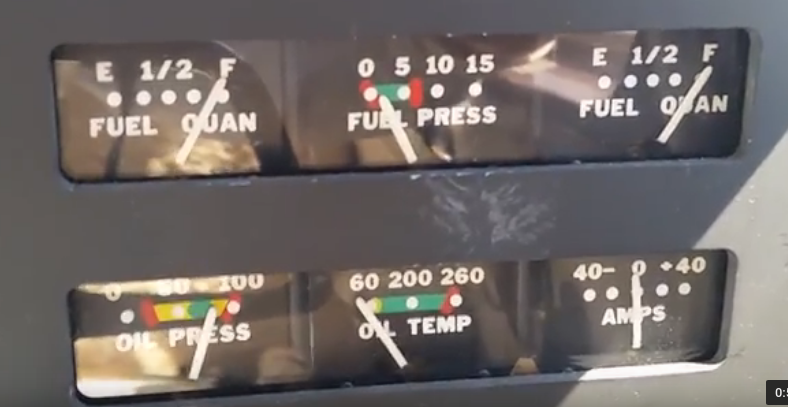
Had a little issue today with Sunny Side Up. I was taking a short flight to go see an old friend and mentor. On climb out, at 1000 feet I shut off the boost pump and fuel pressure went from near the top of the green almost to zero, right at the bottom of the green zone. This is different from normal as it usually stays about in the middle of the green.
Low Fuel Pressure
The Engine continued to run fine. I turned the pump back on and the pressure went back up to the middle of the green. Once I leveled out at 4k I turned off the boost pump and the needle went to about the middle of the green. I will admit some panic set in as I worked the problem. I’m glad it was a clear day with no clouds and great visibility. I could not imagine how I would have reacted had I been inside a cloud.
I continued the twenty minutes or so of my flight. As I neared my destination and began my descent, as part of normal landing procedure, I turned the boost pump back on and the pressure went above the green zone. I now had an over pressure situation. Curiouser and curiouser.
My friend and mentor suggested it might be the check valve in my electric boost pump is stuck open. Another thought was that the engine driver mechanical pump, new at overhaul, about 350 hours ago, was failing. I hoped that was not the case as replacing the pump is no small task.
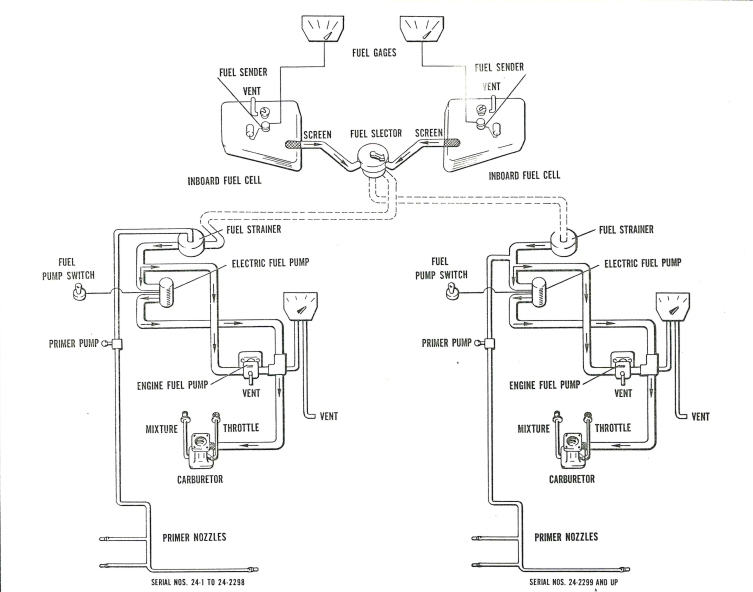
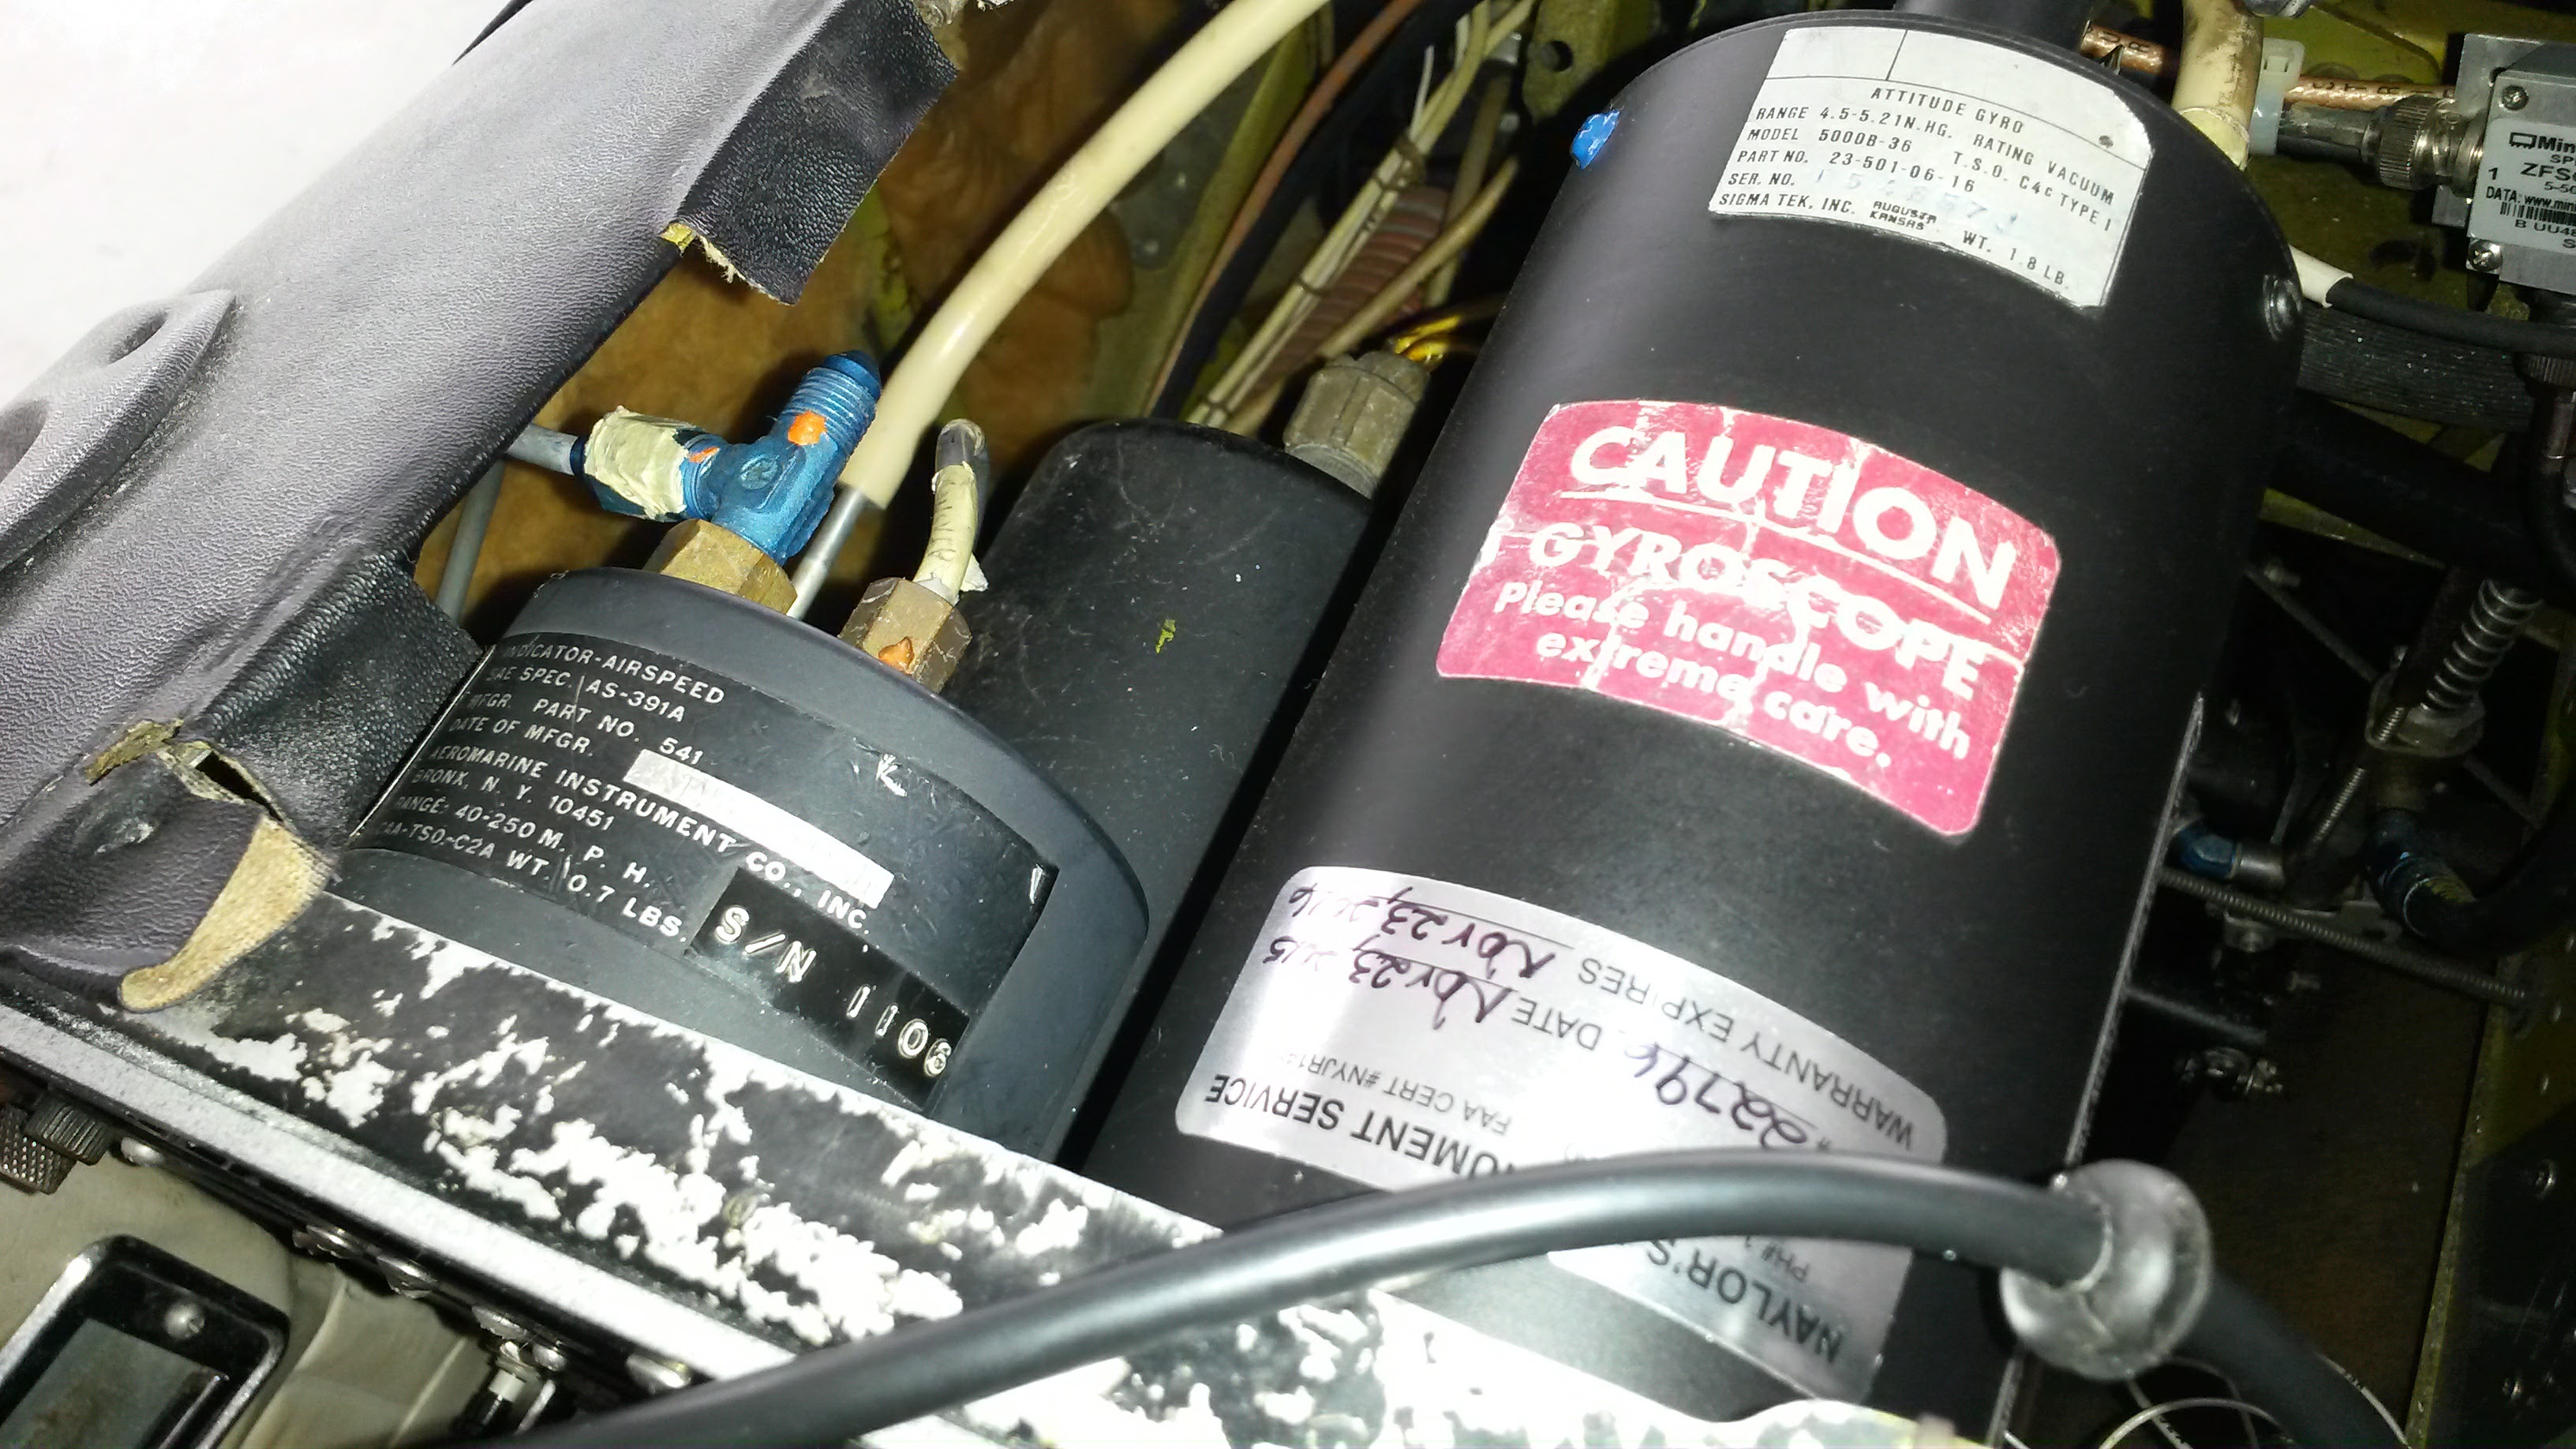
The Comanche fuel system is not all that complicated. Two tanks come to a fuel selector and then fuel is fed through a strainer to an electric and engine driven pump, which both feed the carburetor. In the picture below mine is the one on the right.
Air Inside the Lines
I had some discussions with experts and mechanics alike in order to help diagnose the problem. First off the manual states that the pressure “should not be under 0.5 pounds nor over 6 pounds, with a desired pressure of 3 pounds” Based on the gauge, my fuel pressure was awfully close to that lower number. But, was my gauge even accurate? It is fifty eight years old.
Some of the clues to the problem came from that under and over pressure situation. The fact that the fuel pressure went up upon descent meant that there was air inside the lines, which expanded once at a lower altitude where air pressure is higher and causes expansion. Another clue was that the pressure gauge would fluctuate rapidly when the engine was at idle. That is called cavitating and it clued us in that air was somehow entering the fuel lines. Another clue was that the primer was dry. That is to say, the primer had to be pumped to pull fuel back up to it. So it was not staying loaded as it should, but the fuel was seeping back down the line. Lastly and most perplexing was the lack of fuel staining or smell anywhere in the cabin or engine compartment. if it was leaking, it was very small indeed.
How To Find an Air Leak
Based on the fuel system of the Comanche, air could be entering the system at several places. The fuel tank selector, the primer handle, either of the pumps, and the fuel lines themselves. SO many places to look made the whole situation overwhelming. It was hard to pick a starting point. The mechanic and I settled on the primer problem first.
If the leak was in the primer or attached lines, I would have a hot cylinder as this would possibly create a lean condition in one of the cylinders. Come to think of it, Number 1 cylinder was hotter than the rest. So yet another clue.
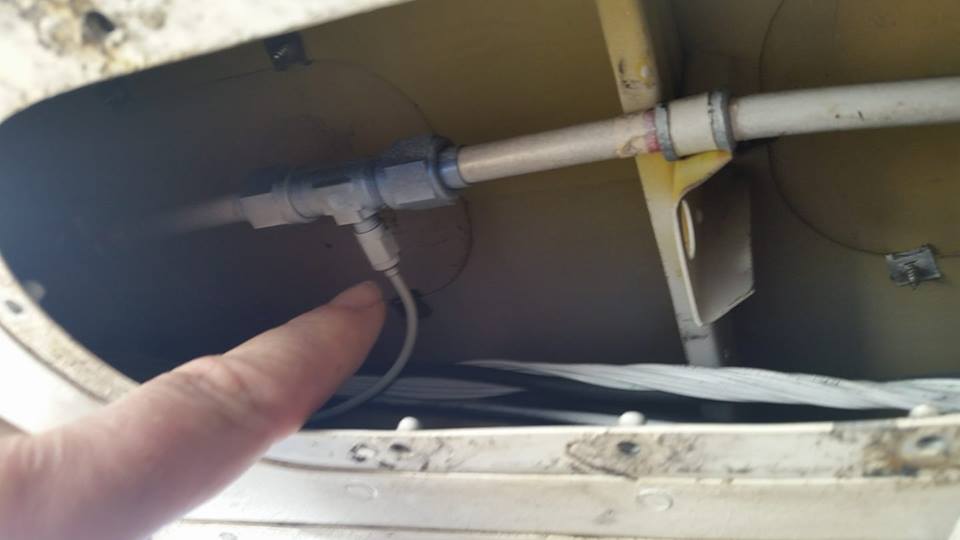
The first test was to pressurize the primer system. air was forced through the primer lines just before the primer and lo and behold we found a small leak where the primer line attaches to the main feed under the plane. This was a simple fix. Loosen the connections and then re-seat and tighten them. The leak stopped. I hoped that the problem was fixed, but no not yet. The fuel pressure was still really low.
My mechanic then stood staring at the engine for a while whilst rubbing his chin. A classic “Don’t bother me I am thinking” pose I often see. He then went and got a spray bottle of soapy water. He had me lock the brakes and put a chock on the front wheel. He instructed me to start the engine and put it at idle. He then walked up behind the prop and opened the cowling. This part always makes me nervous.
He would spray and then look up at me an ask it there was a change in the fuel pressure reading. He sprayed cylinder 3 intake pipe and something did happen. The engine stumbled and the pressure fluctuated wildly. The intake on number 3 cylinder was sucking air. My mechanic had a wide grin on his face. The soapy water bubbled for just a moment before being sucked into the intake and making the engine stumble. But why did the fuel pressure fluctuate?
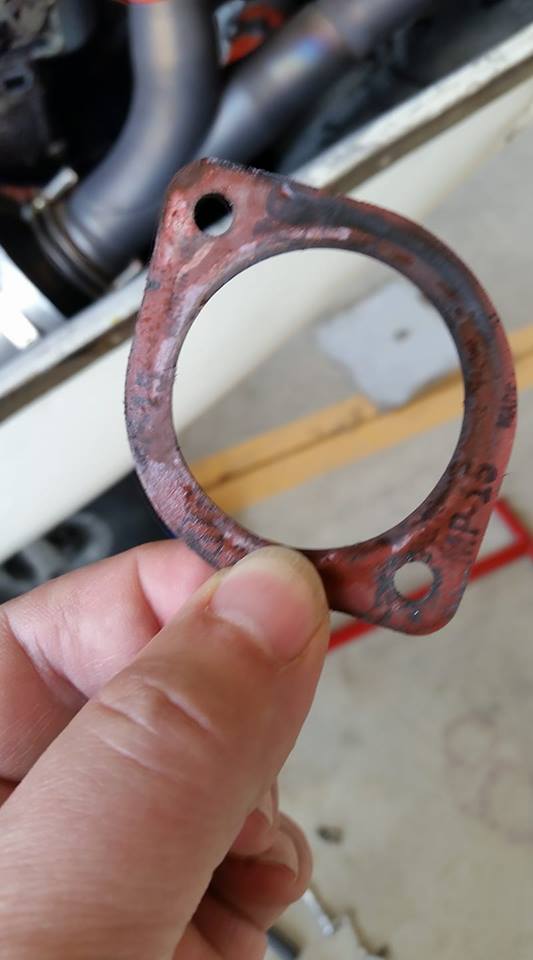
A removal of the intake pipe revealed that the gasket had failed. From the picture it is easy to see the back soot where the air was seeping past the gasket and being sucked into the cylinder and causing a lean condition and extra heat. Fifteen minutes, a new gasket and re-torquing the bolts solved this issue.
Now why would an engine stumble cause the fuel pressure to fluctuate? That was yet another part of the puzzle. We started pulling on the fuel lines. If they were old and really stiff, they may have a crack in them that was aggravated when the engine stumbled and wobbled. The fuel lines are covered in a heat resistant orange wrap that helps protect them from heat and vibration. As the mechanic squeezed at them, he tugged and shook them.
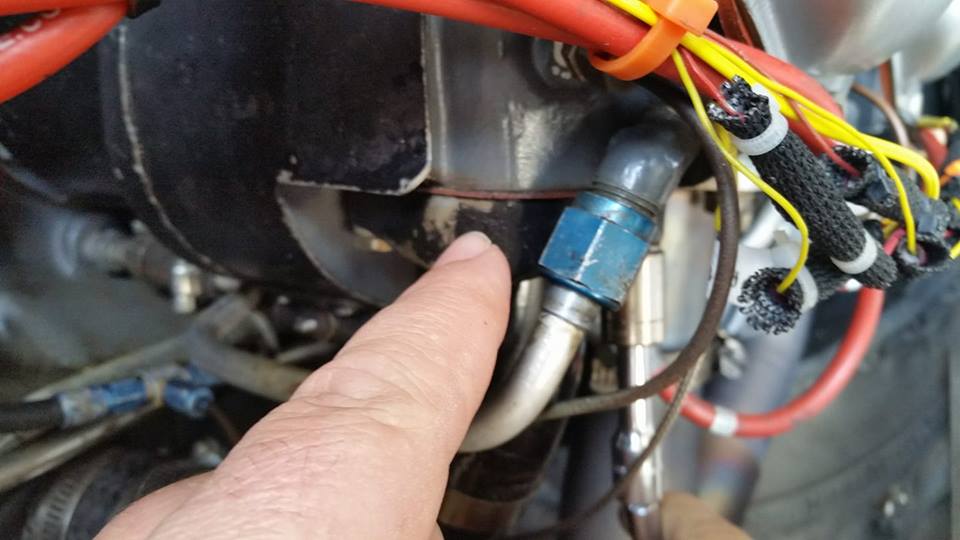
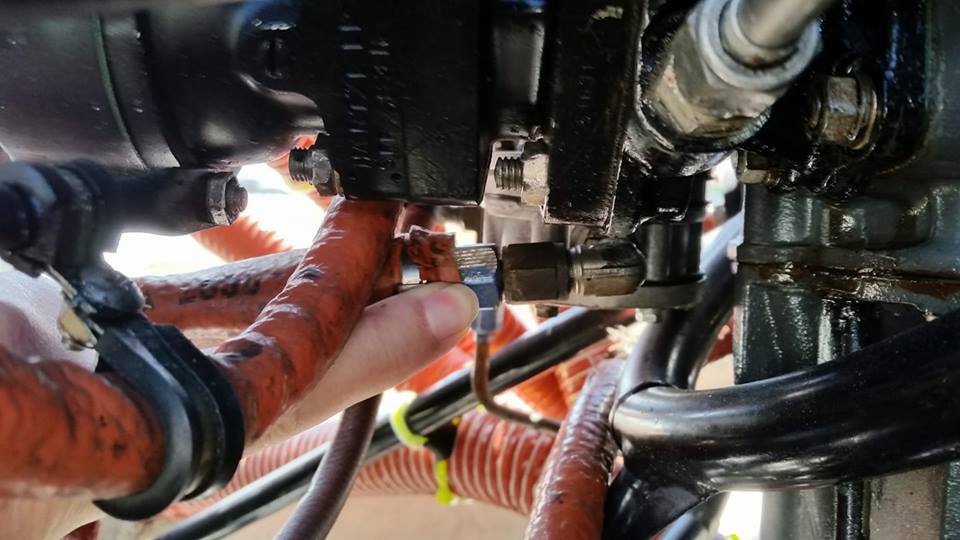
Then he spotted the problem. The return line on the engine driven pump was loose. The fitting had come loose and backed off the nut a couple of turns. It was just enough to allow some air to be sucked into the system when under pressure.
A couple of turns with a wrench and the fitting was seated tightly and no amount of shaking the hose would make it come loose. Did we just find the problem? The mechanic and I were hopeful. Now it was time for a run-up of the plane to check the fuel pressure readings at the gauge.
Success! The fuel pressure was now stable and right at the top of the arc. A good suggestion from another mechanic was to paint some torque seal across the fittings. Then it becomes easy during visual inspection to see if a fitting has slipped. A simple problem to fix, but not so simple to find.
In November of 2017 my wife’s grandmother passed away. So we had to make last minute travel arrangements or take the Comanche to Staten Island New York. We opted to fly ourselves. On the trip up it became chillingly clear that the heater was dumping deadly carbon monoxide into our cockpit. We had to fly in a very cold airplane all the way up and back. My wife made it very clear that I was to fix this problem.
One option was to purchase the same system from one of many places that sells the standard parts. This option had merits of price and ease of replacement. The downside was I might be right back in the same situation too soon. There are also Airworthiness Directives (ADs) on the exhaust for failed baffling inside the muffler. The pipes also have a tendency to crack right by the muffler because of vibration.
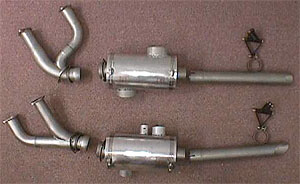
Instead I opted for a dual exhaust system which eliminated several problems with the old one. The dual exhaust is an STC’d option from Aviation Performance Products. They offered a stainless steel dual exhaust option.
Pic of the exhaust system
180 exhaust system
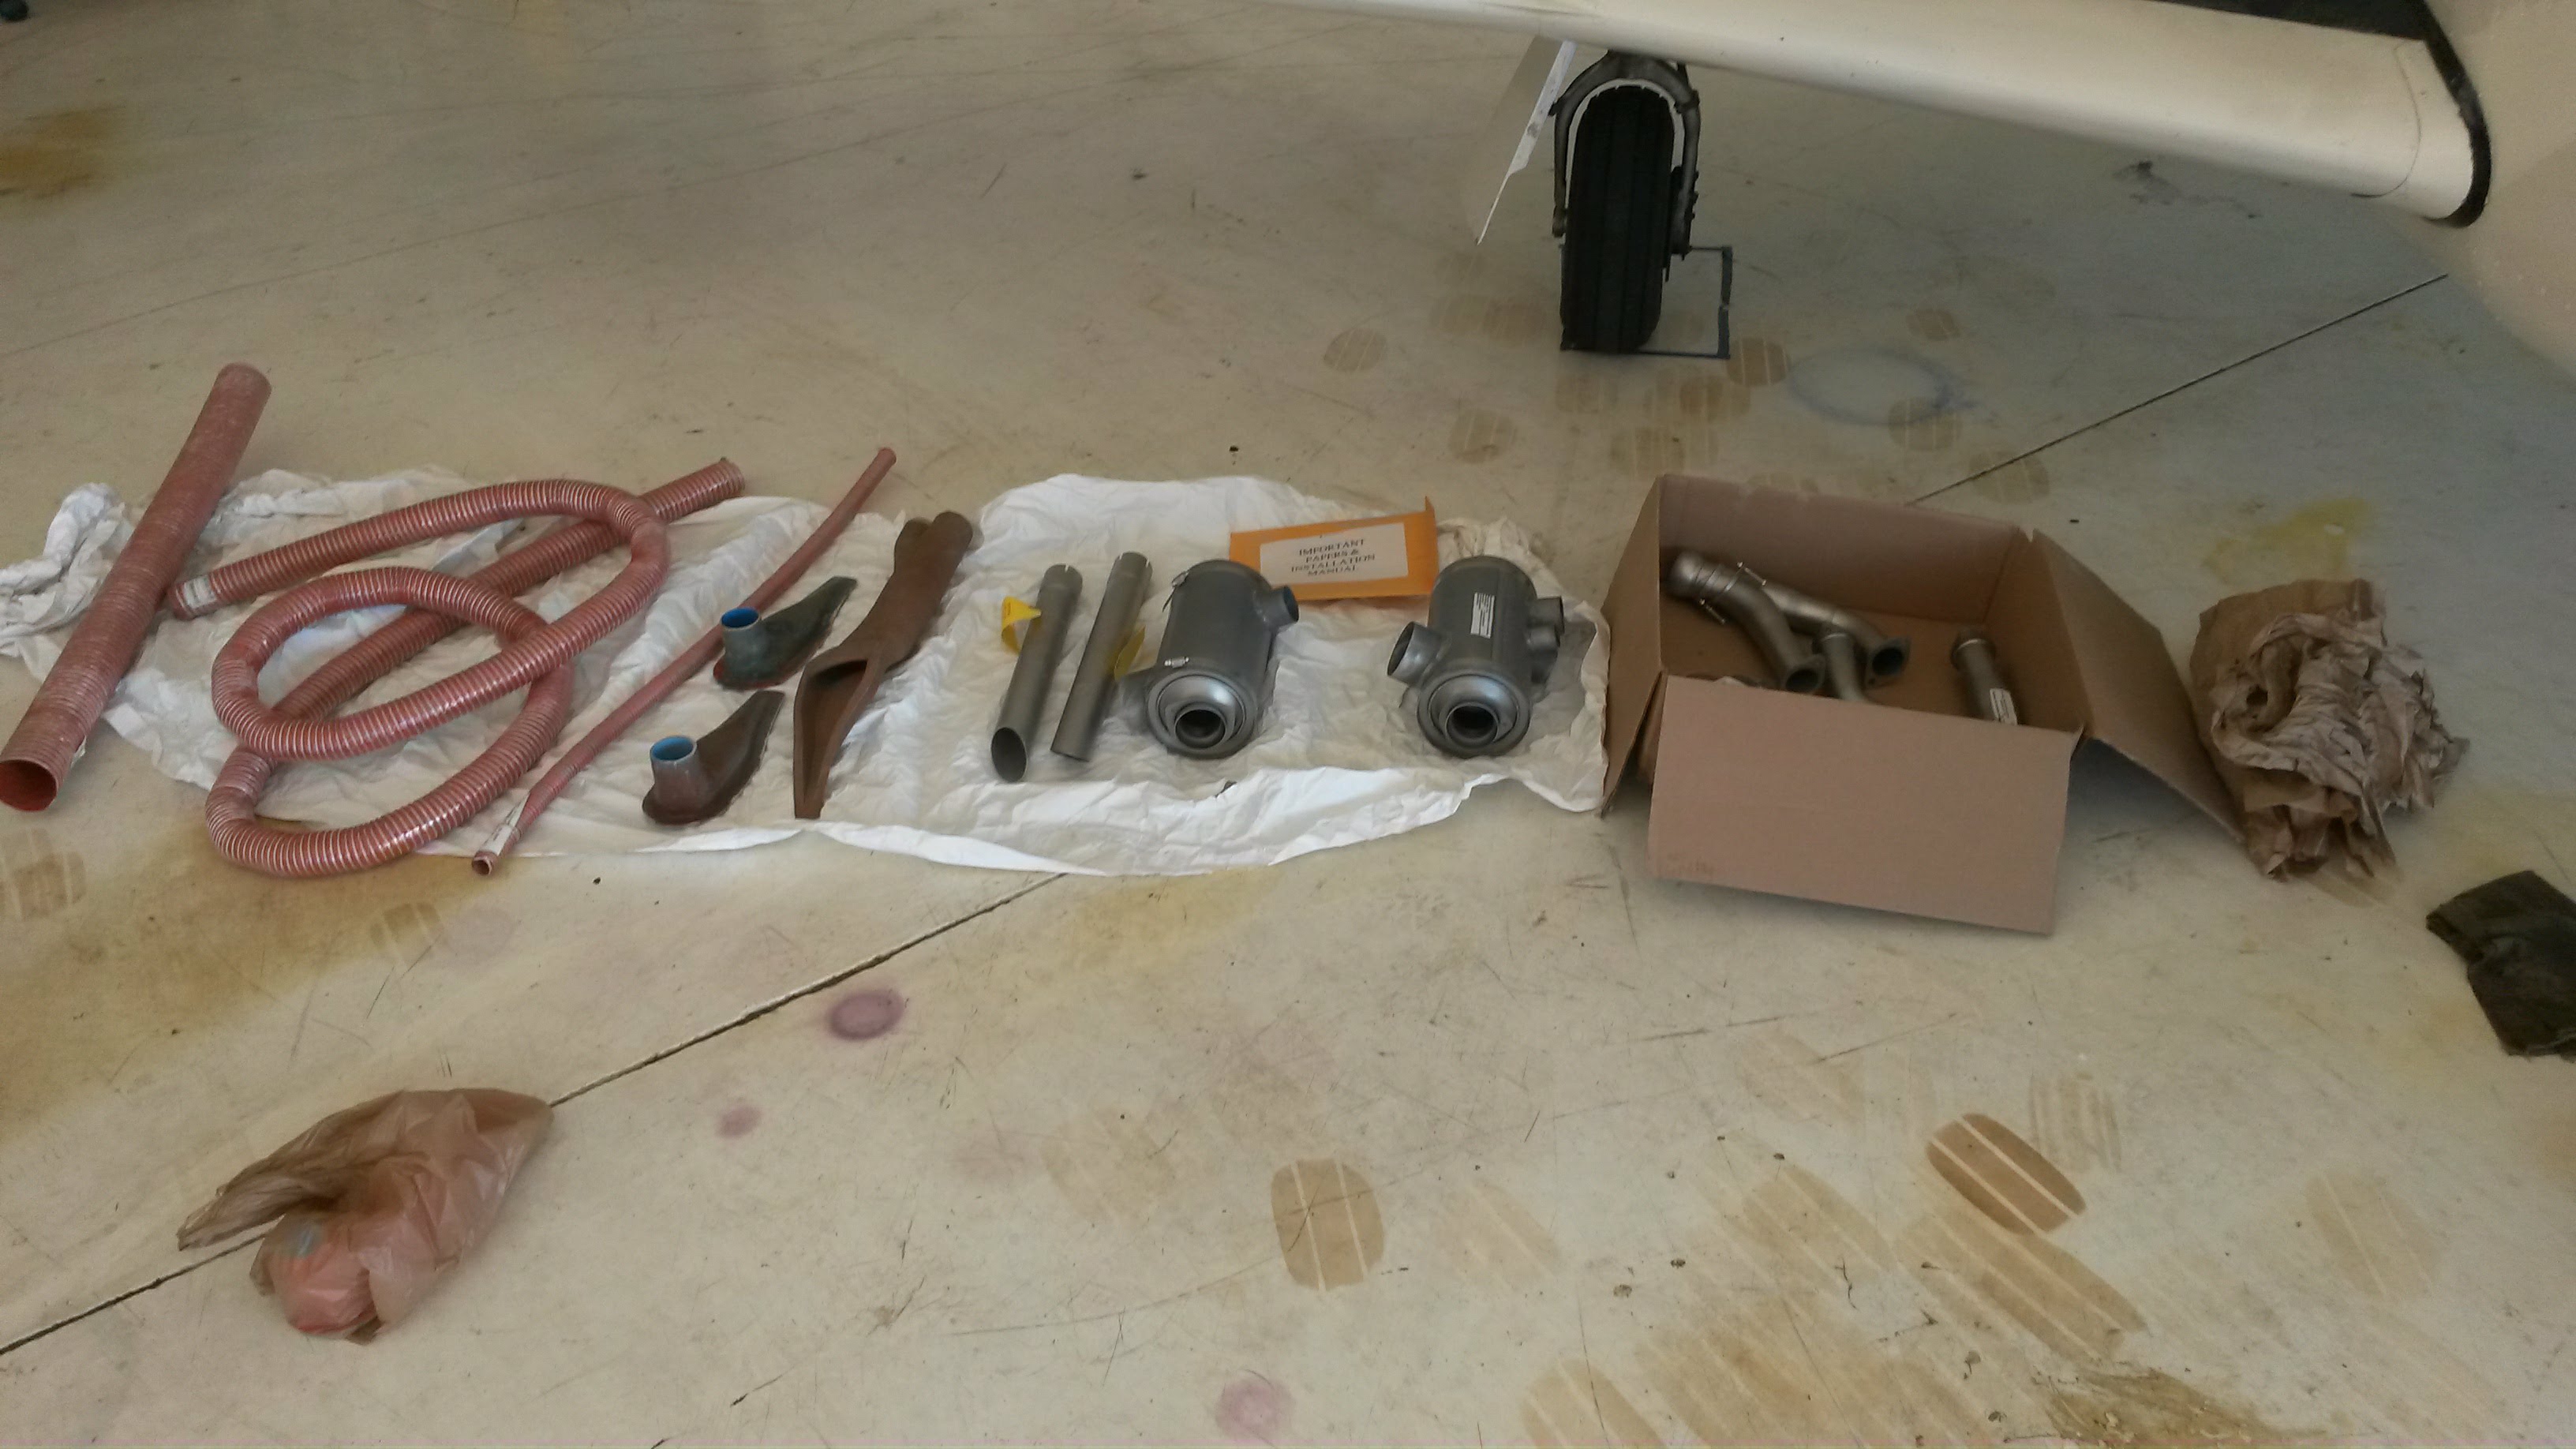
The product took a week from order to delivery. I picked up the product from the Melbourne shop and took the kit to my mechanic.
The Entire Dual exhaust kit
My mechanic and I spoke at length about the install process and what would need to be done. A couple of items came up. I had to order new exhaust gaskets as the kit does not come with them. Also all the SCAT hose would need to be replaced with all new lengths and whole new runs of hose. Also I would need to make considerable modifications to my cowling, including cutting away some on the bottom edge to allow the new dual pipes to be low enough below the plane’s belly and not contact the cowling itself. Also I would need to add new air intake ports for the fresh air vents. Lastly I needed an adapter for the left side heat muff so that the 2 inch intake port from the back of the engine baffles would fit on the 3 inch port on the heat muff.
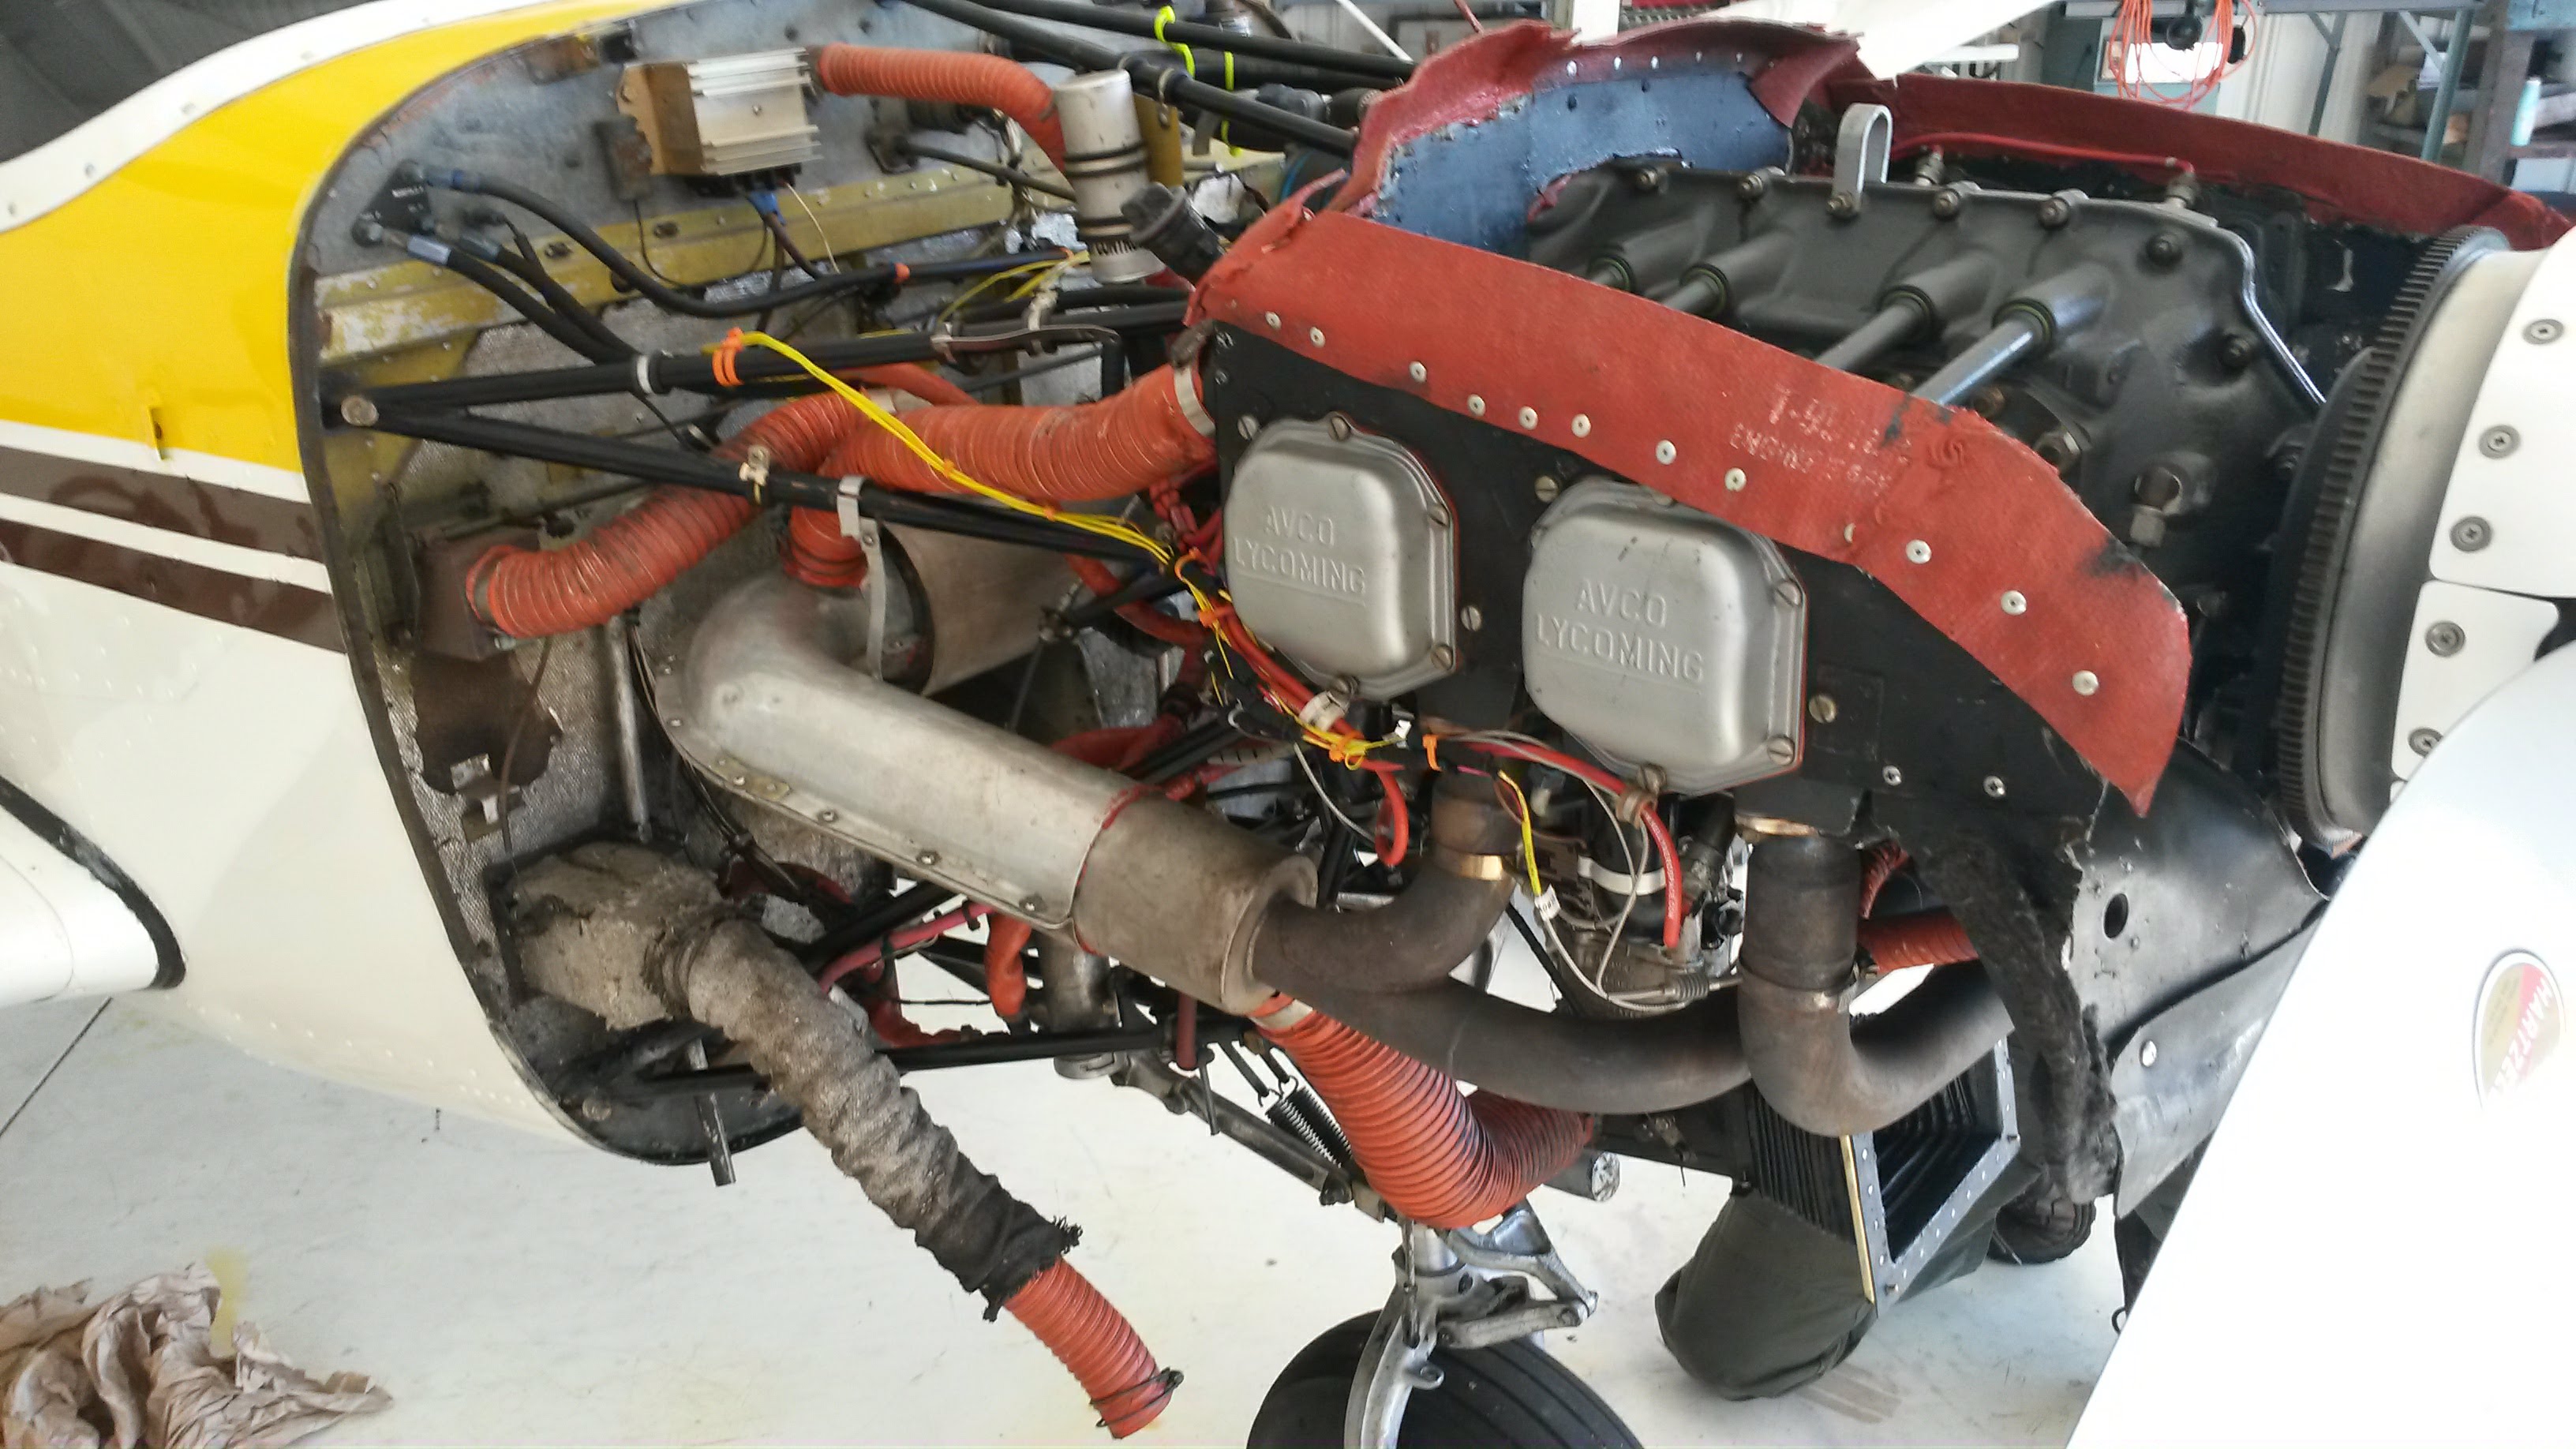
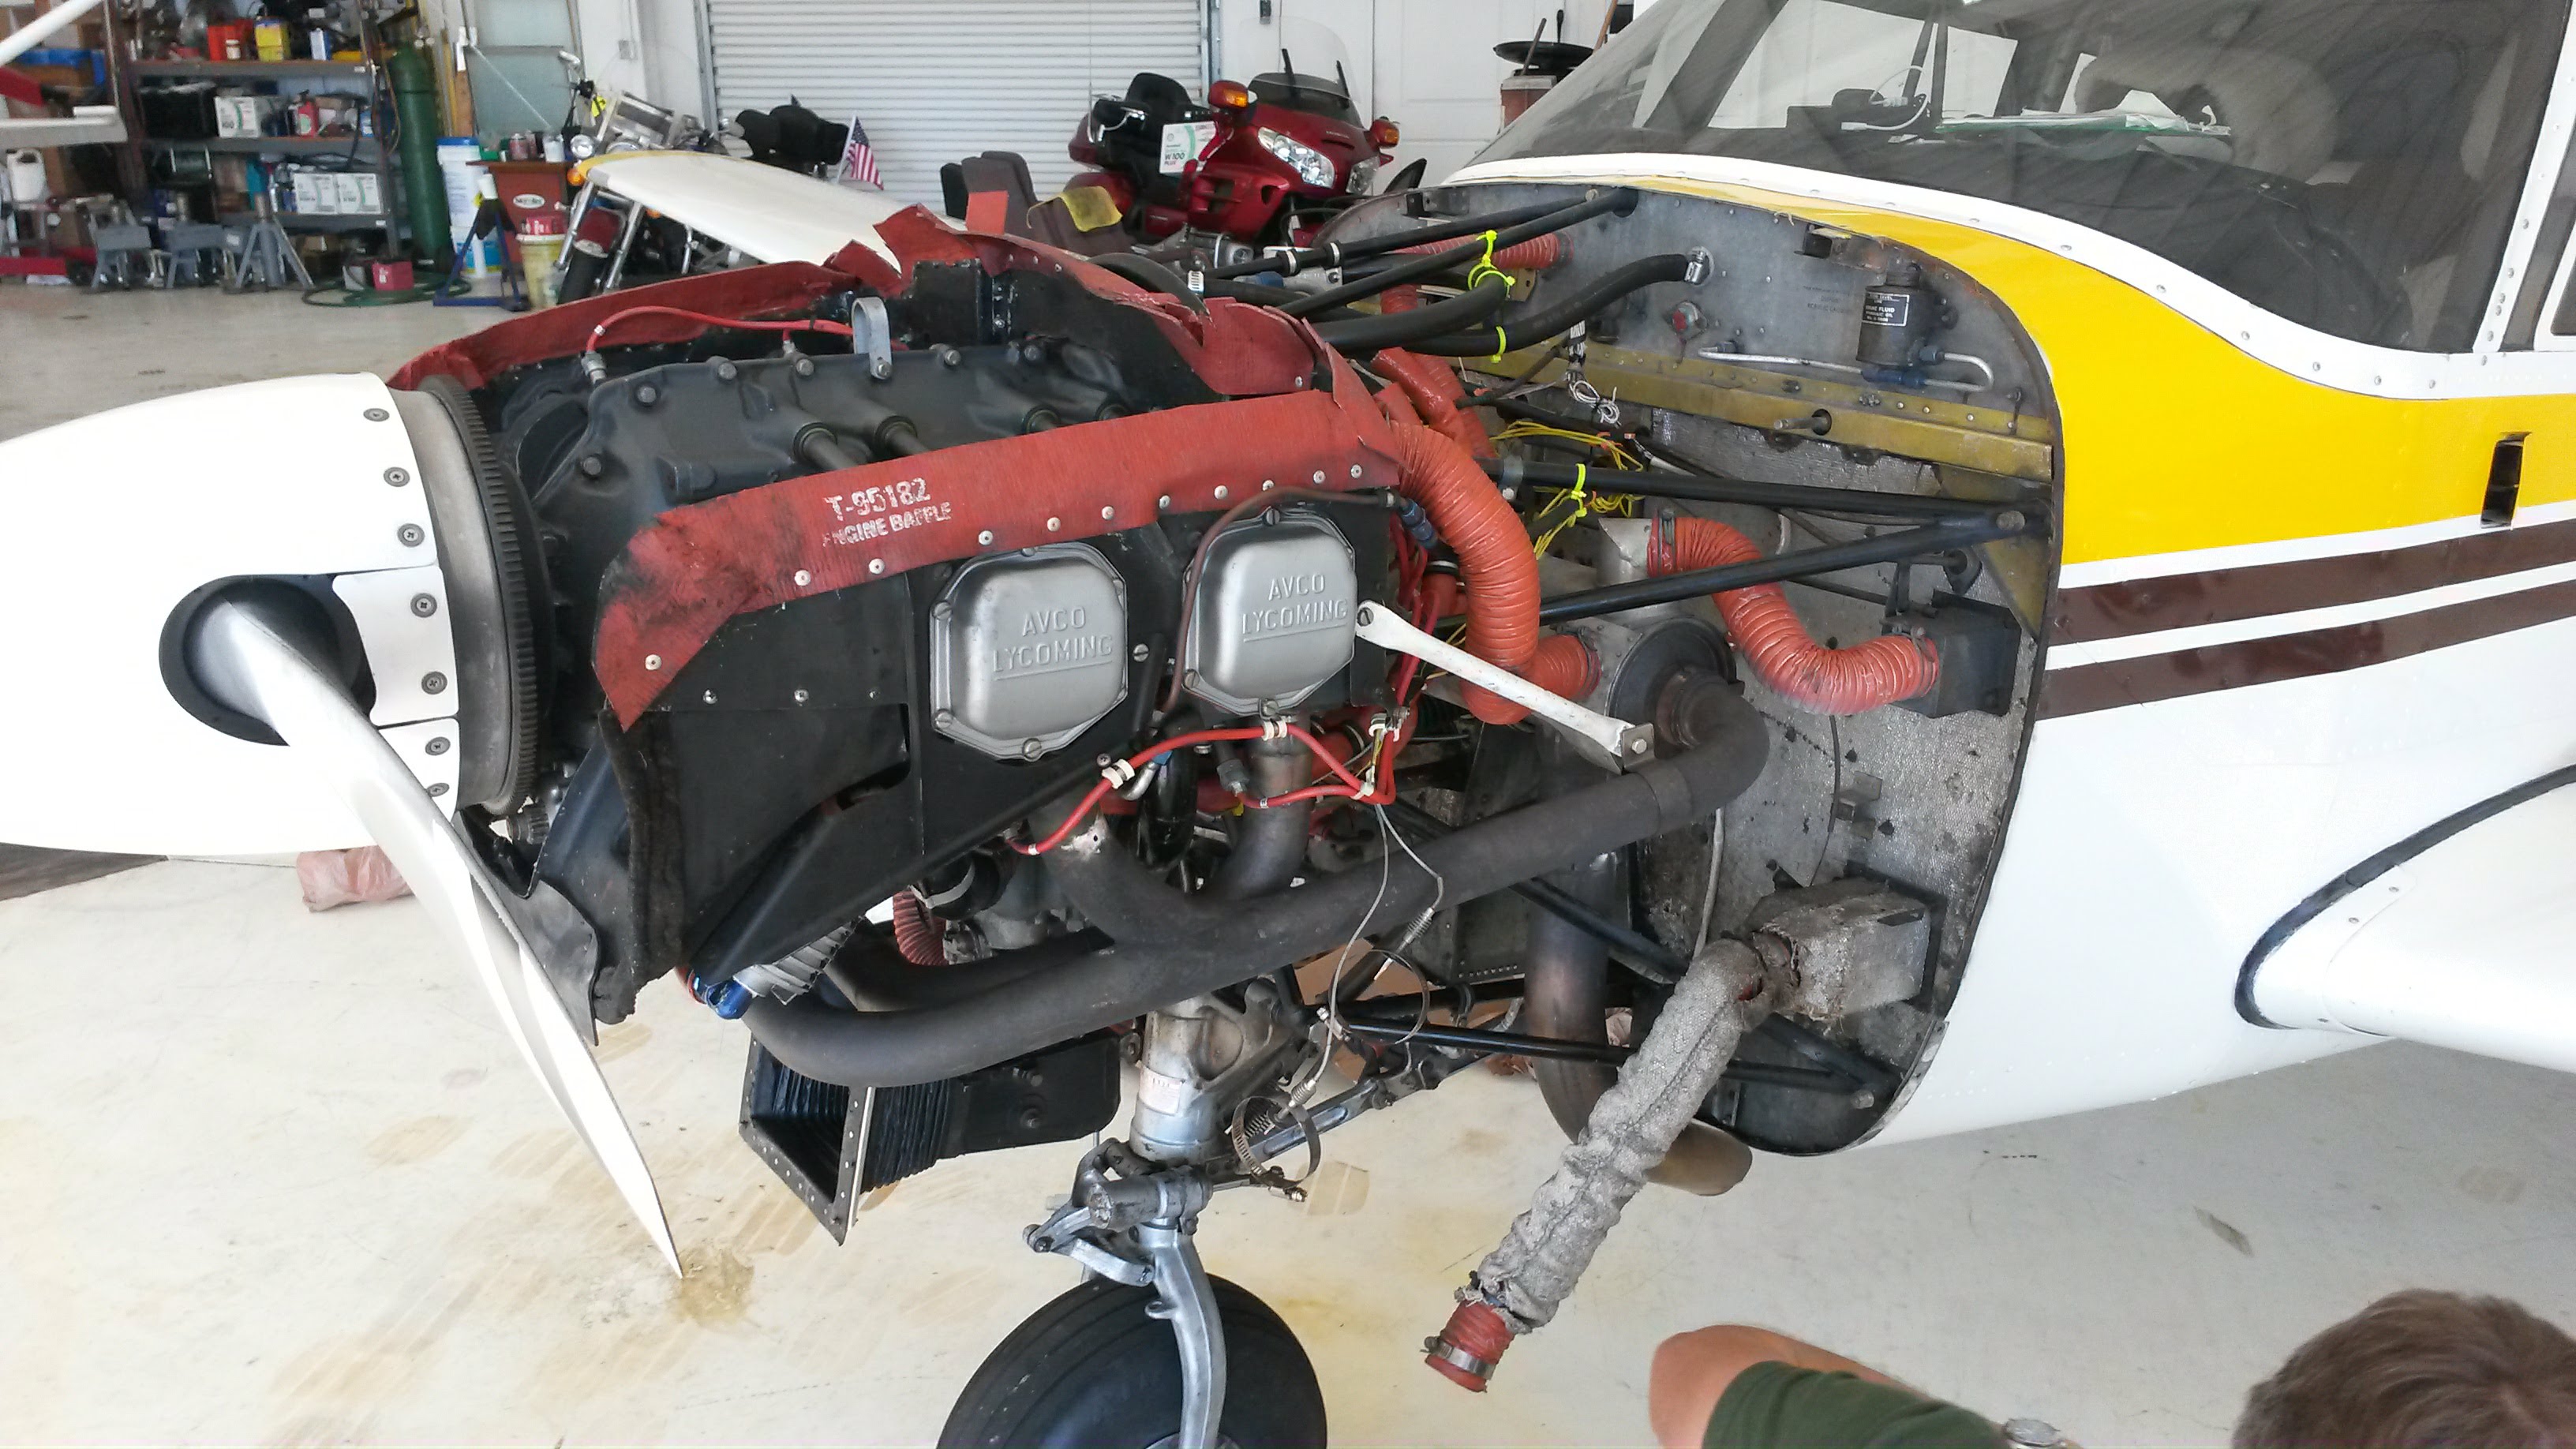
With all the pieces figured out the installation began. We took off the cowling and took stock of the old exhaust system
Old Exhaust Right Side
The old exhaust system is big and bulky the pipes cross over underneath and then go to the back of the engine and include a giant muffler, which takes up the entire back of the compartment from the engine to the firewall. The heat muff for the carburetor heat was held on by ten screws and nuts and I had to seal it with high temperature RTV so that it worked sufficiently.
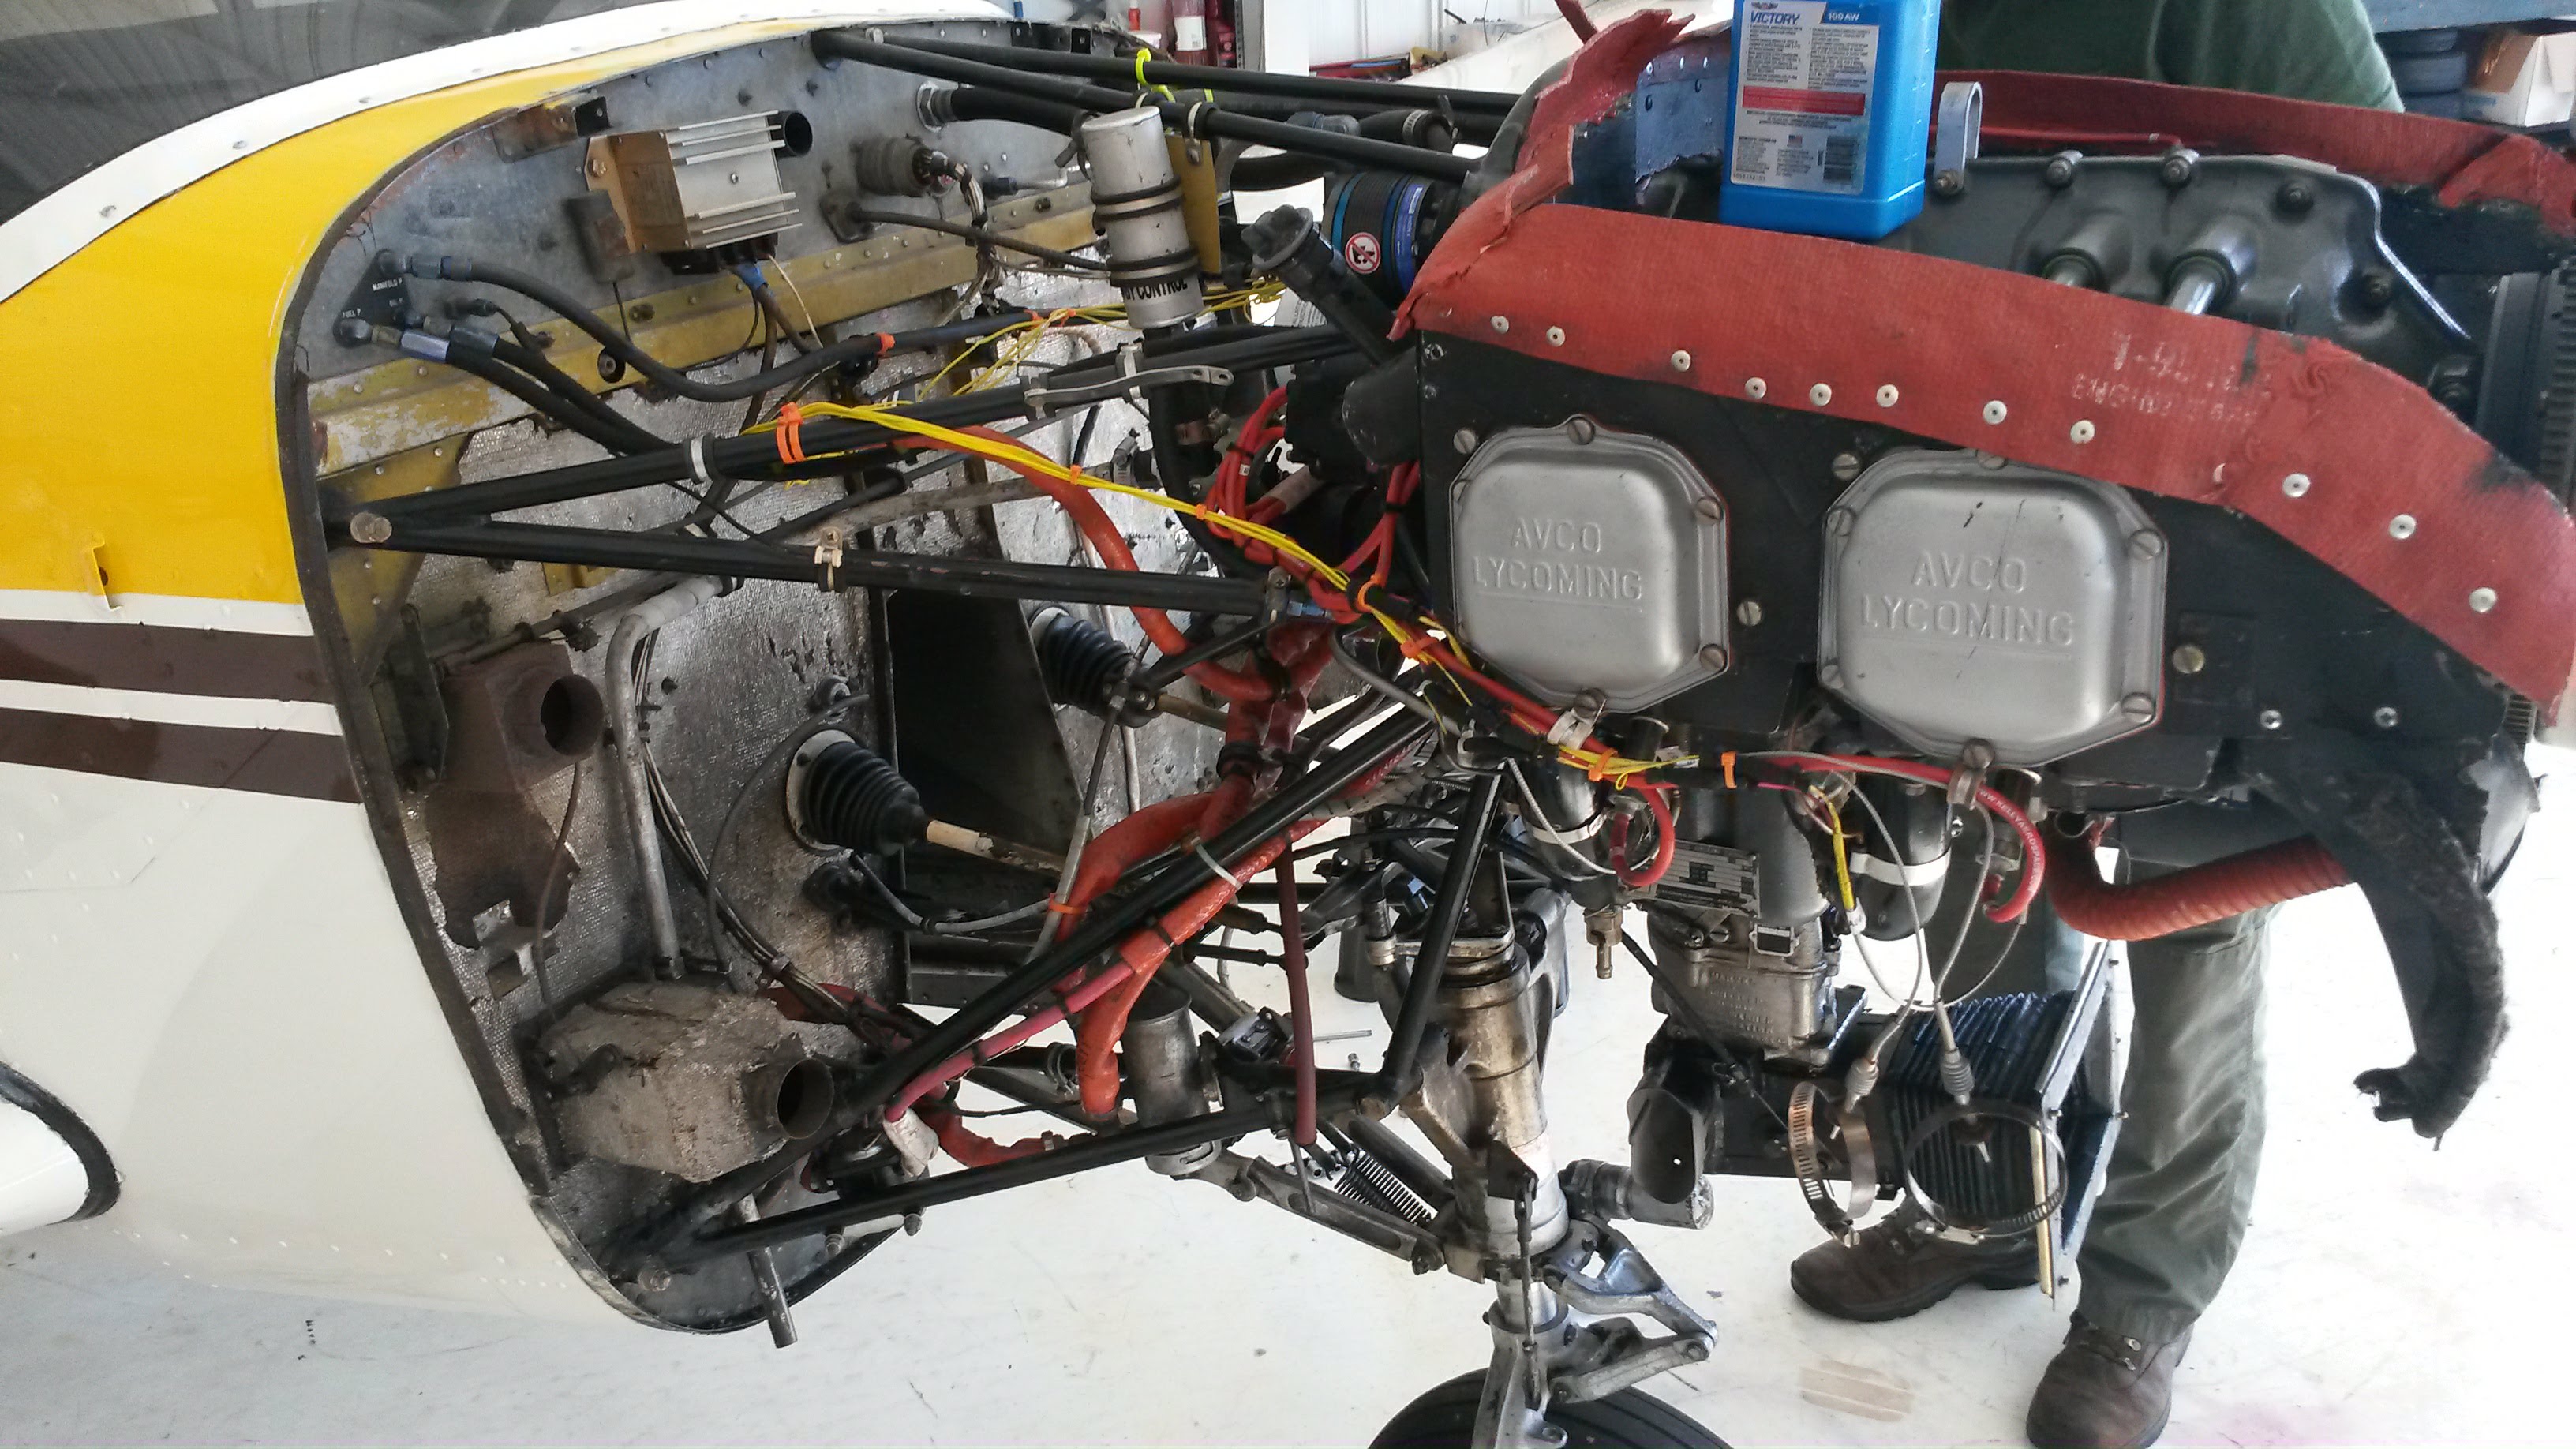
Old Exhaust Left Side
The left side of the exhaust was much the same, I added a support to help with the vibration that often caused the exhaust to crack and fail right at the muffler on this side. I was hopeful that all these problems would go away with the new installation.
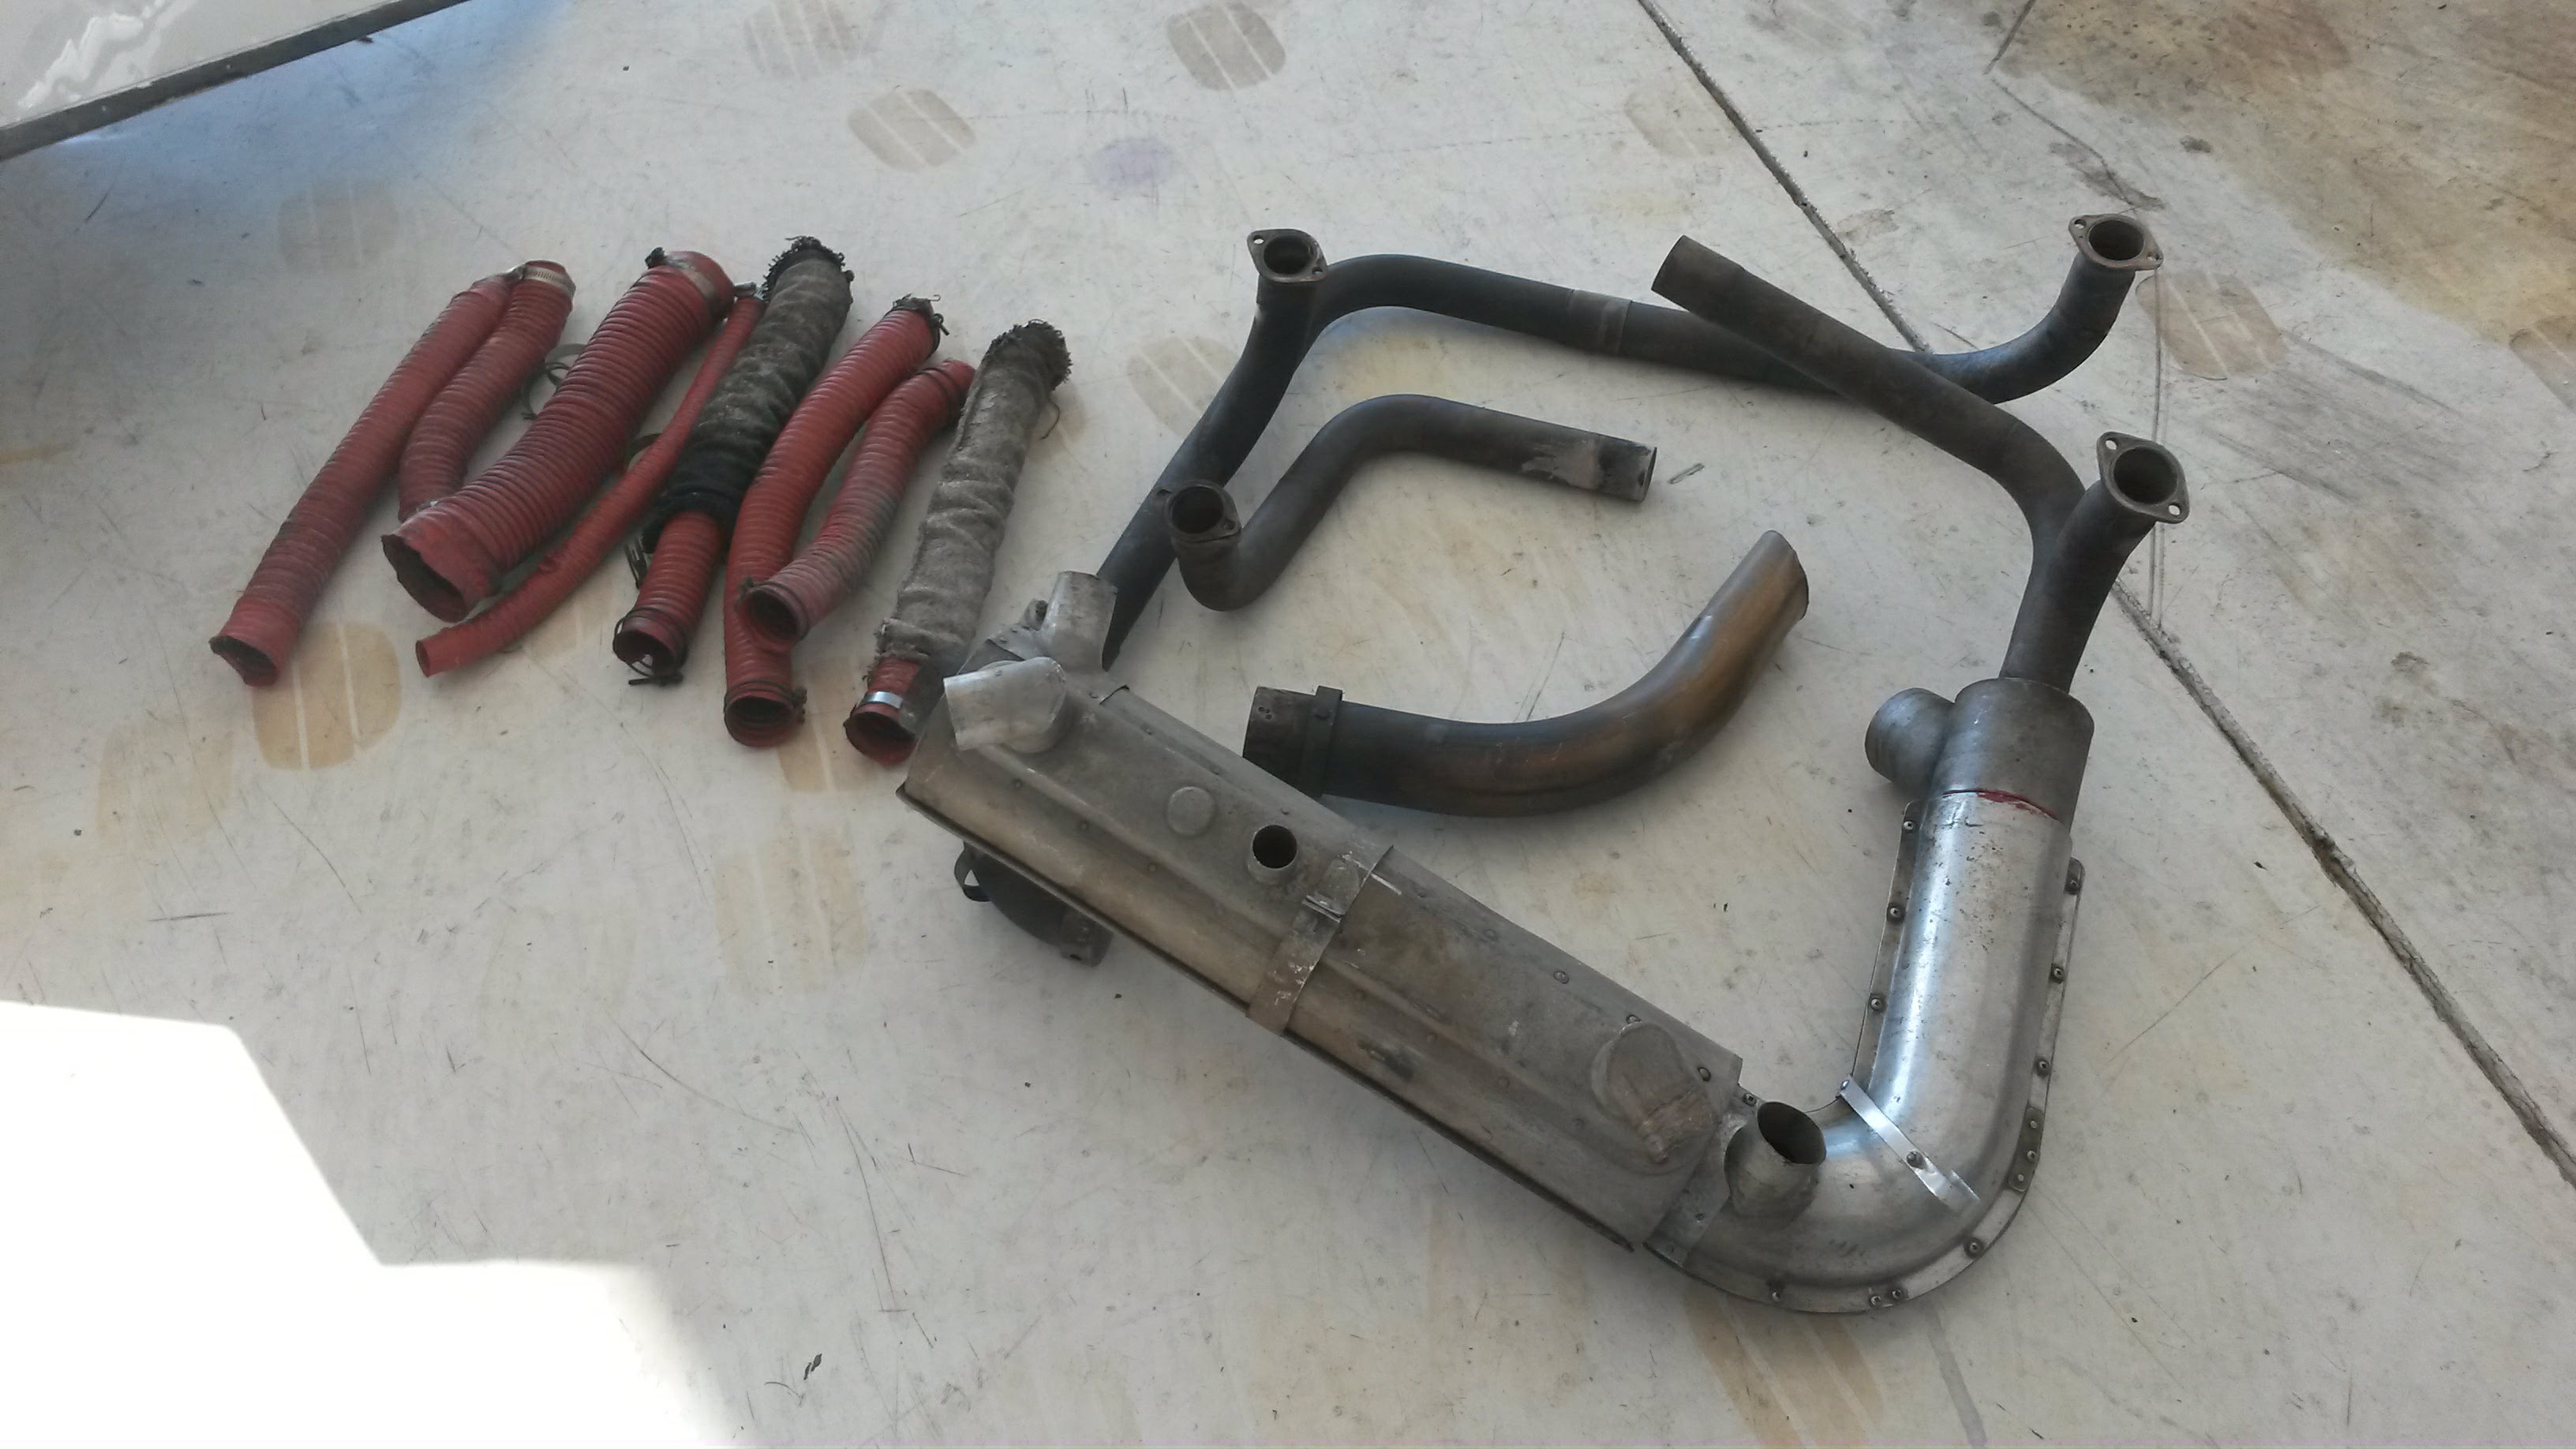
We set to work removing the old exhaust and ended up with quite a collection of parts.
The Old Exhaust
The old exhaust system was pretty easy to remove, but took a bit of coordination as we had to disconnect both sides before it could be removed. With the exhaust removed it became clear just how much space that system used in the engine compartment.
Old Exhaust Removed
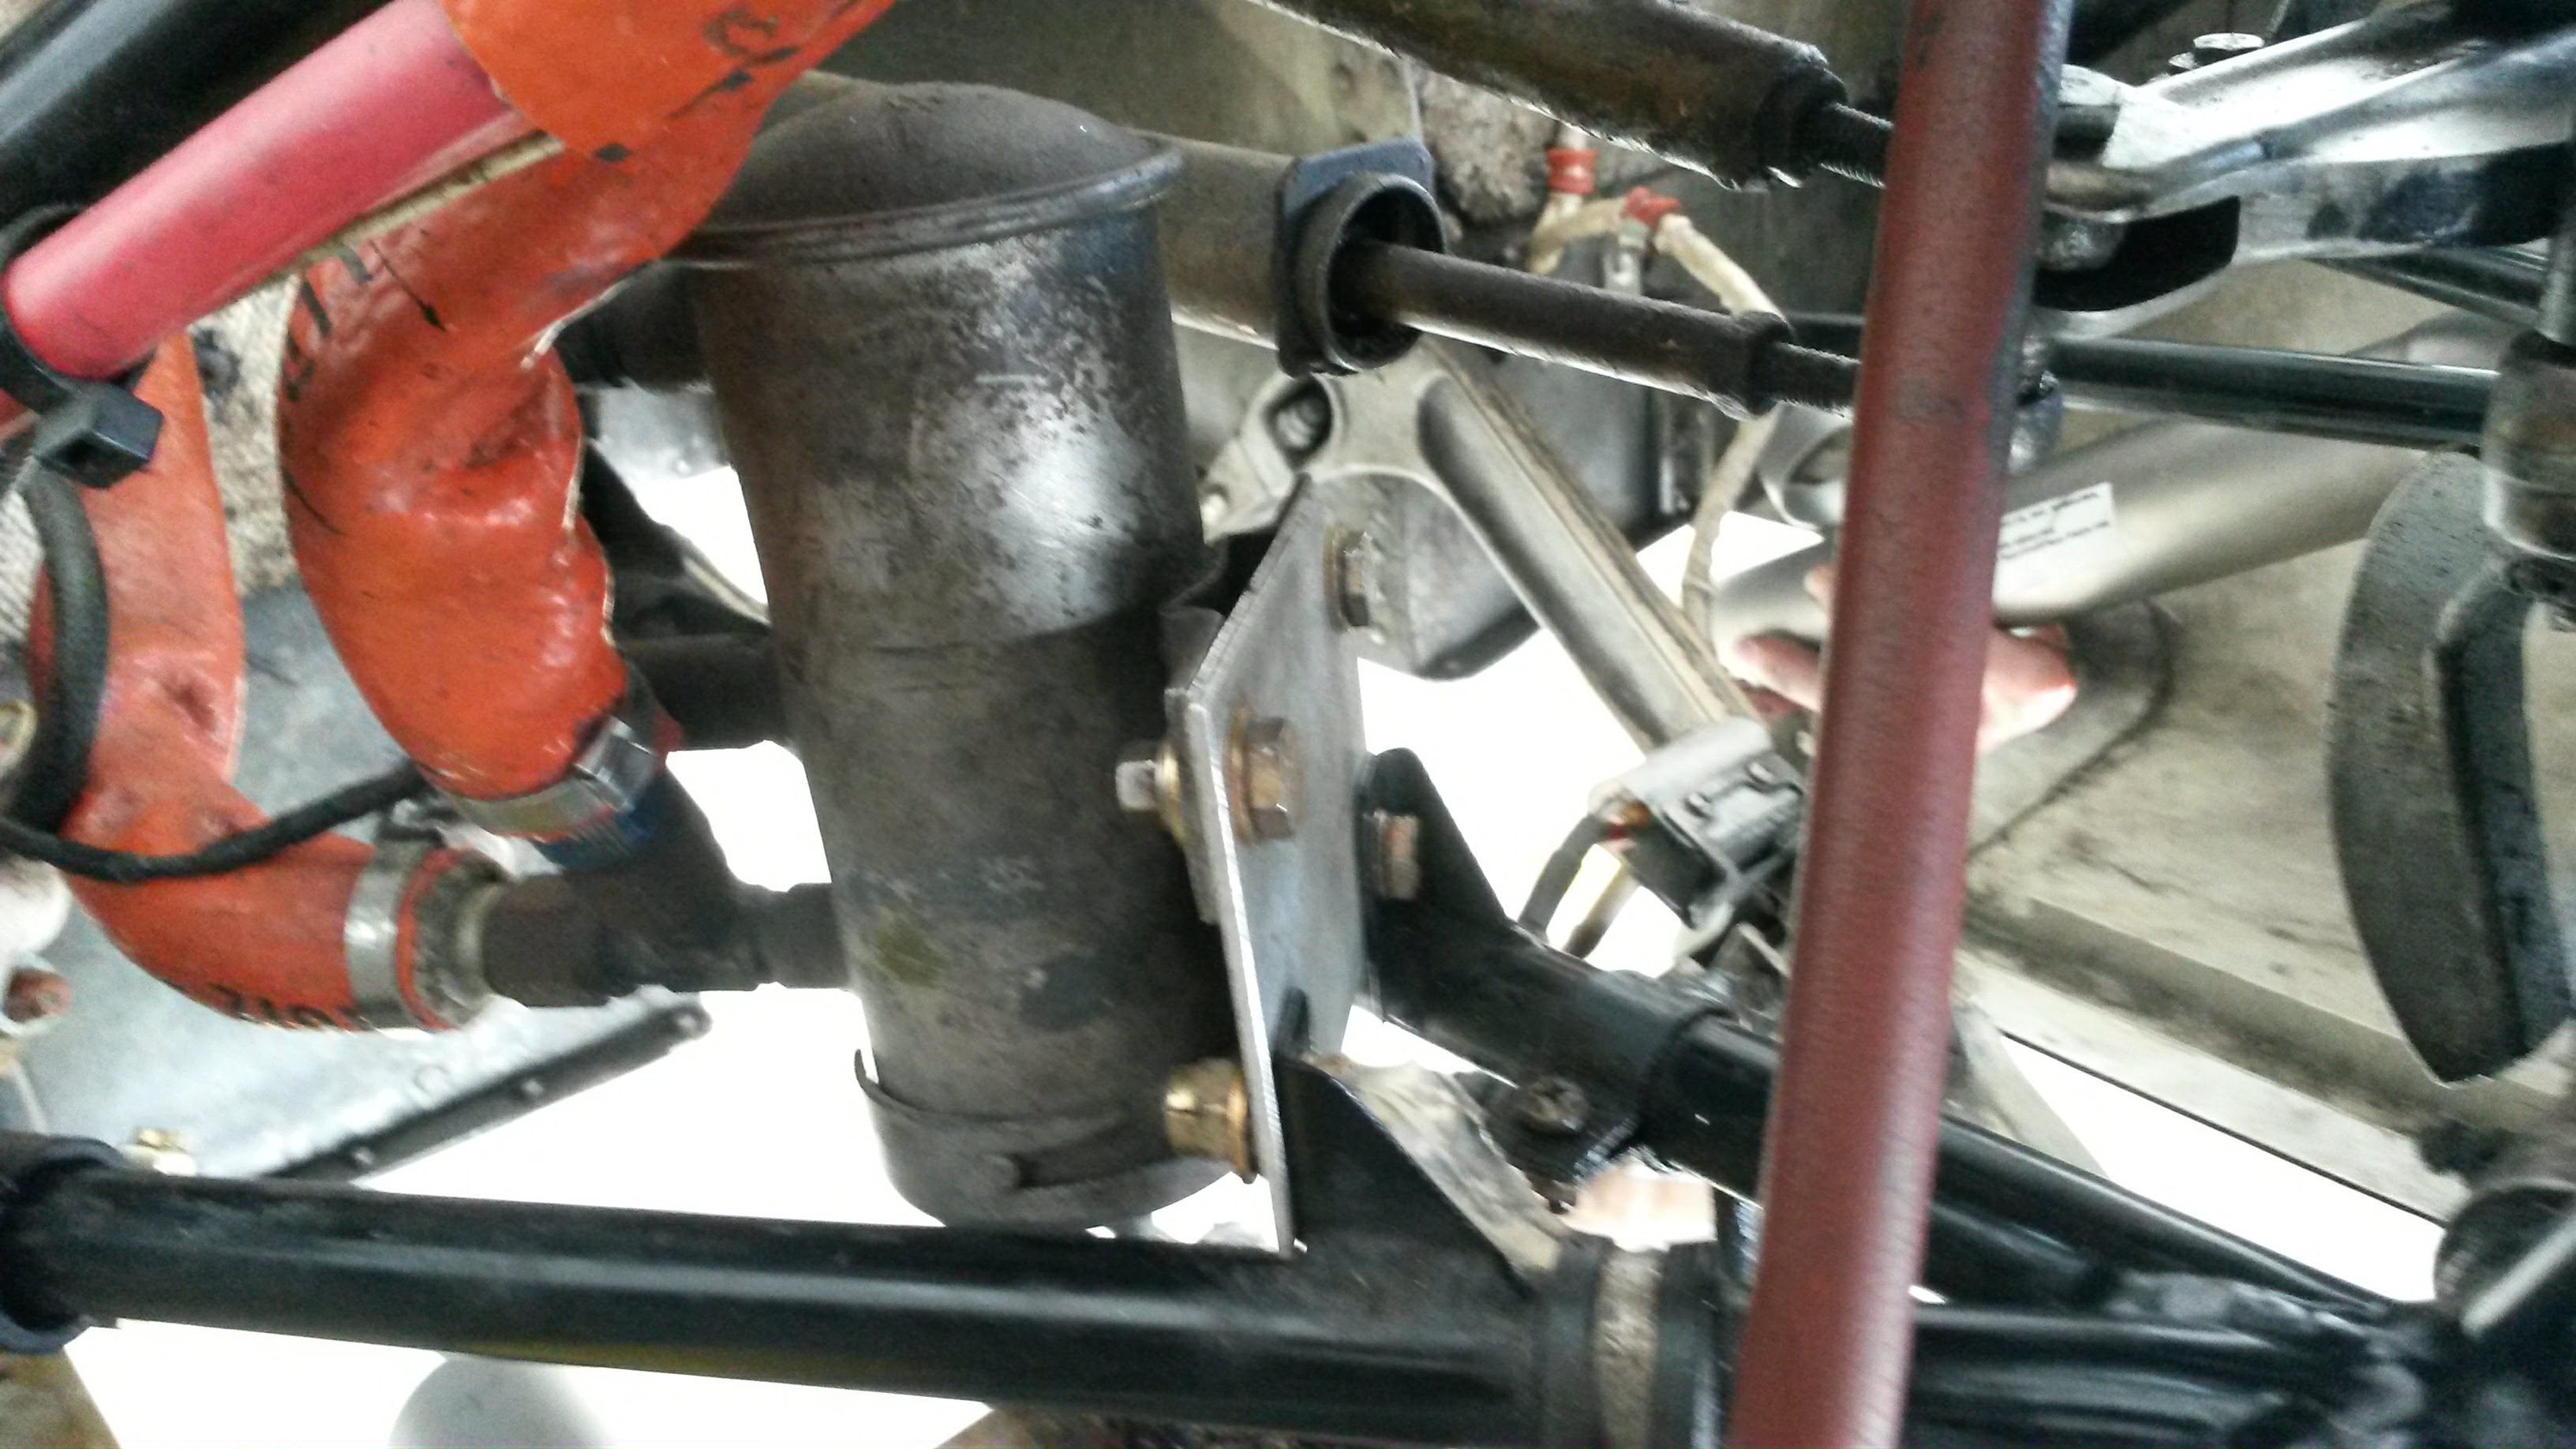
With the old exhaust off we started the modifications to the fuel pump. The new muffler comes very close to the pump. So it had to be raised up with an extension plate so that it was further away from the heat of the exhaust pipe.
Modified Fuel Boost Pump
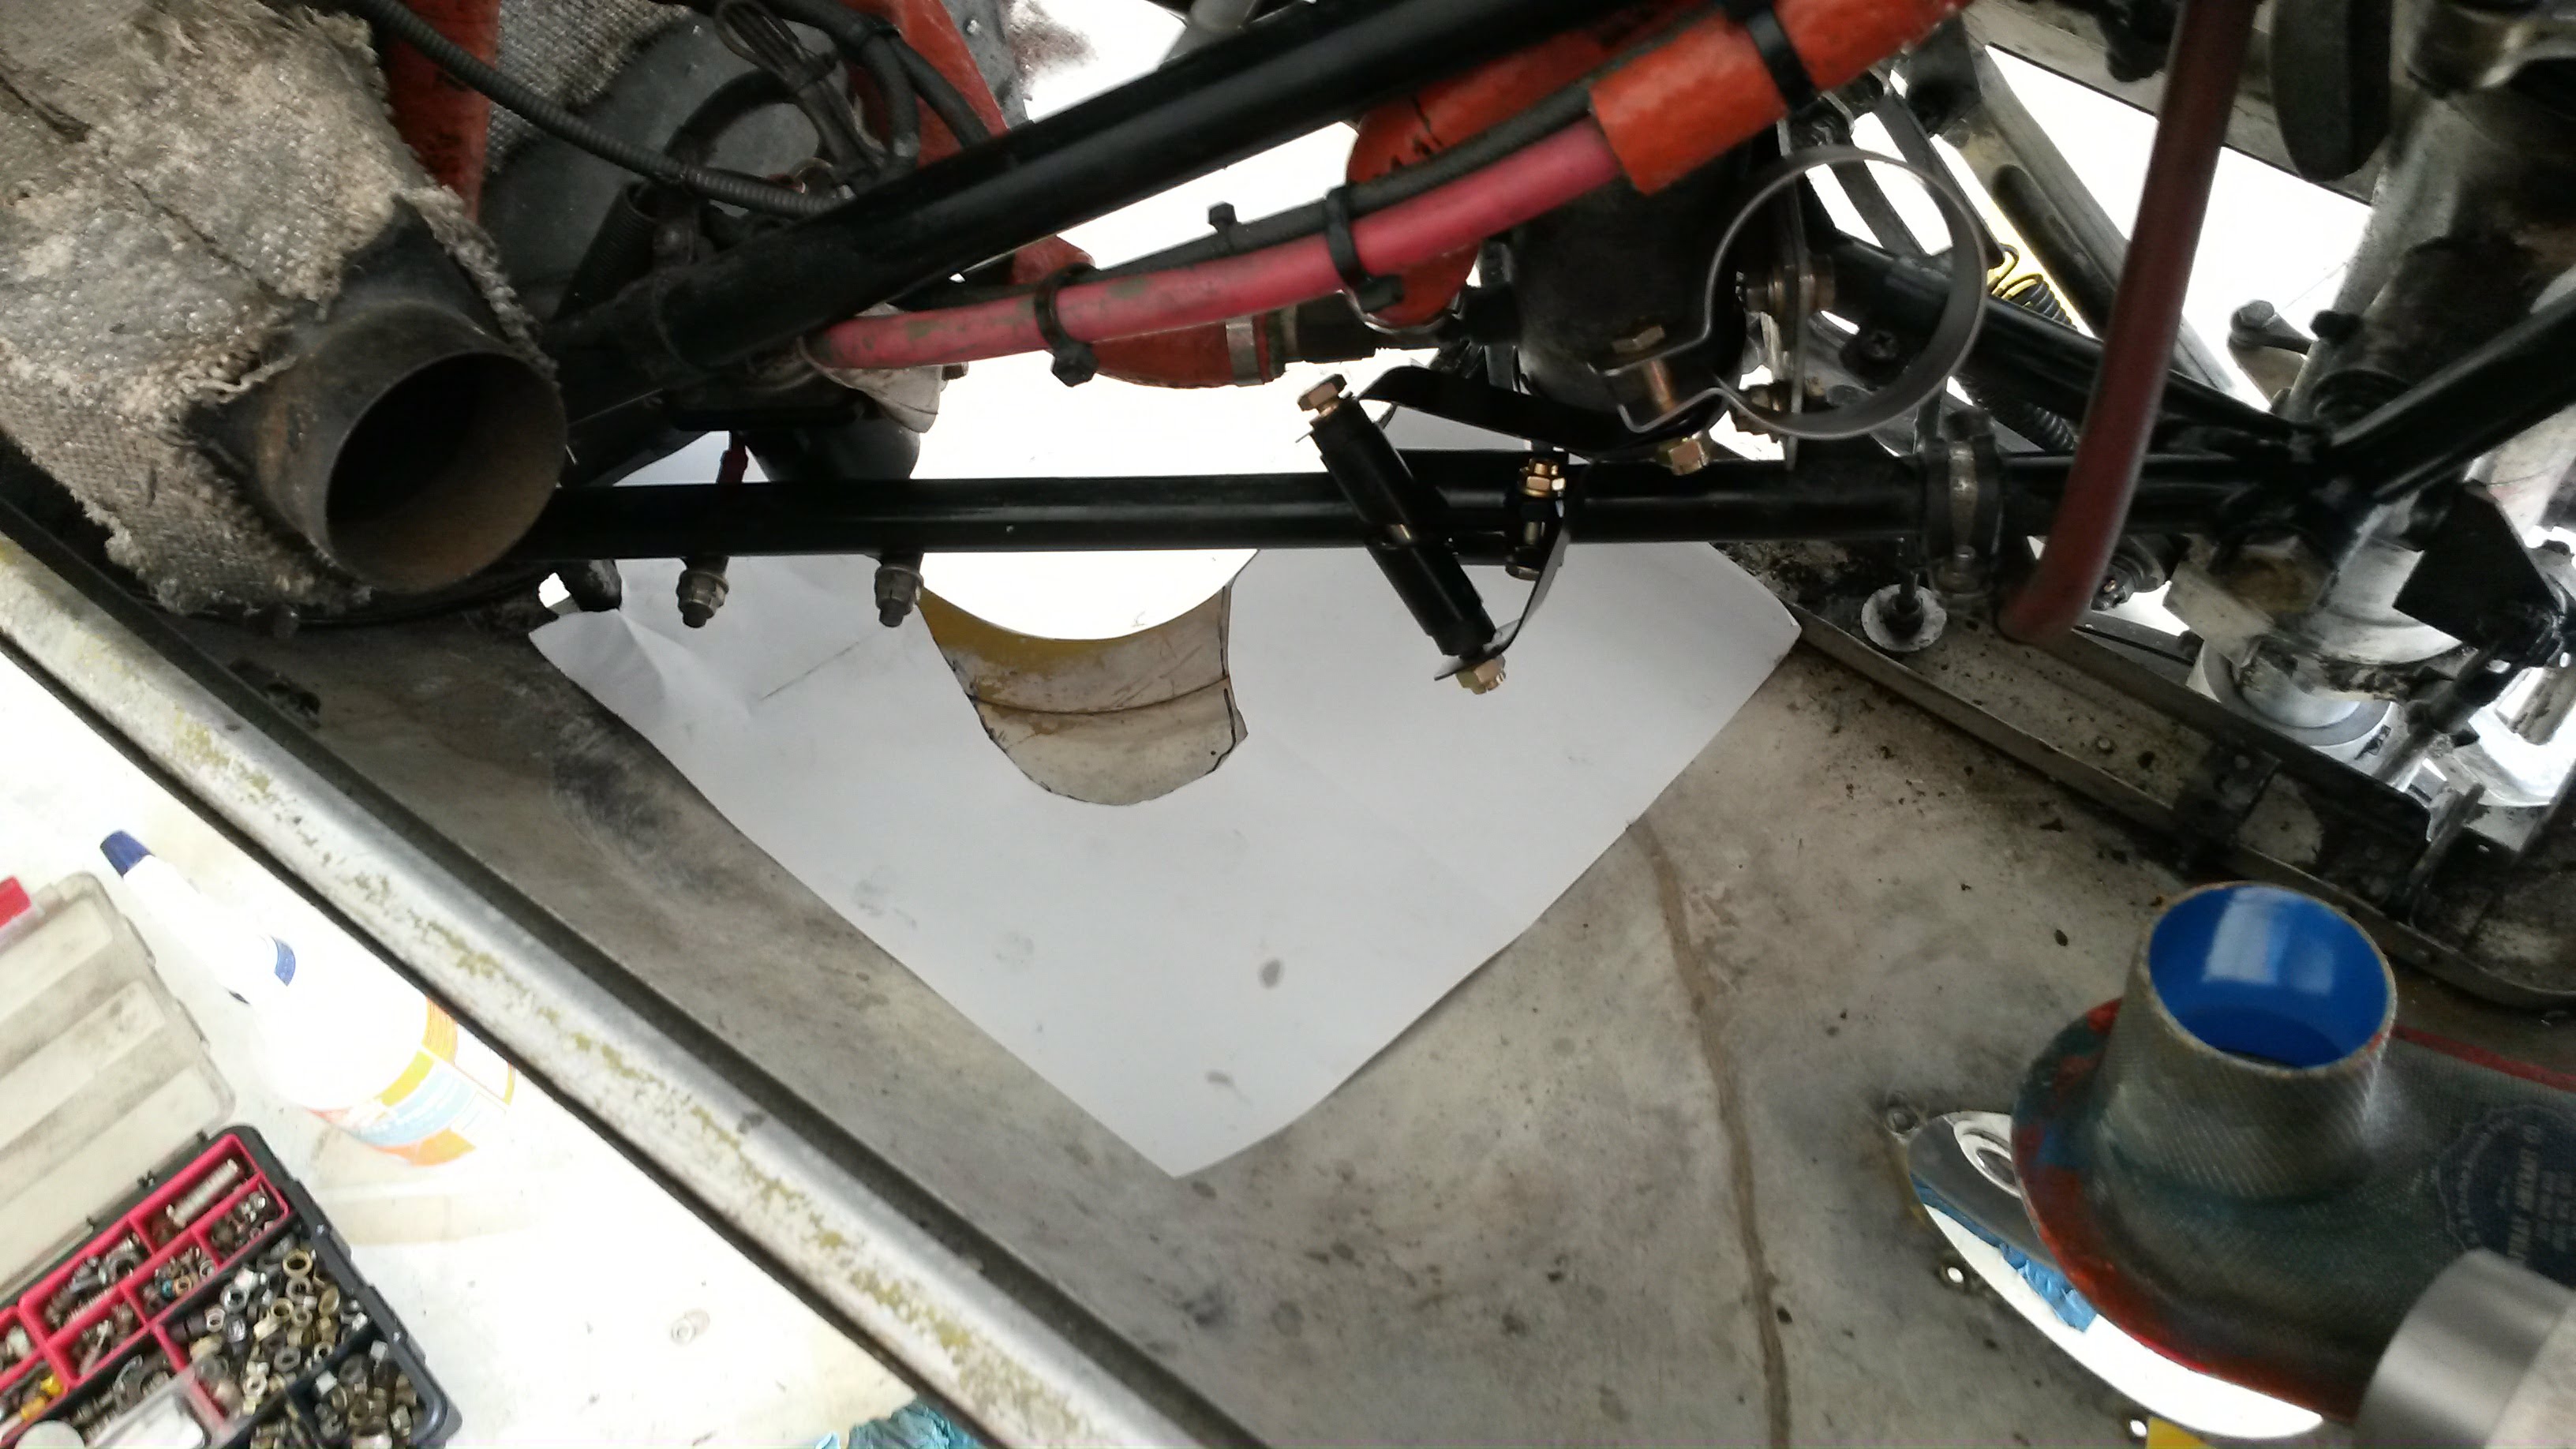
After we made a trial fit of the system, it was time to start the modifications on the bottom Cowl. The plans come with some templates that can be cut out and placed upon the cowling. from there you can make your own adjustments, as the template is only a rough guide and more modifications might be needed.
Template for Cowl Trim
This modification was nerve wracking. Take too much and we wreck the cowl. Take too little and the mufflers don’t fit. We had to do this process two or three times before we were sure it was right. On top of all this cutting we than had to make new doubler plates and rivet them on. We originally intended to replace the fresh air intake ports on the bottom of the cowling with NACA ducts. However this option would not work as the new mufflers were in the way.
Bottom Cowl Modification
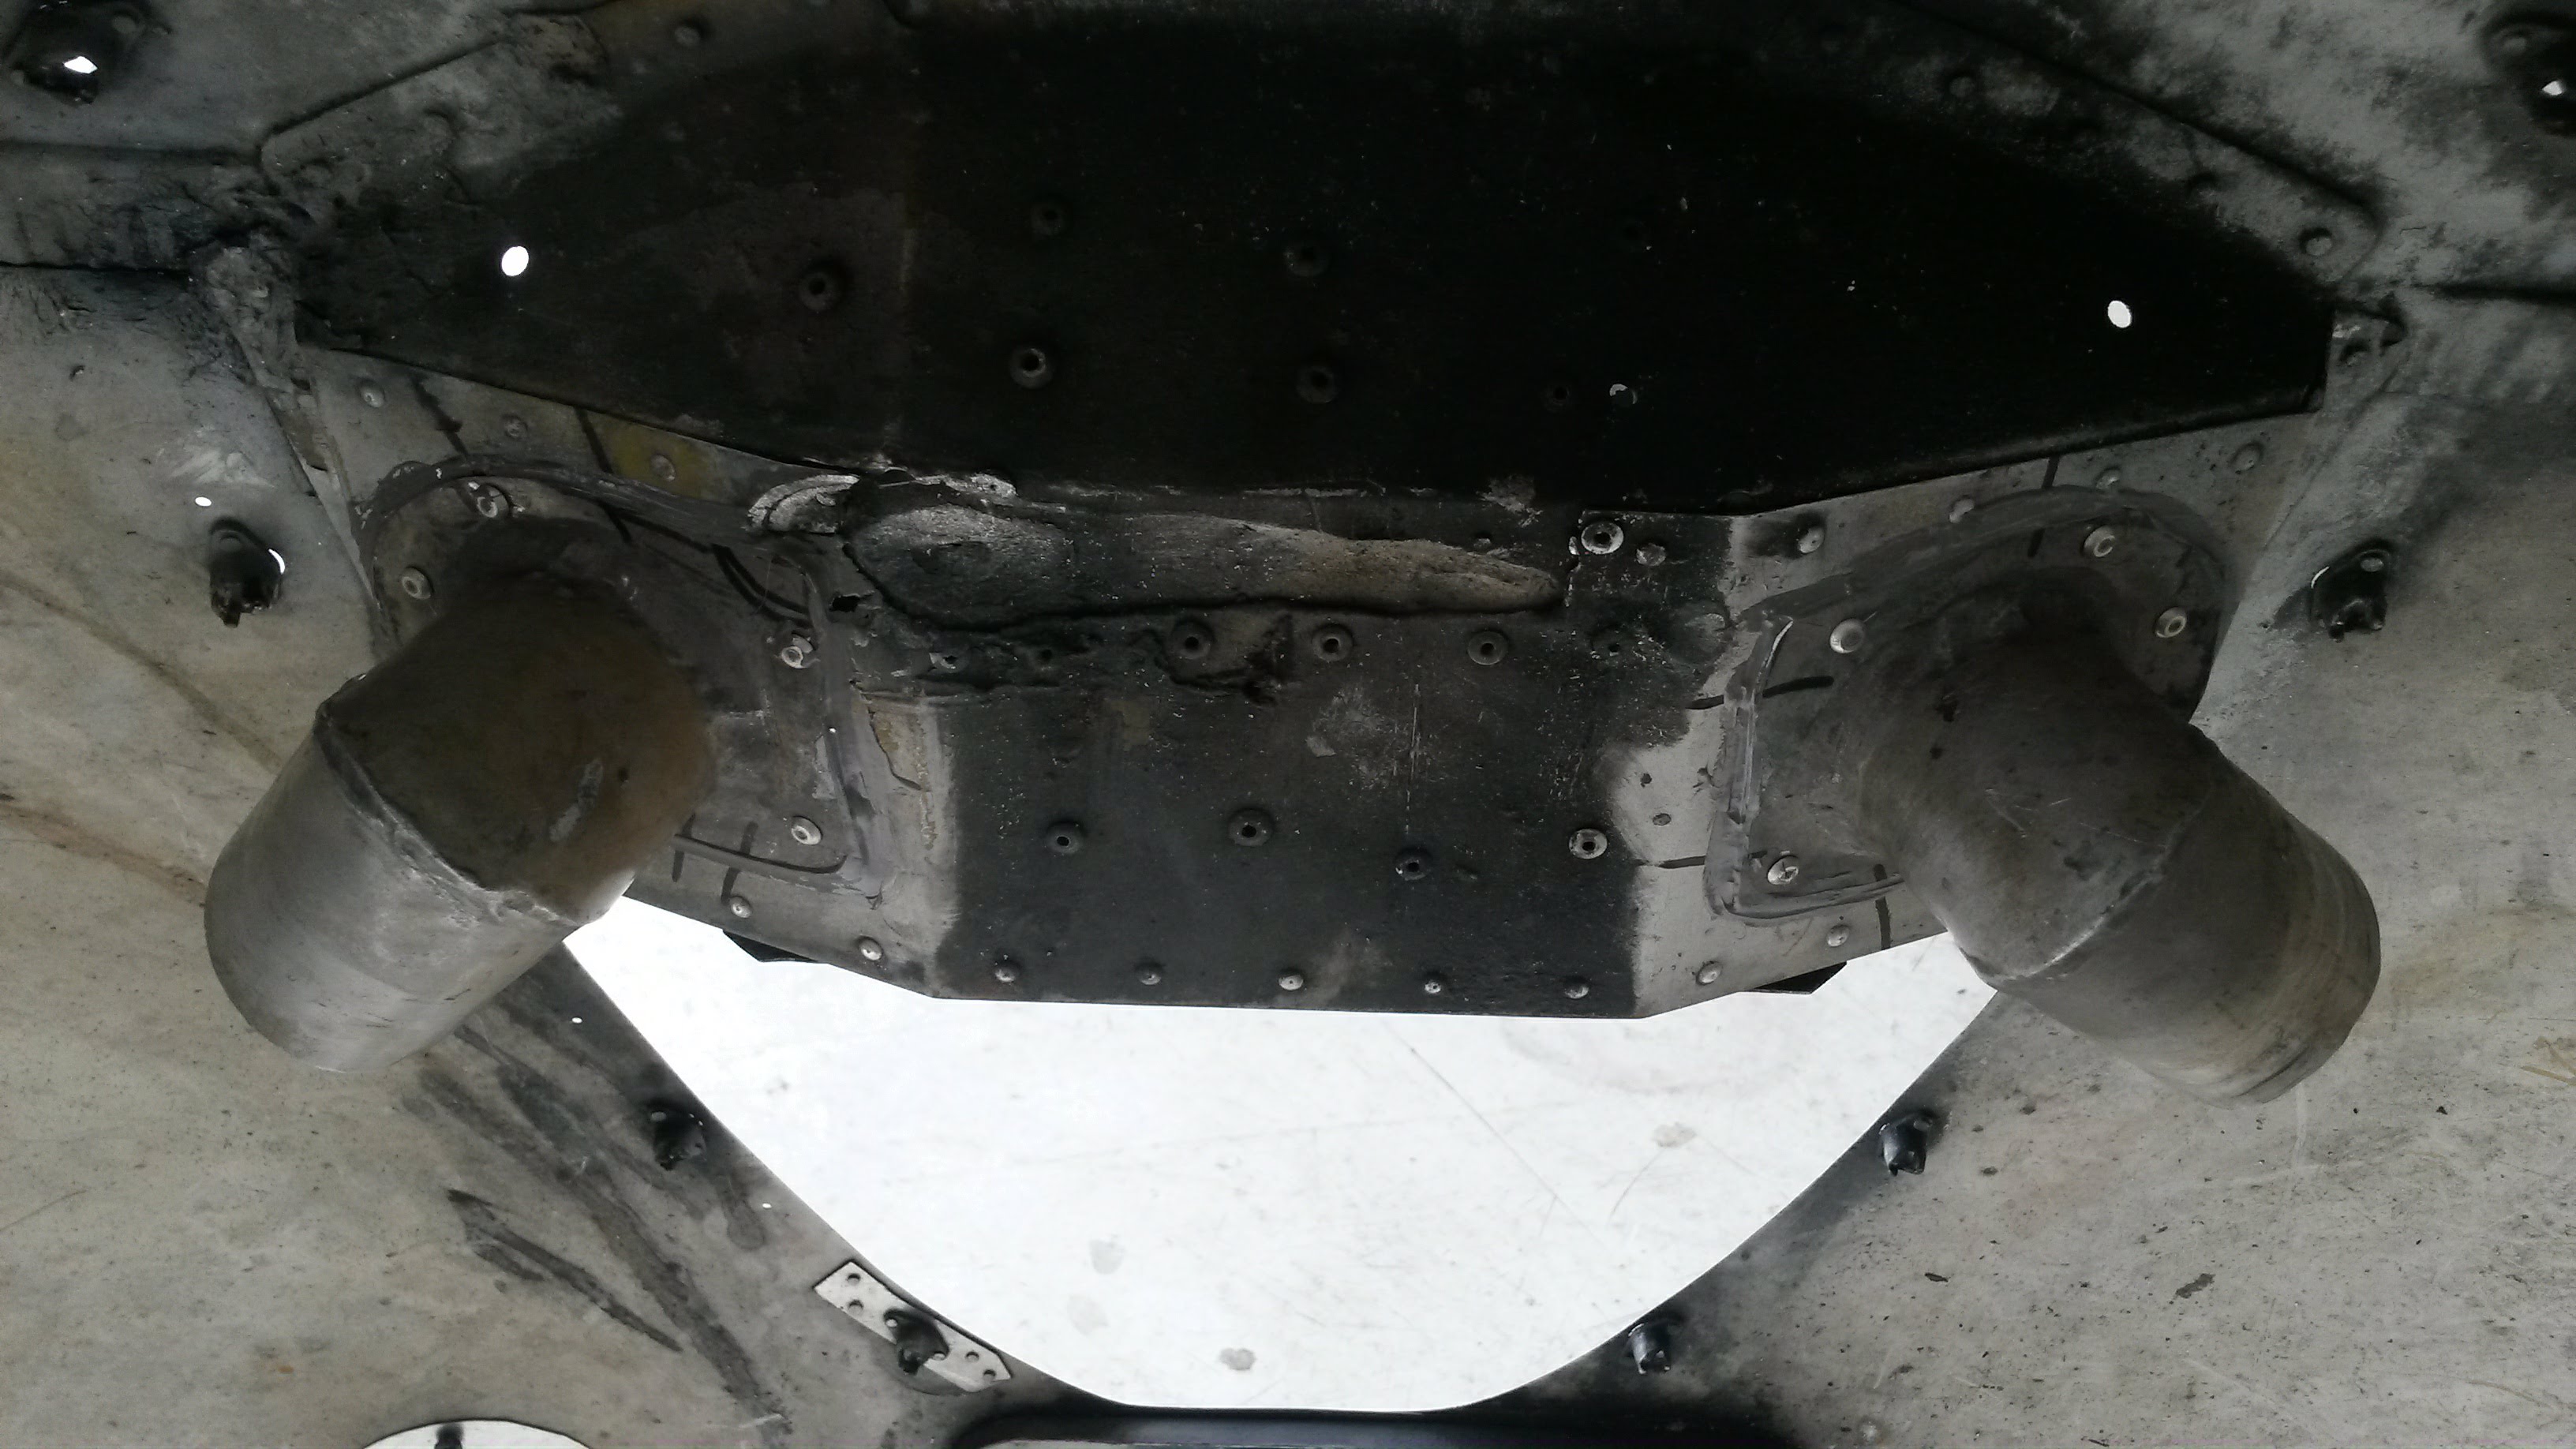
As part of the STC old parts from the existing system were incorporated. In order to provide fresh air, two new intake ports had to be added to the cowl. These ports were to be cut off the muffler heat muff and attached to the front of the cowling on top of the airbox.
New Fresh Air Ports
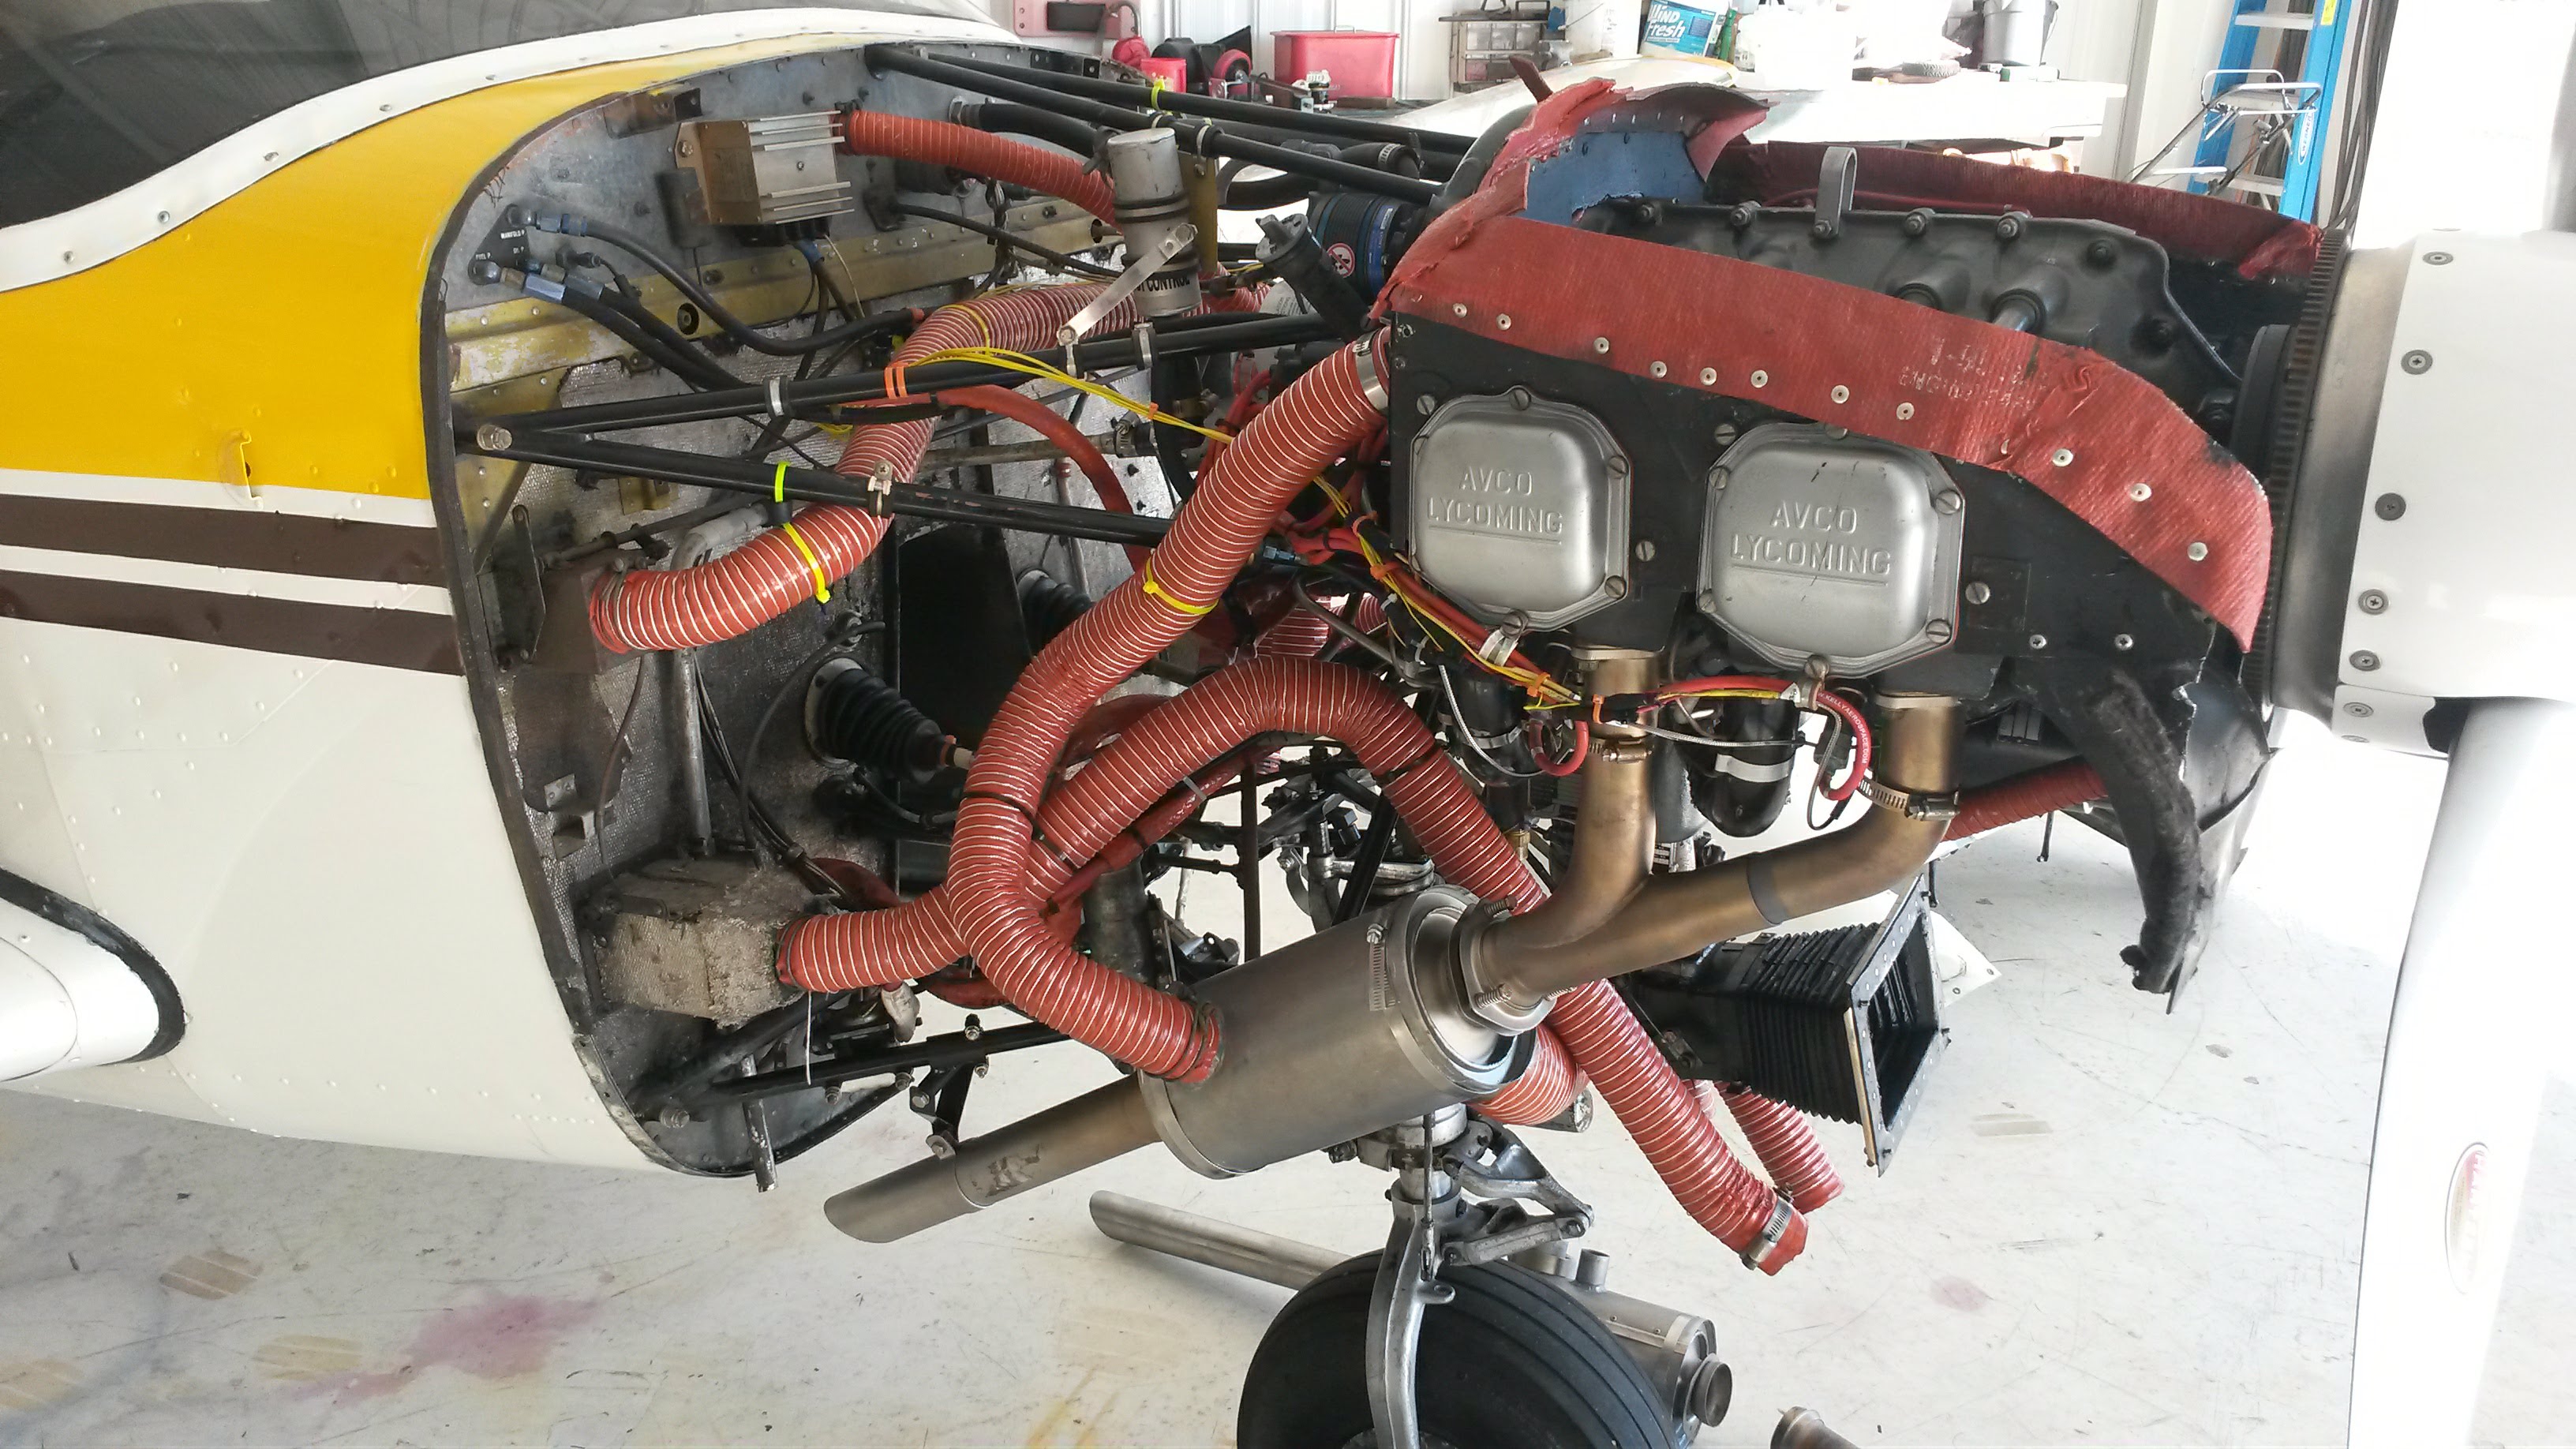
My Comanche has dual heat ports and dual fresh air ports on each side of the firewall. New SCAT hose had to be run for both fresh air and heat. The right side muffler handles the carburetor heat air. So the air intake off the back of the baffle puts hot air into the carb box. We also drilled out holes for the exhaust gas temperature (EGT) probes. I decided to try them on the inside, so they were tucked out of the way. This worked okay on the right side, but we had to do something slightly different on the left.
Right Side of Dual Exhaust Installed
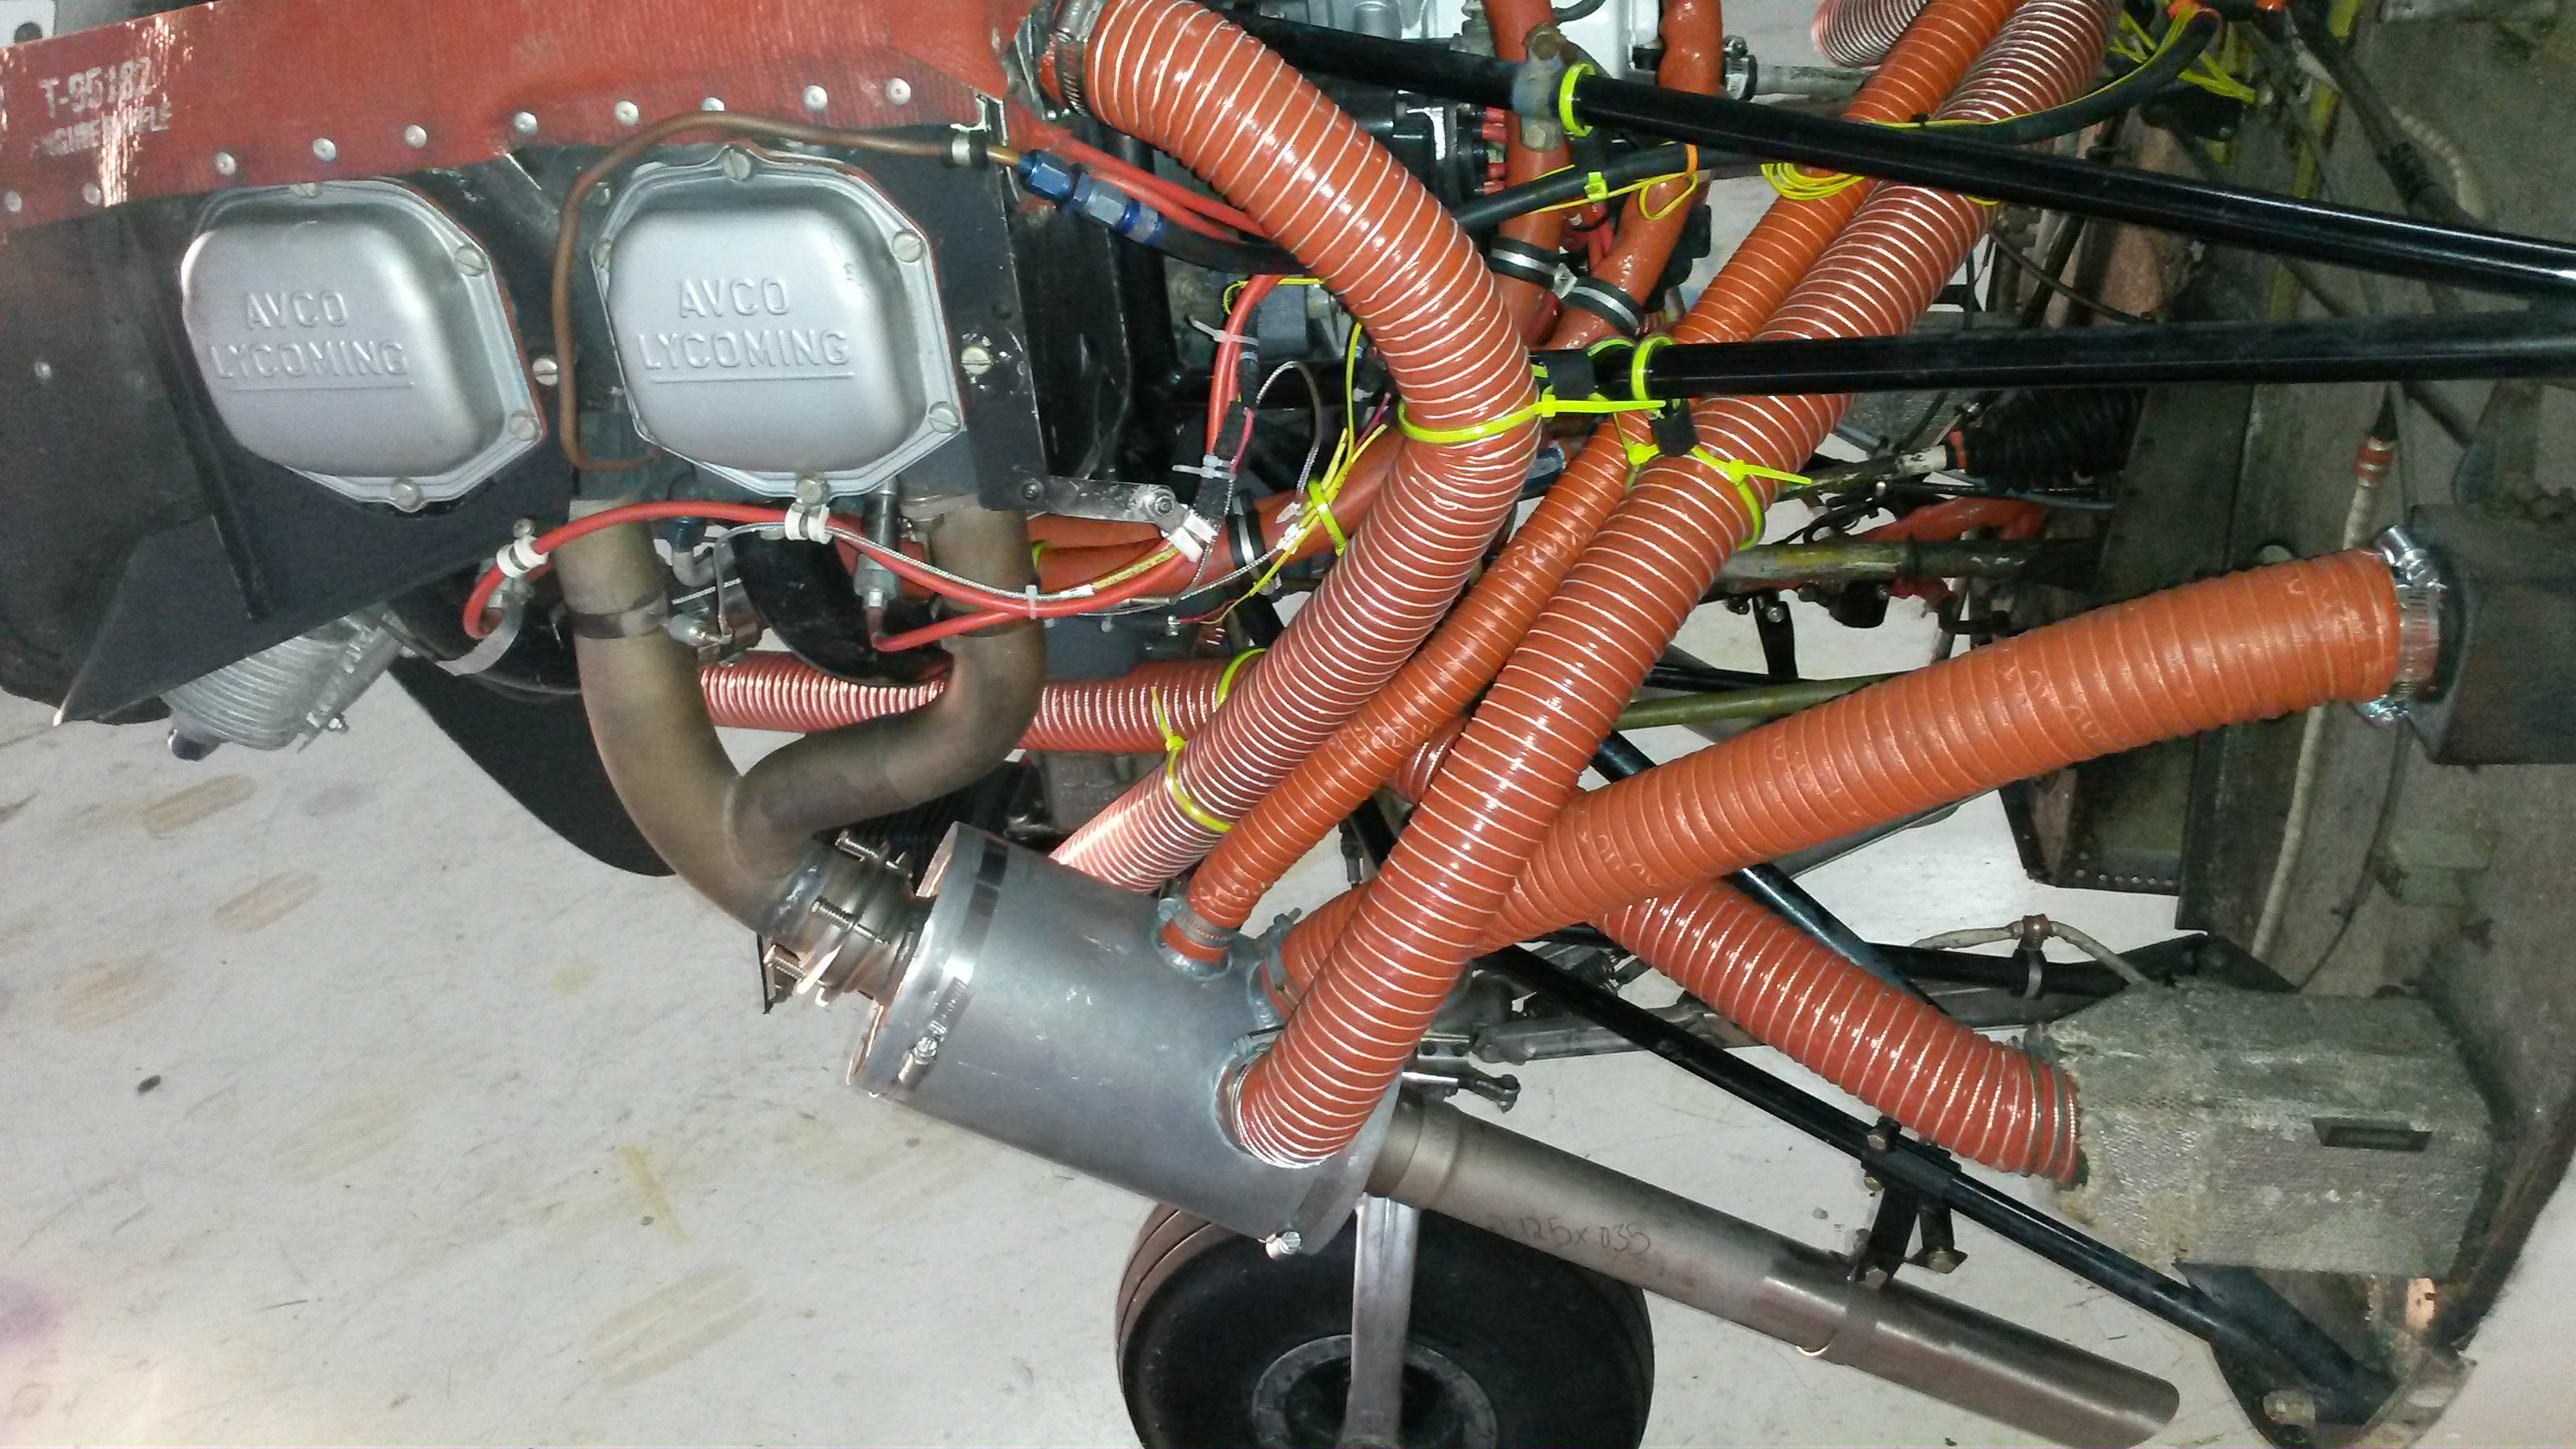
The left side was a real challenge. The heat probes would not fit under the baffling so they ended up more on the back of the pipes than on the inside our outside. Also as the picture shows, we had to run many new lengths of SCAT tubing from the left muffler to all the heat ports. Both the left and right heat and windshield defrost all come off this muffler.
Left Side Exhaust
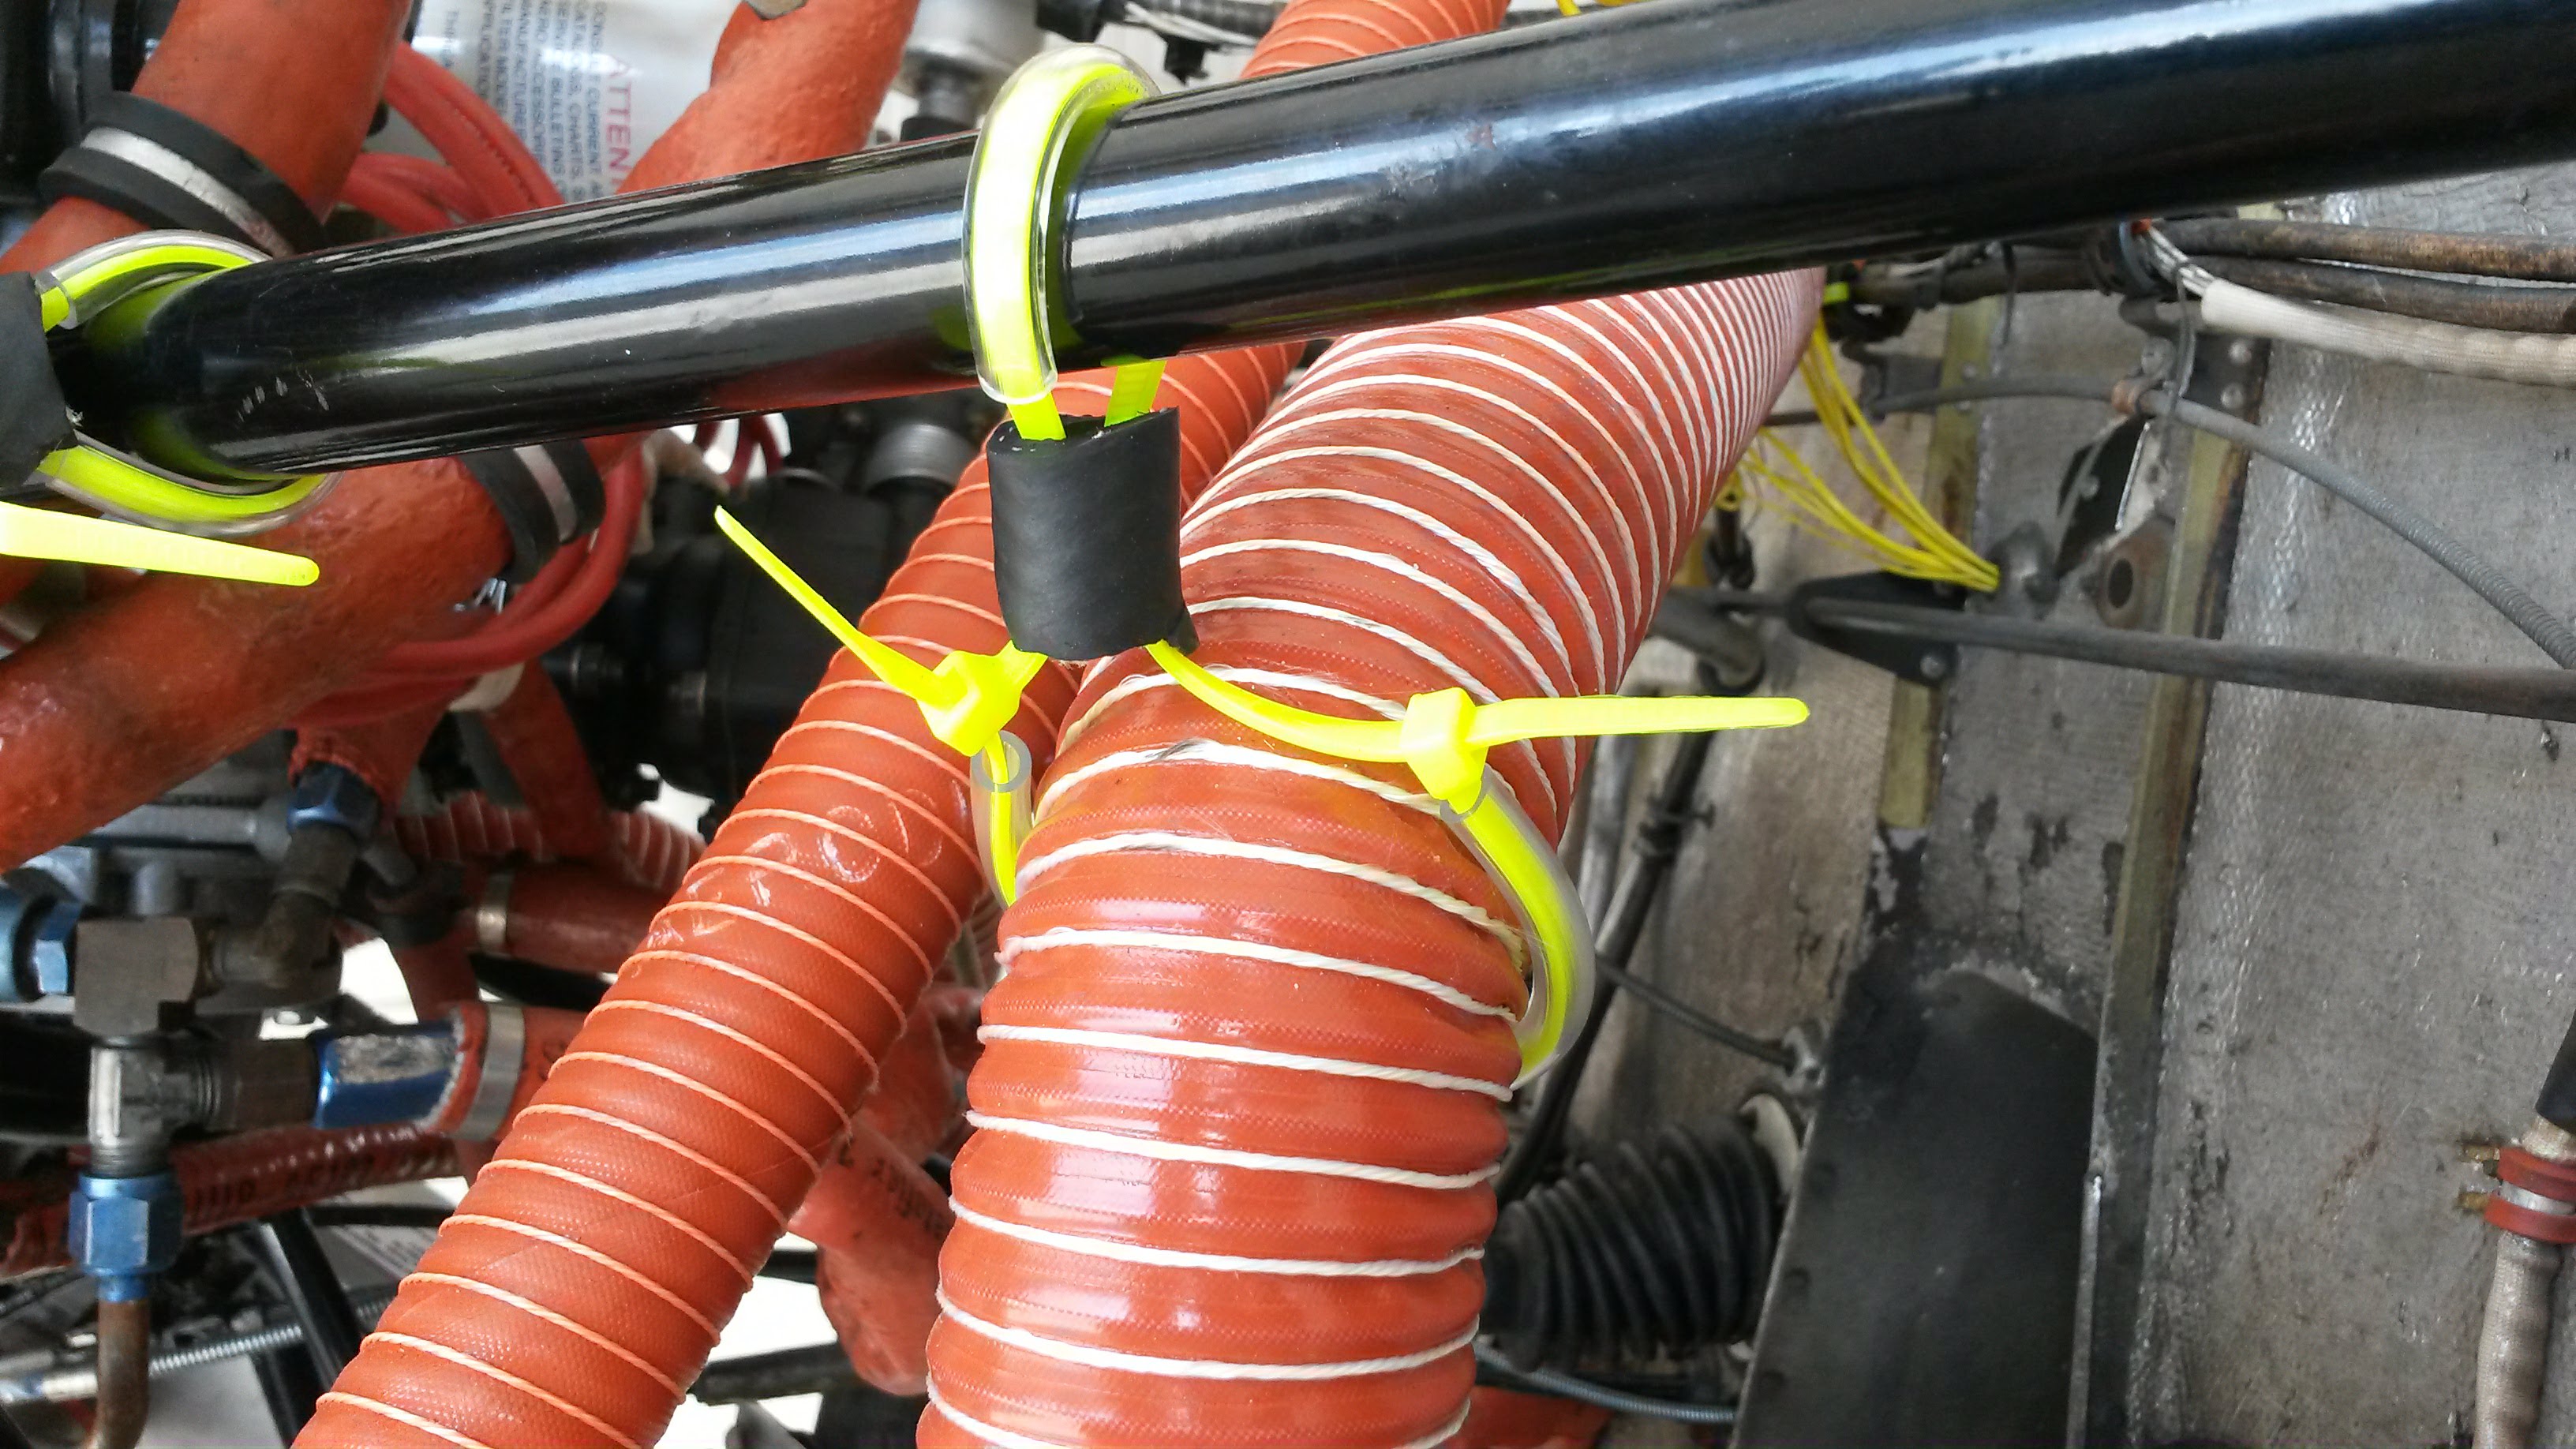
A note on securing the SCAT tubing. I did not use adel clamps. My mechanic and I talked about how to secure them and we decided together that some zip ties would work. I used some high temp clear plastic hose over the zip tie to prevent wearing and then a small piece of rubber tubing to create a stand off. Now the pipe would be secure and protected against vibration wear. Once these ties were tightened, they held the pipes in place.
Zip Tied Hoses
There are several perks to this new exhaust. The heat now works fantastically and no more carbon monoxide in the cabin. The engine sounds different as the exhaust has a deeper more rumbling tone to it. Also much less heat transfer from through the firewall making the dashboard hot. Overall this project was a good change. I now have a much better exhaust system. I am not yet sure if it was worth all the troubles, but it does work as advertised and does seem to improve the situation quite a bit.
Day 5
Travel day from Greybull, WY to Rapid City, SD (2 hours). It was a beautiful flight. We flew north over the Big Horn Lake and then followed the river through the canyon over the Yellowtail damn to Fort Smith where we then turned southeast towards Rapid City. We crossed the border of Wyoming into Montana, but we can’t call it an official visit and we did not land.
Departing KGEY heading north
Climbing out was slow, even with only 50 gallons of fuel. We averaged about 350 fpm. So I slid over closer to the mountains and used the updraft to increase our rate of climb. This route to the north and then swinging back around to the south east was for sure not the most direct, but by far the most scenic.
The flight following and radar services are very spotty out here. I was able to contact Denver Center once I got over Sheridan (SHR) as they must have a relay station at that airport. The services lasted all of about 15 minutes as I passed into a no radar zone then lost radio coverage. So squawking 1200 and VFR all the way to Rapid City.
The descent into Rapid City is a bit tricky. You have to stay high to clear the mountains just west, then descend at a pretty steep angle to be at pattern altitude once you get close to the field. Fortunately it was Sunday, air traffic was light and Ellsworth Air Force base, just north of Rapid City, was closed for the day. The wind was 180 at 17 gusting 35 as we descended and landed.
Piper Comanche Landing Rapid City
I did my homework on Rapid City. There is a Westjet FBO on the field. Seems they are a bit pricey and not all that GA friendly. Located on the south end of the field is Rapid Fuel self-service pumps and free public tie-down parking right behind their hangar. Make sure you bring your own ropes as the chains provided are very short.
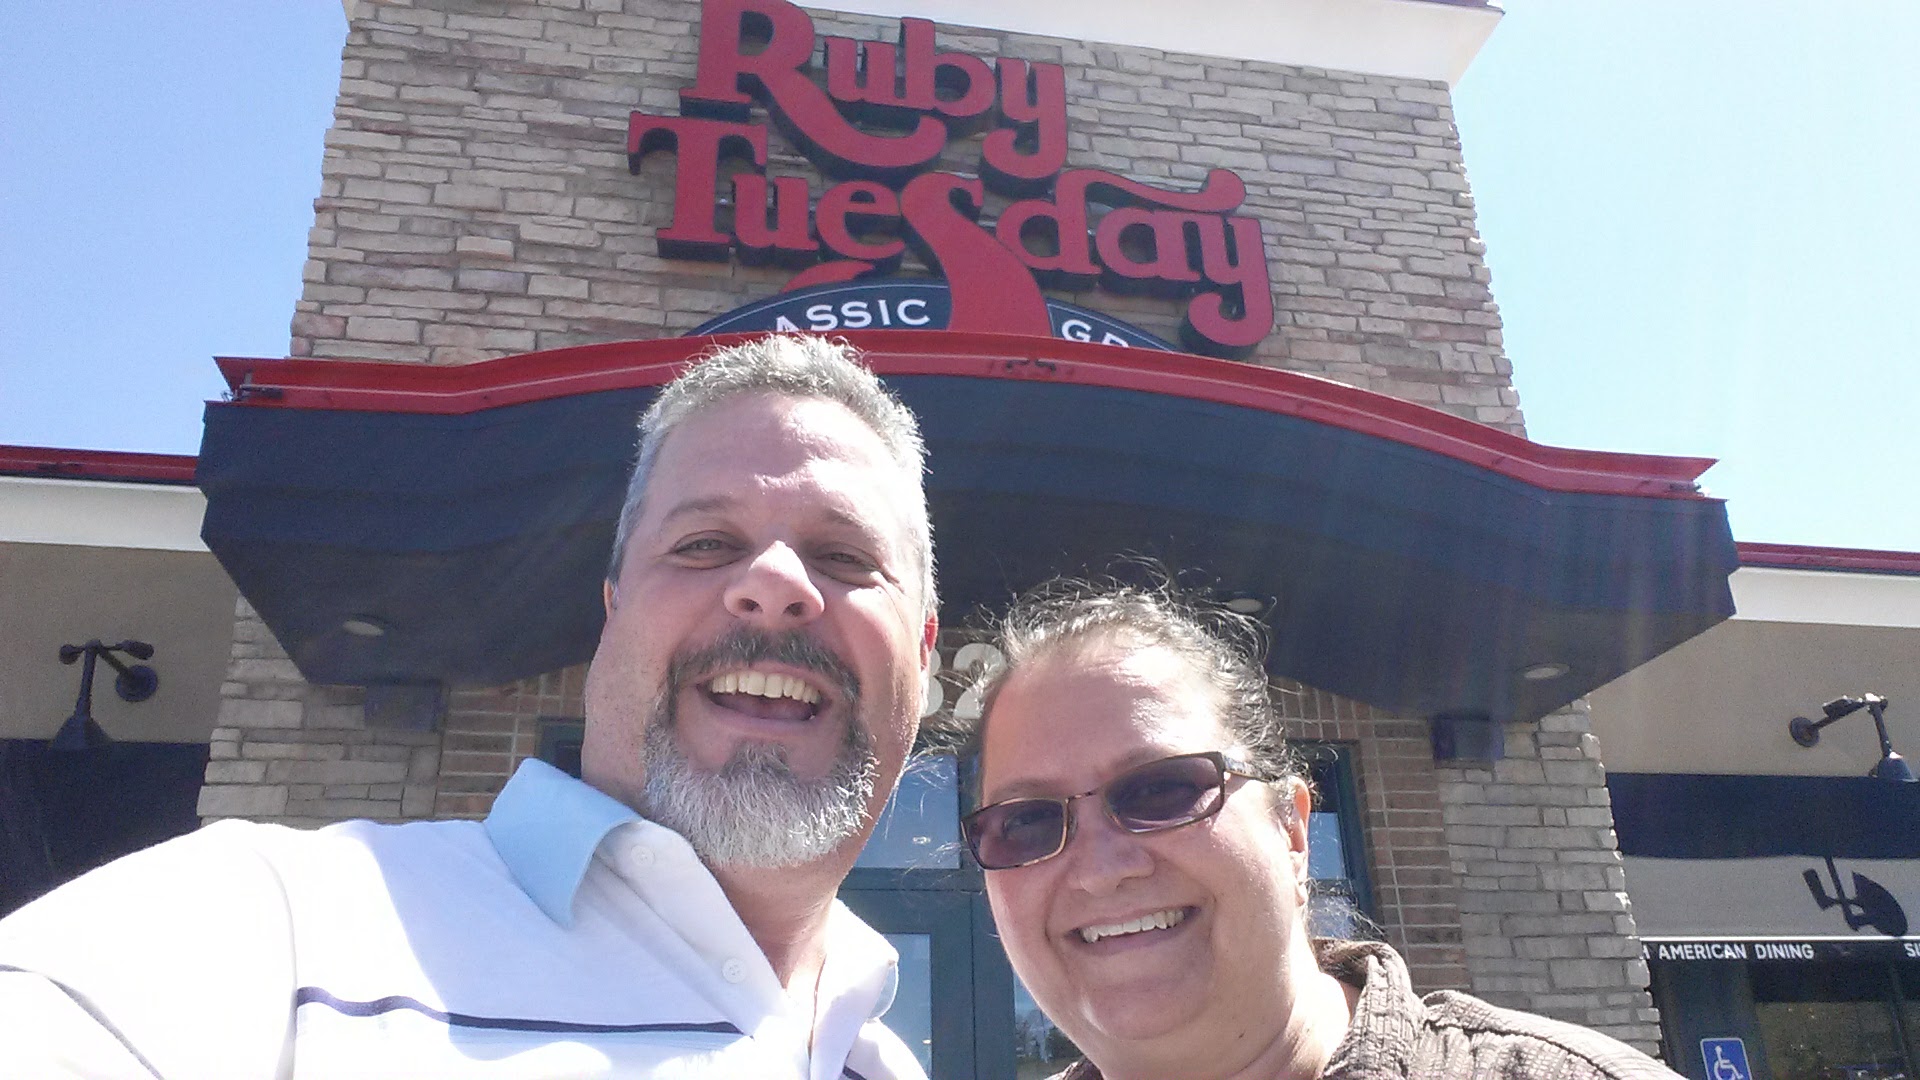
So what do you do after a grueling 2.5 hour scenic flight around the mountains of Montana, and across the plans of Wyoming and South Dakota? You go to Sunday brunch at Ruby Tuesday of course!
We then checked into our hotel and relaxed the rest of the day.
Day 6
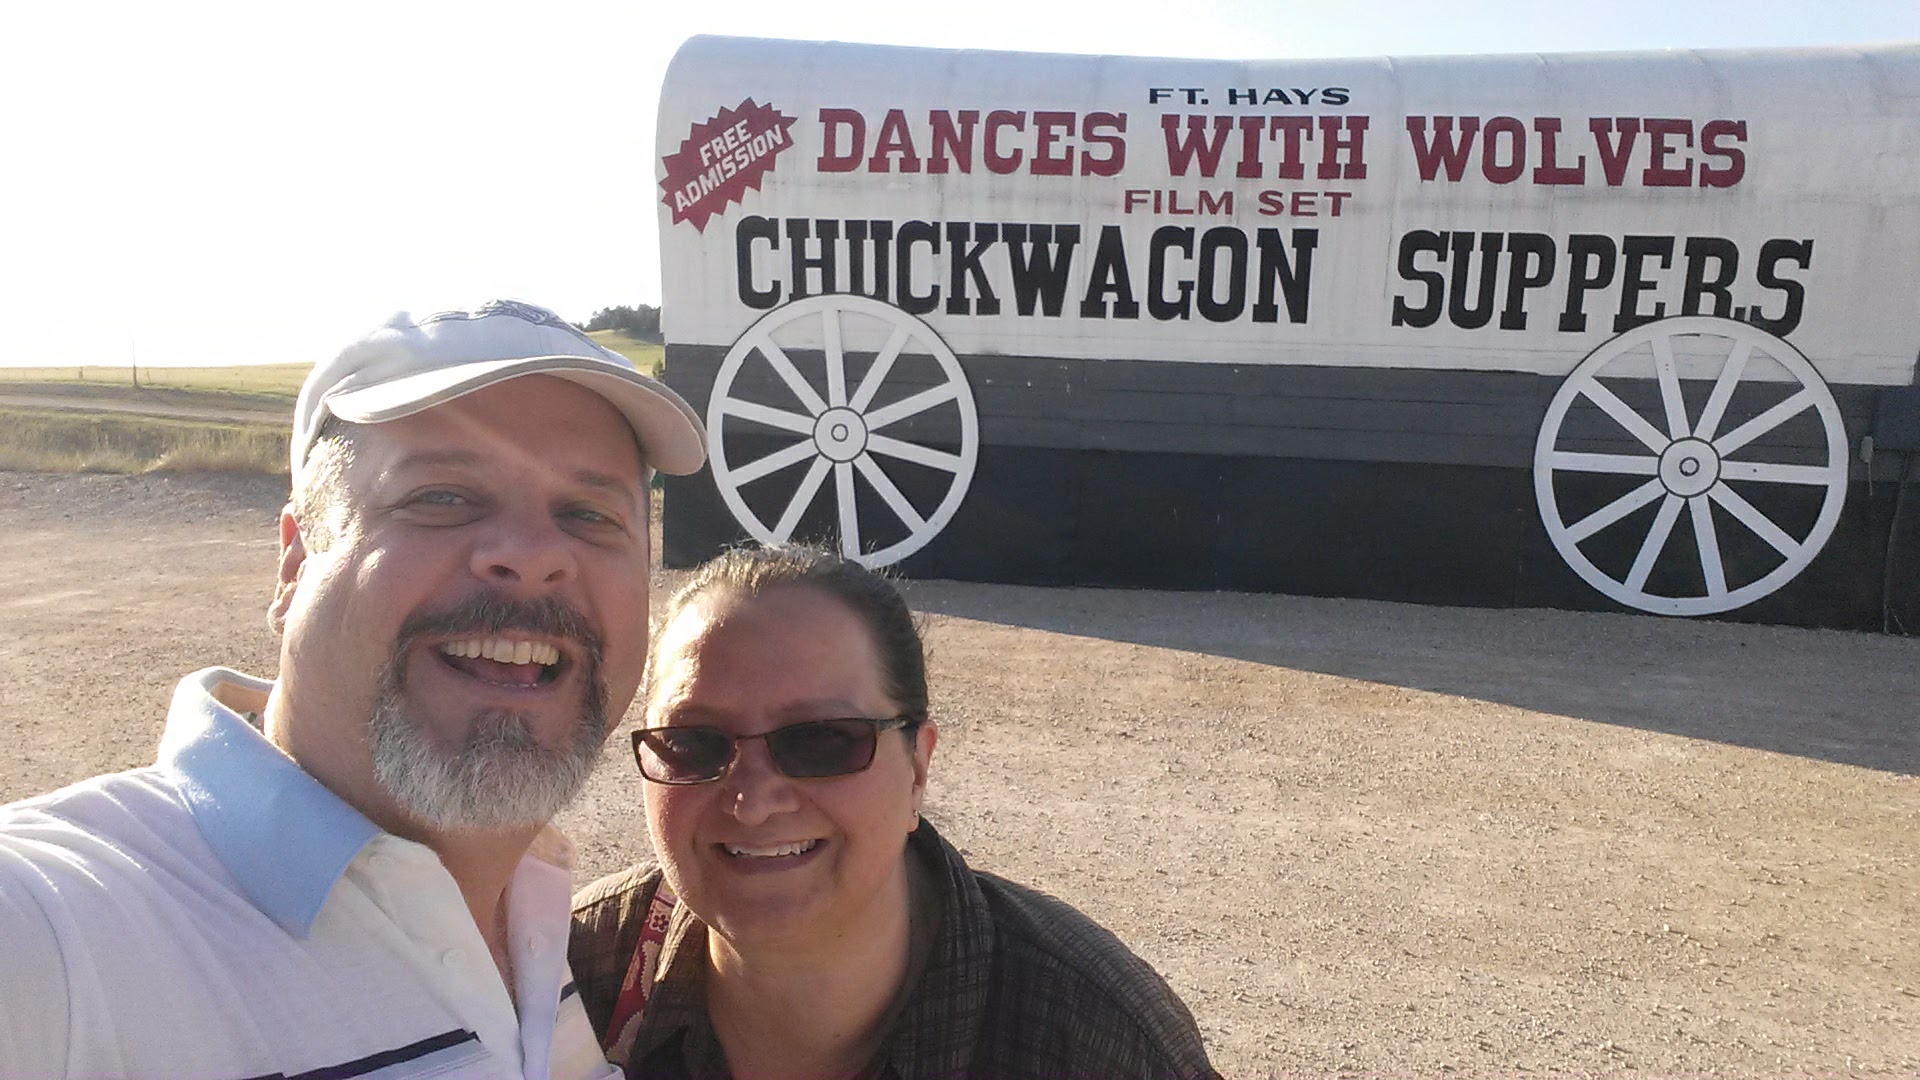
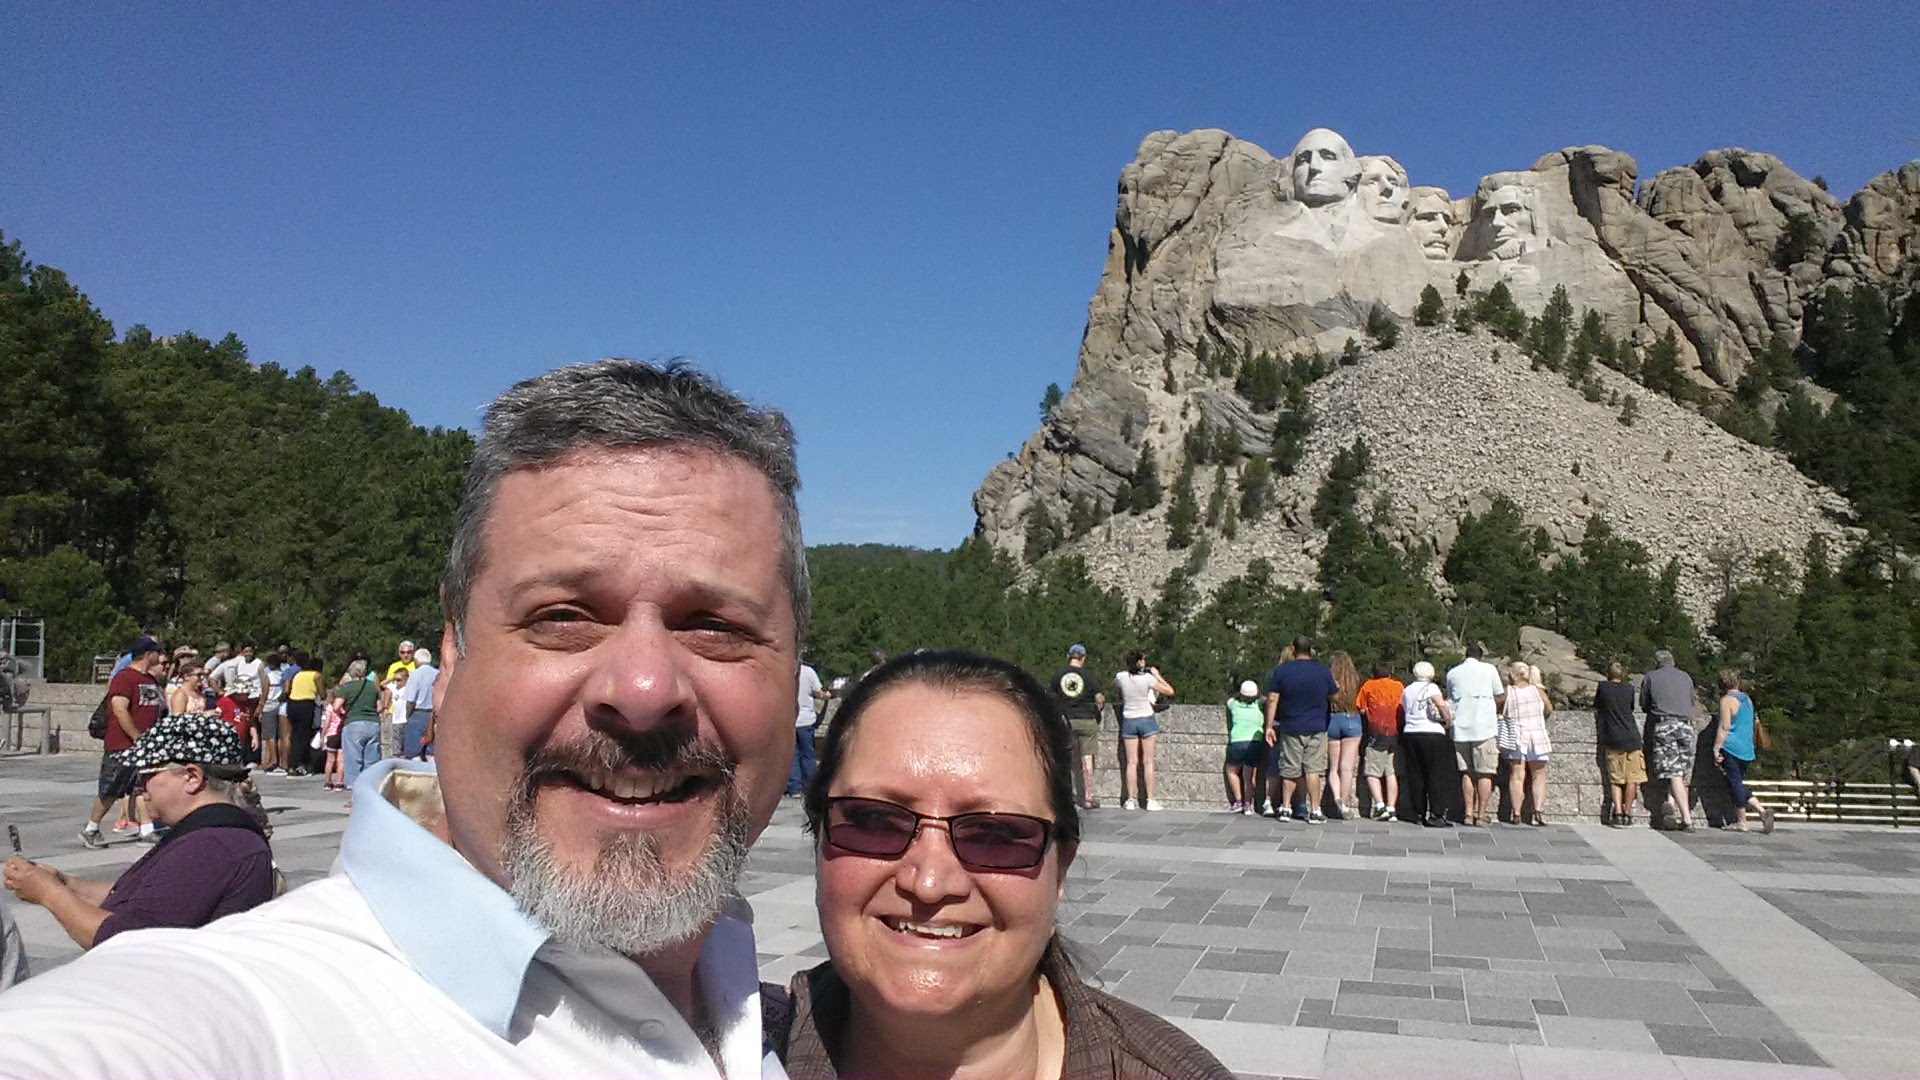
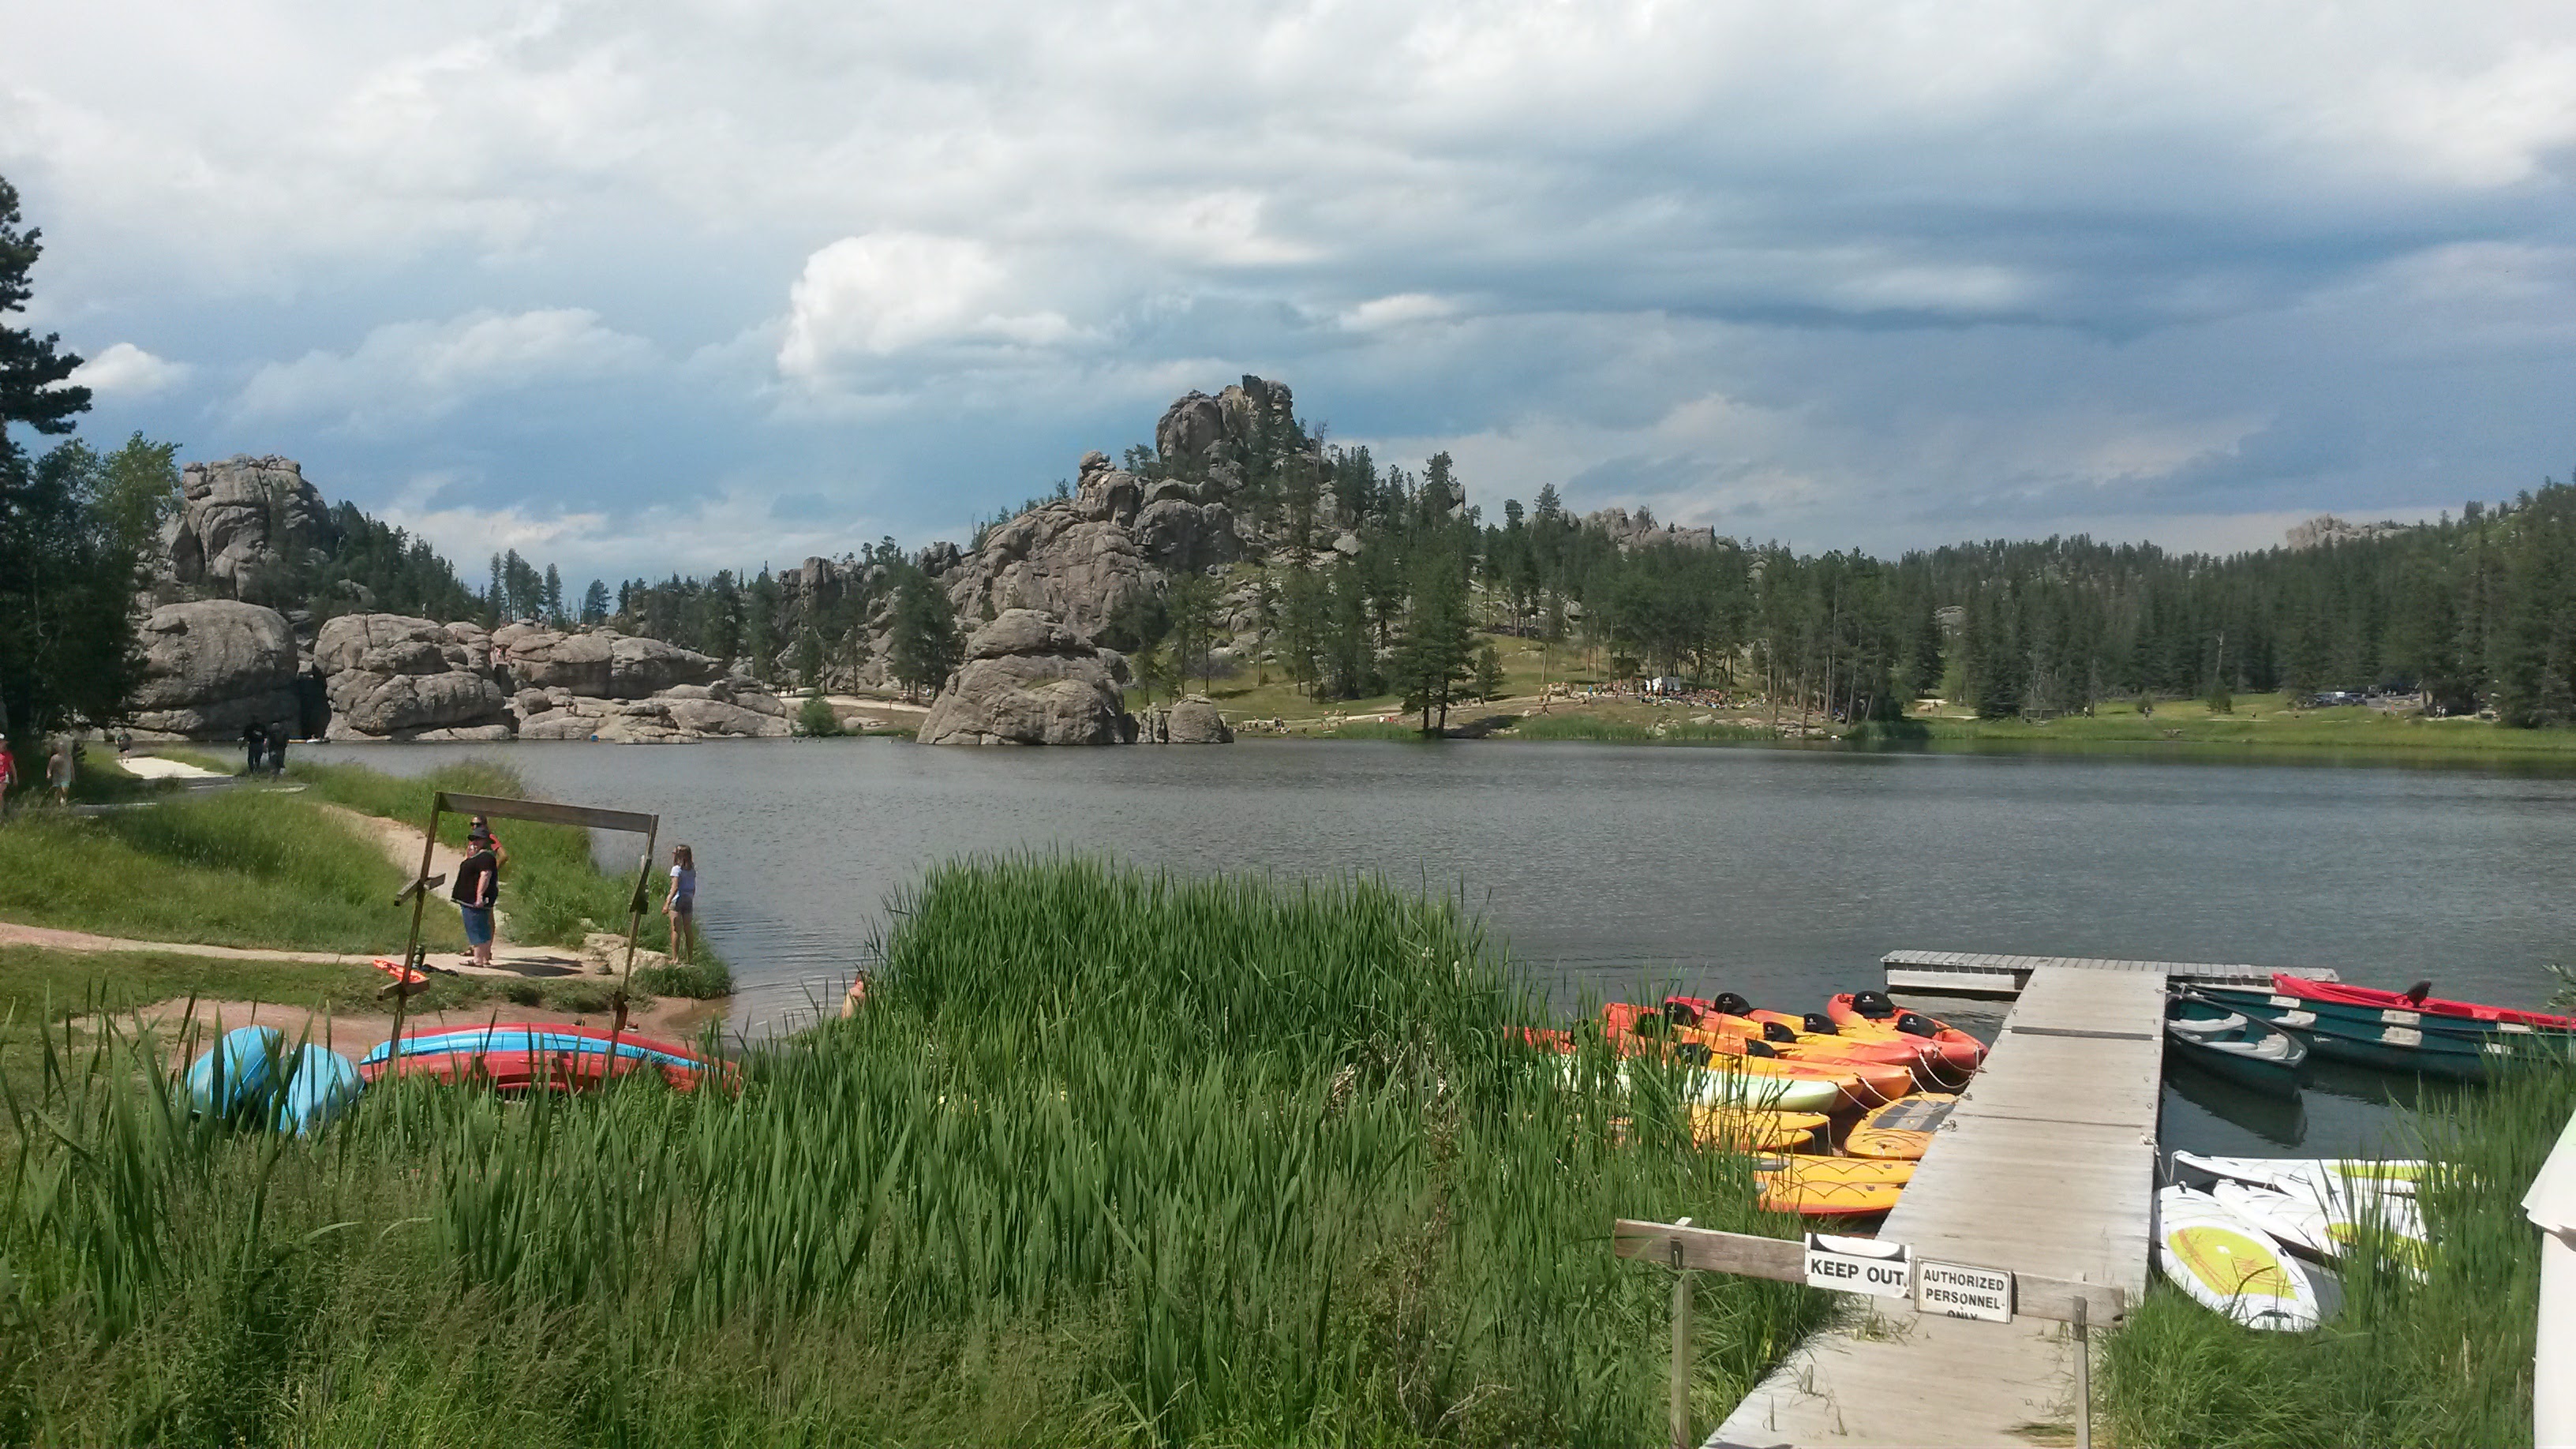
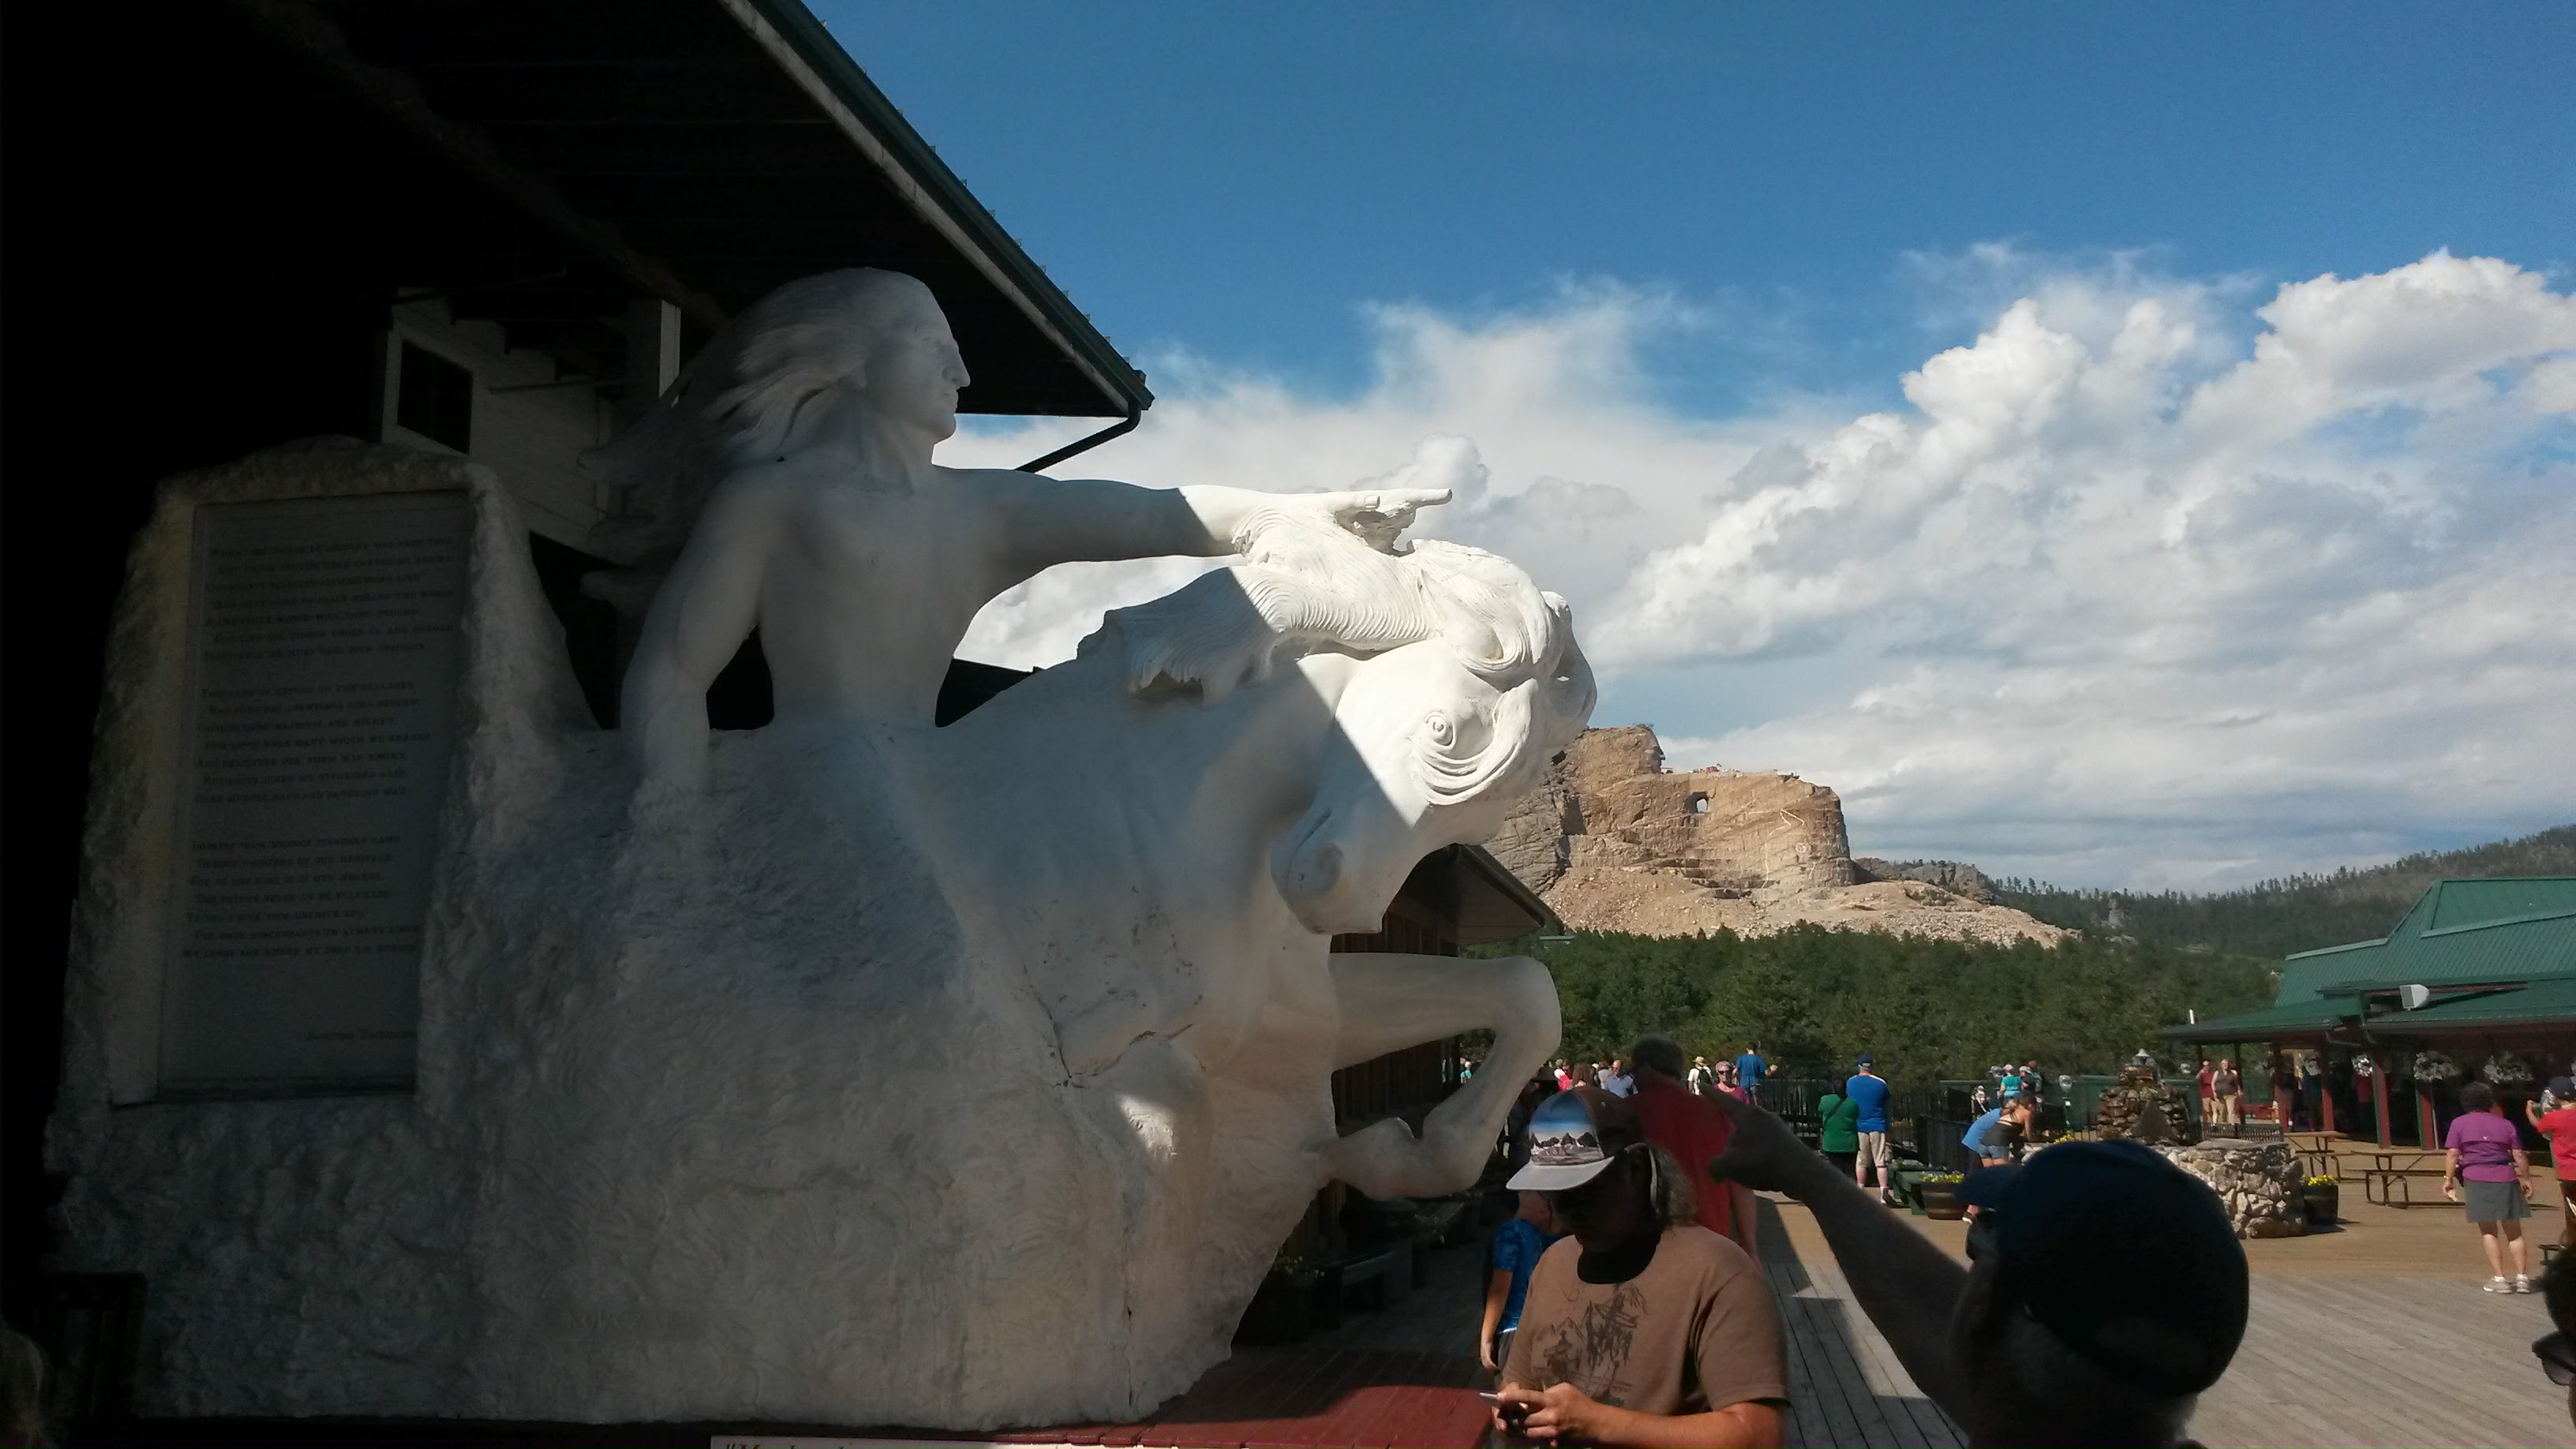
Today we were tourist! We started our day at the Fort Hays Dances with Wolves Film Set where we had breakfast then the bus picked us up for our tour. Our bus driver for the tour was a hoot, and he took us to Mount Rushmore, Iron Mountain Road through scenic tunnels and pigtail bridges, Custer State Park, State Game Lodge for lunch (this is the presidential summer White House for former president Calvin Coolidge), Needles Highway passing through scenic tunnels and by scenic overlooks, Sylvan Lake (a spectacular man-made lake located at the bottom of Harney Peak), and Crazy Horse Mountain. Then we returned to Fort Hays for a Chuckwagon (dinner and show). It was a great day!
Ft. Hays
Mt. RushMore
Sylvan Lake
Crazy Horse
Chuck Wagon Dinner Show
Day 7
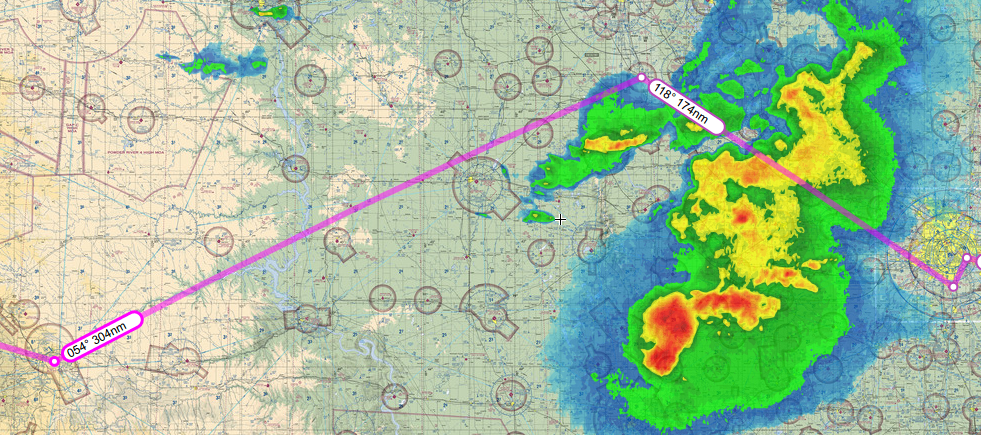
Travel day from Rapid City, SD to South St. Paul, MN. Because of thunderstorms which aren’t good for little airplanes like ours, we decided not to go to the North Dakota stop that we planned.
The Planned Route
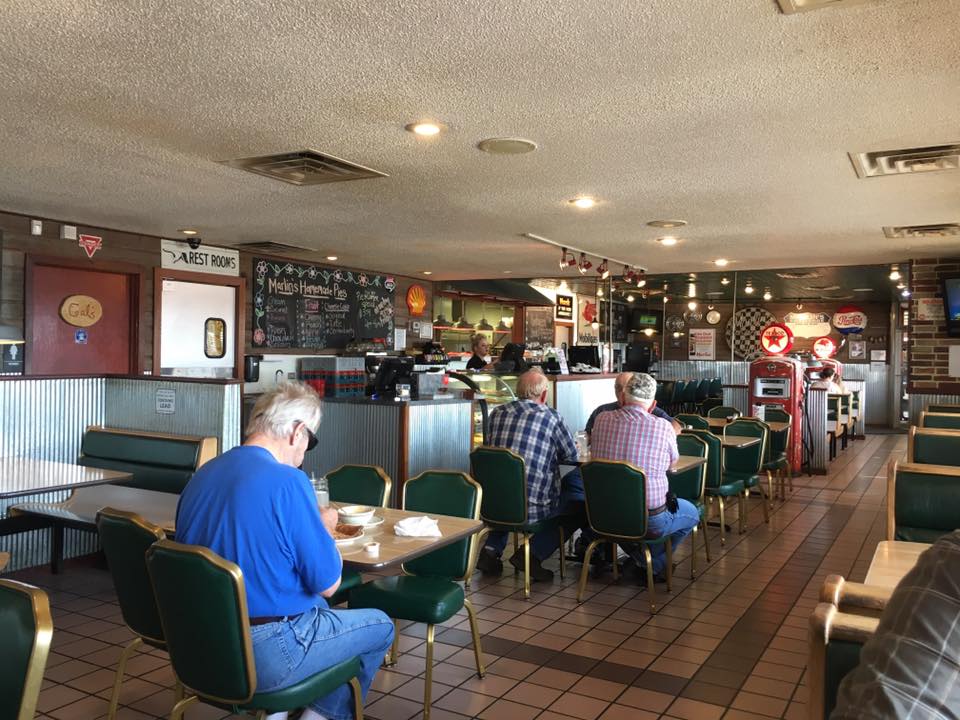
Instead, we detoured to Sioux City, Iowa so that we could wait out the storms. Joe Foss Field has two FBOs. After reading up on them we chose Maverick. http://www.maverickaircenter.com/ They were kind enough to lend us the courtesy car. As it was a bit after lunch time we headed out for a bite of food. We discovered a wonderful diner named Marlin’s where we had lunch. Great food.
Marlin’s Diner
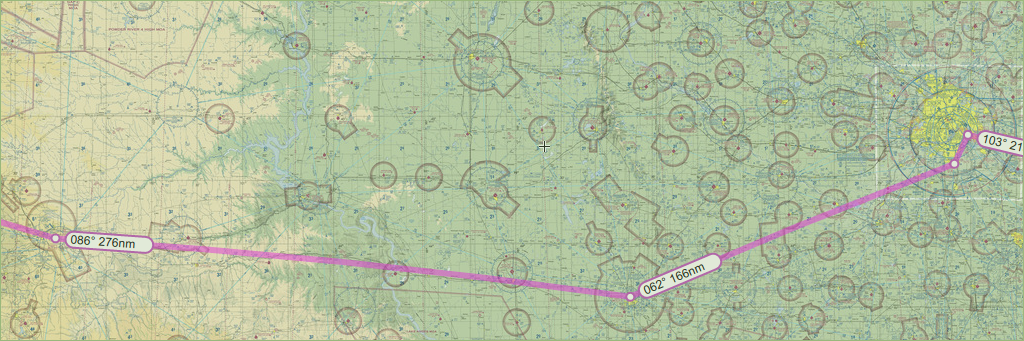
Once the storms passed, we were able to continue our flight. The remnants of the storm made it challenging during our flight from Sioux City to South St. Paul. There were multiple layers of clouds from 3500 feet to 6500 feet and above. I still managed to get some pictures (even though it was very hazy the entire flight) and videos (cloud surfing).
The Actual Route
The Flight
The destination airport KSGS South St Paul Municipal Airport-Richard E Fleming Field is a gem. They have 100LL, Jet-A and 93 octane Mogas. They also offer a full service FBO with courtesy cars and rentals. We decided to use Uber this time and it worked out great. Took us 15 minutes to get from the airport to our Air BnB location.
Oh yeah we really like airbnb.com. We were able to rent a nice little house for $89 a night in the west 7th neighborhood in St. Paul. We have all the amenities of home, while away.
Our summer trip this year was overly ambitious and had to be scaled back to reasonable. Once we figured out what we could do versus what we wanted to do, we came up with a pretty good route.
We will first head to Forth Worth Texas and visit some friends and see the sights like tourists. Then it will be on to Grey Bull Wyoming to visit more friends at a dude ranch. Then over to Rapid City South Dakota to see Mount Rushmore and the Devil’s Tower. Then of to St Paul Minnesota to do a brewery tour and walk the river walk. Then a short stop at OSH, of course, and then we turn south, past the Chicago skyline, down to Crossville TN to visit family. From there a short hop over to Pidgeon Forge to play tourist. Ambitious but not impossible. Distance: 3605 nm Time: 29 hours Fuel: 292 gallons
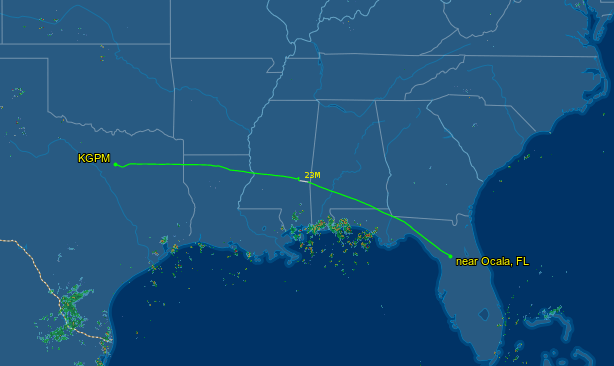
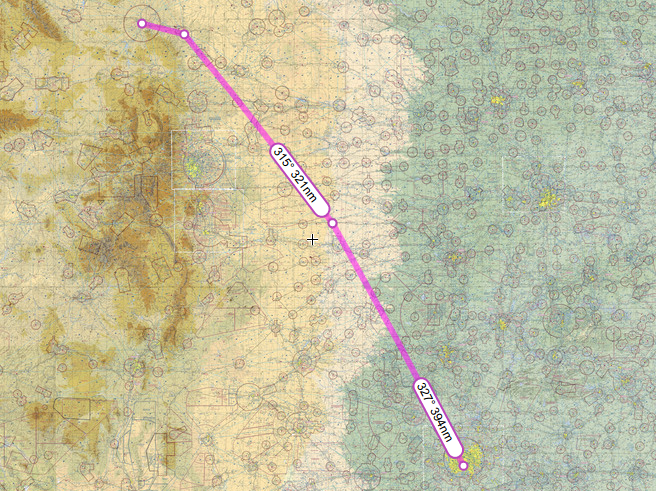
The first leg of the trip took us from Ocala, KOCF to 23M Clarke County for a fuel stop, and finally to KGPM Grand Prarie
We had to fly higher and a bit more north that planned as many thunderstorms popped up along the way.
The clouds looked like cypress knees. A bunch of cumulus towers two to three thousand feet tall and slowly climbing. My wife did a short time lapse of the flying as we cloud surfed.
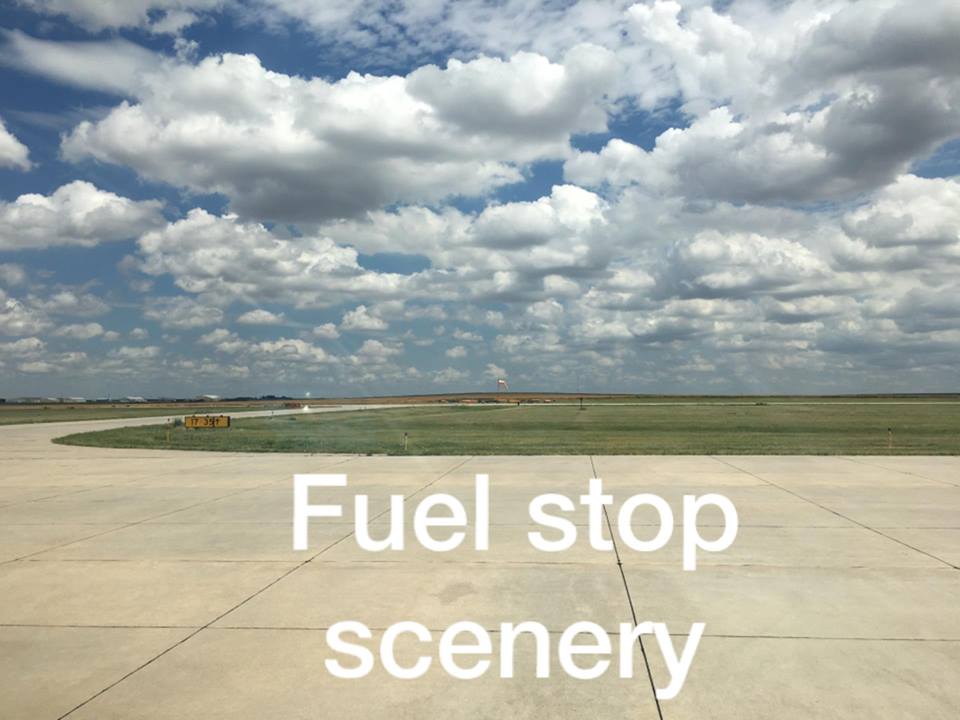
I highly recommend 23M Clarke County airport as a fuel stop. Nice folks and very reasonably priced 100LL and 93 mogas. Here is a link to their facebook page
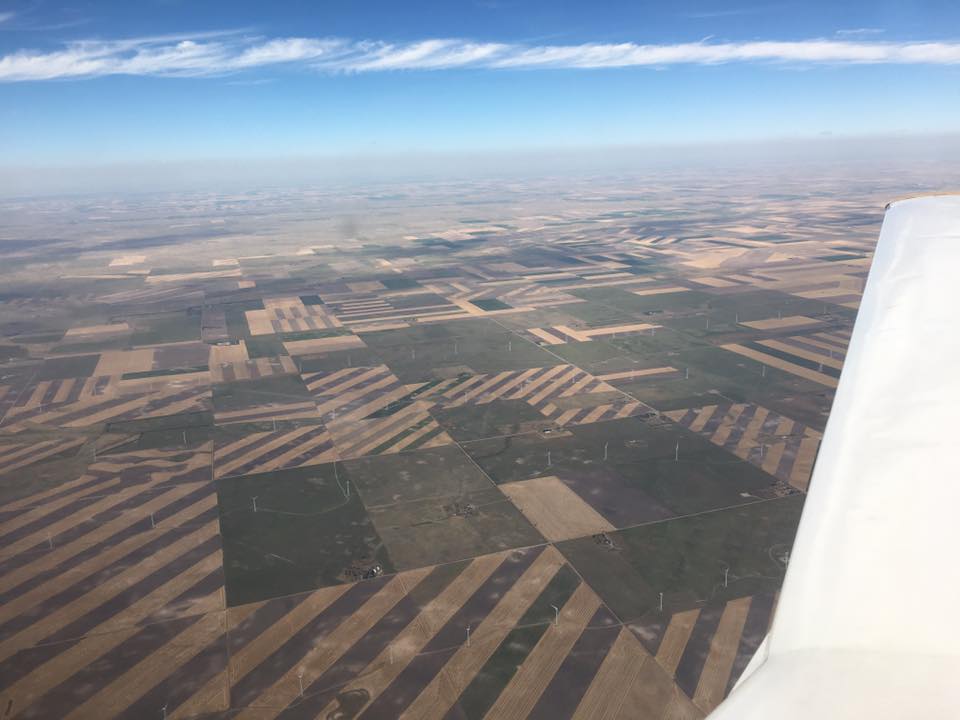
We climbed up to 10,500 for the leg from Clarke County to Grand Prairie to get above all the little towers of cumulus clouds. The Comanche really hums along happy at that altitude. I was able to lean it out well and burn about 8.5gph at about 130kts
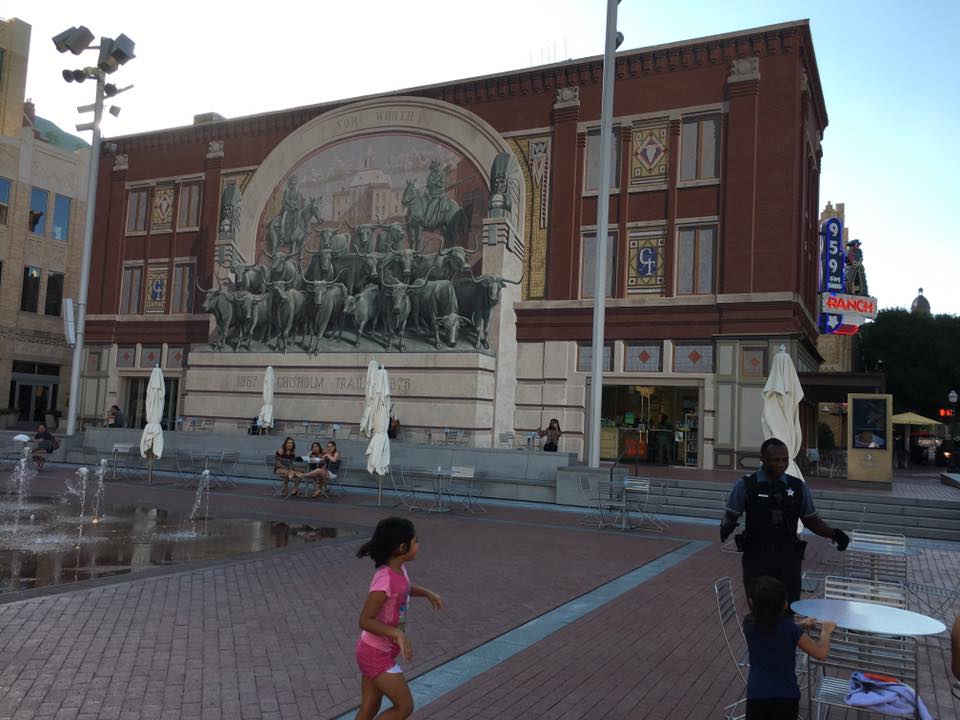
We landed at Grand Prairie about 3pm local time and got our rental car and headed downtown. We decided to try something new and used airbnb.com and got a great little studio apartment right in the heart of downtown Fort Worth just off main street.
We walked around downtown for a while and then over to Risckys BBQ and had a great dinner and drinks. One of the local favorites is a local brewery just south of Forth Worth called Revolver Brewing. They have excellent brews. I highly recommend them.
End of day 1.
Day 3
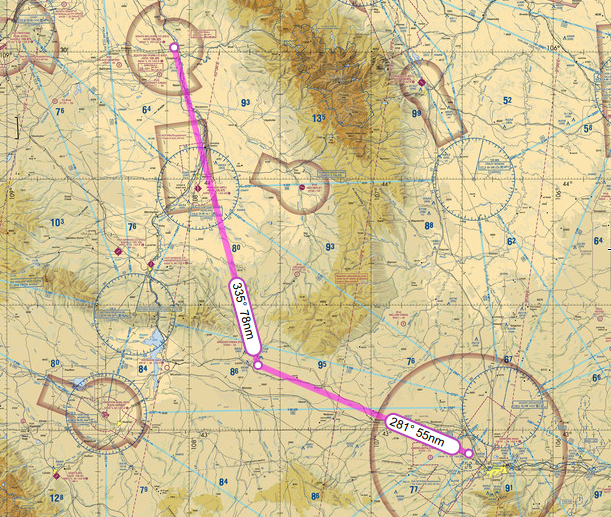
After a really nice stay in Grand Prairie we departed out and headed northwest to Casper Wyoming with a mid-point fuel stop in Kansas at Scott City Municipal.
Flying out of Grand Prairie was much easier than I imagined. I had visions of getting routed all over the place and then abandoned as soon as I left the bravo. Instead I was instructed by the tower to fly runway heading and then contact regional departure. Once handed off to regional departure they gave me one vector change for the climb and then handed me off to Fort Worth Departure with no problems.
We continued north west and made a fuel stop at Scott City in Kansas. This is the second time we have made a stop in Kansas for fuel. Both of the airports we used had cement runways made of large square blocks. The tires sang out a song as we landed and taxied. The fuel was reasonably priced and they pumped for us.
We made our final hop from Scott City all the way to Casper Wyoming. The terrain began to change color, just like on the sectional a little while after our fuel stop.
I used the Hipsher IIP VOR as a navigation point to keep me clear of the restricted areas around Camp Guernsey and to keep me clear of the mountains just west of me. It was a relief to turn that final corner and head west into the valley right at Casper.
We used Atlantic FBO on the field and got a ride to the hotel for the night. The folks at the FBO were really nice. Wife and I had a fantastic glass of lemonade, which really quenched our thirst after so many hours of flying. The hotel send a shuttle to pick us us and take us back. Fuel was reasonably priced, but I only took on the minimum as we are now in some really high Density altitude areas. Weight is really king out here.
Day 4
This morning we departed Casper as early as we could and then flew north west again along the river up to Grey Bull Wyoming. As you can see in the video below the density altitude, even early in the morning, is very high. We rolled a very long time before gaining enough speed to lift off the runway. Fortunately the runway at Casper is 7000 feet long and afforded us plenty of time.
Flying to Grey Bull was really easy. The route was even simpler. Just go west to the entrance to the valley then turn north and follow the river up to the airport.
The airport was visible from a really long way off as it sat right at the top of the valley on the entrance to the river.
Piper Comanche Approach and landing Grey Bull WY
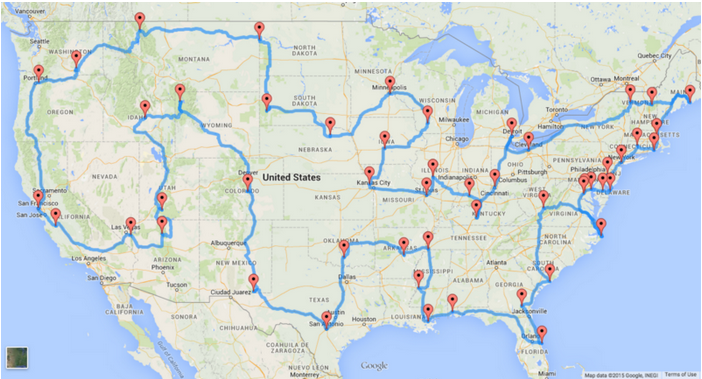
I am sure that many of you have seen this article about the Perfect US Road Trip. I really enjoyed the article and recommend giving it a read. Lots of great suggestions for places to visit and things to see.
The Perfect US Road Trip
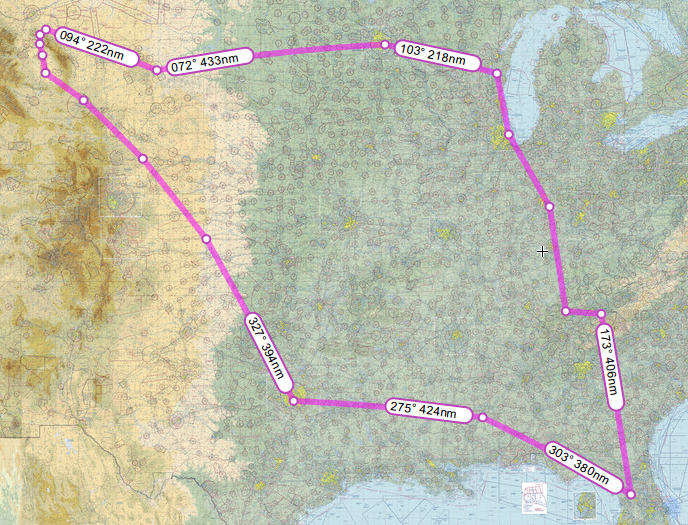
After reading it, I got an idea. What if I did this same trip in my airplane? I pulled up the road map provided in the article and starting matching it up to airports using the SkyVector website. Lo and behold, nearly every place mentioned has an airport nearby. In some cases right next to the site. I created a flight route that nearly mimics all the locations provided in the perfect trip and to be honest it looks quite possible. Maybe a few adjustments for getting over mountains and around some restricted areas but, otherwise very possible.
I used airnav.com to help me find airports close to the sites. When selecting airports I tried to go with local or municipal airports that had FBOs that could get a rental car or at least provide a courtesy ride to a local hotel. In nearly every case fuel and hotels were available within a short drive, if an overnight stay was needed. Mind you, not every place had a five star hotel with every amenity, but most had inexpensive motels within a short distance. I did not really focus on finding the least expensive fuel, just that the airport had fuel available or a close by airport had fuel. I am sure a thrifty pilot could use airnav.com to check local fuel prices and adjust the route to save a buck or two on fuel.
Could this route be optimized to be more direct? Yes it can. The goal here was to match the road trip as close as possible. That way even if you don’t land in every state you at least get to fly over and see them from the air. Another benefit is that you can fly over all those commuters on the highways below, open your window and shout at them “Where is your plane, peasants!”.
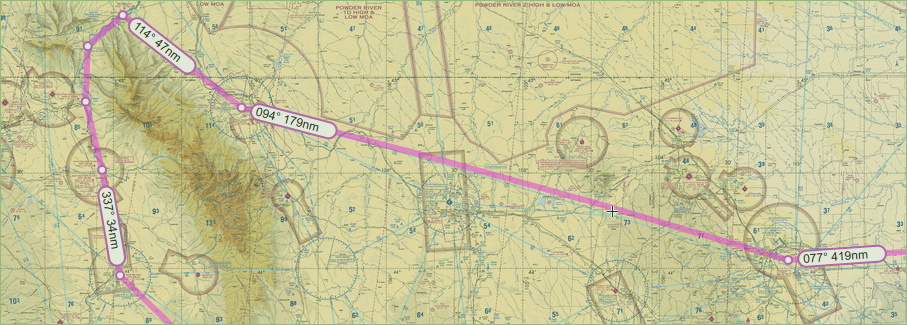
Perfect US Flying Trip
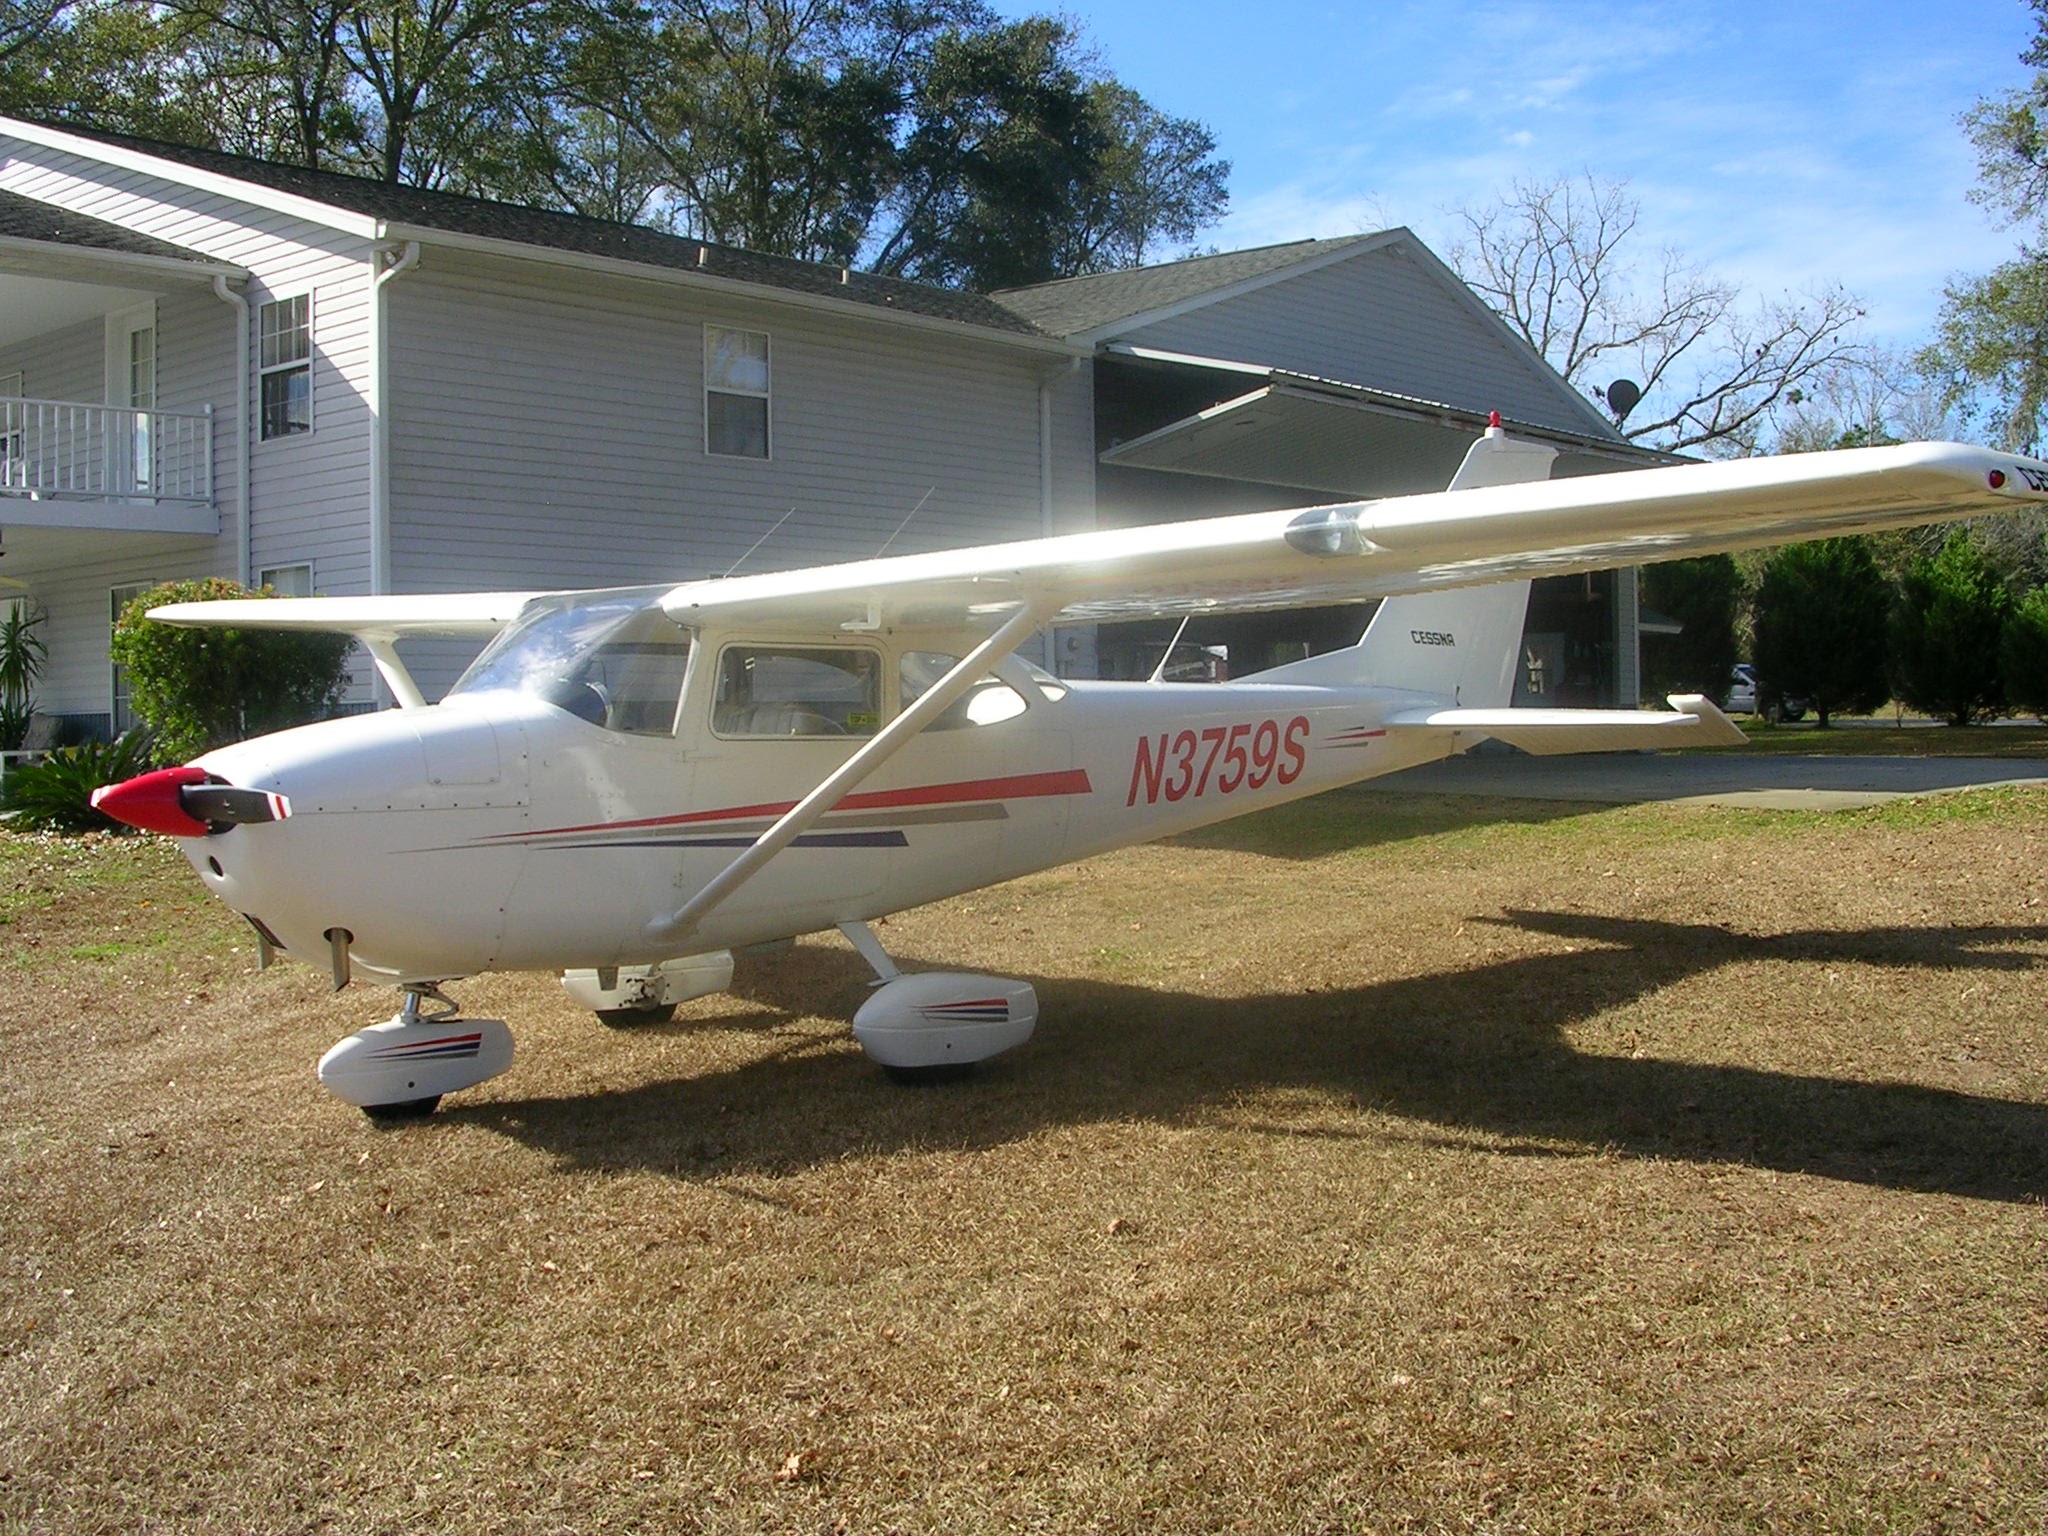
Rudy the Red-Nosed Cessna 172
As this is supposed to be a sight seeing trip I chose to plan for flying my 1964 Cessna 172E. This will be a low and slow flight focusing on maximum visual enjoyment. This plane consumes about 6-8 g.p.h and goes about 105 knots (or 120 mph) on a calm wind day. The trip would cover 9673 nm, take 91.5 hours of flying time and consume at least 778.3 gallons of fuel. Some of the legs would be right at the maximum range with safety, and to be honest I’m not sure my backside or bladder could make it that far without an interim stop. On some of the legs slight left or right deviation would be advisable to avoid those pesky tall mountains, but none of it is impossible.
Sunny Side Up the World’s greatest Piper Comanche 180
If I did this trip in my Piper Comanche, slightly different numbers. 80.5 flight hours and 804 gallons of fuel. For sure I would be more comfortable, I could fly further and get there quicker. However I think the point is to take it all in, so low and slow would be optimal so a simpler craft would be best.
The cost for this trip by aircraft will be a bit higher than driving. The biggest expense will be fuel. Based on the regional prices of Aviation Gas 100LL from the www.100ll.com website the average price for a gallon of fuel in the US right now is $5.09 per gallon. Therefore 778.3 gallons of fuel would run about $3692 in fuel. Most FBOs will waive overnight parking fees with a fuel purchase so that is a money saver. My 172 has a MoGas STC, which means I can burn unleaded car gas that does not contain ethanol, so I might even save a few more dollars.
Another expense will be an oil change. With just under 100 hours of flying time at least one oil change will need to be done. A shop might charge an hour of labor and the cost of the filter and oil. Probably best to budget $200 for that activity at about the half way point of the trip. Perhaps this oil and filter could be prepositioned for the half way point of the trip. If you are your own mechanic then lucky you! You can change the oil on your own.
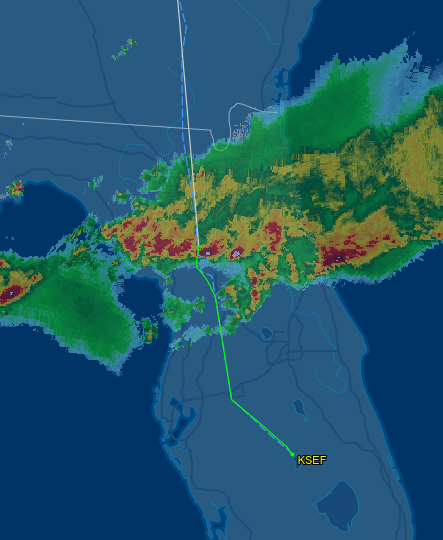
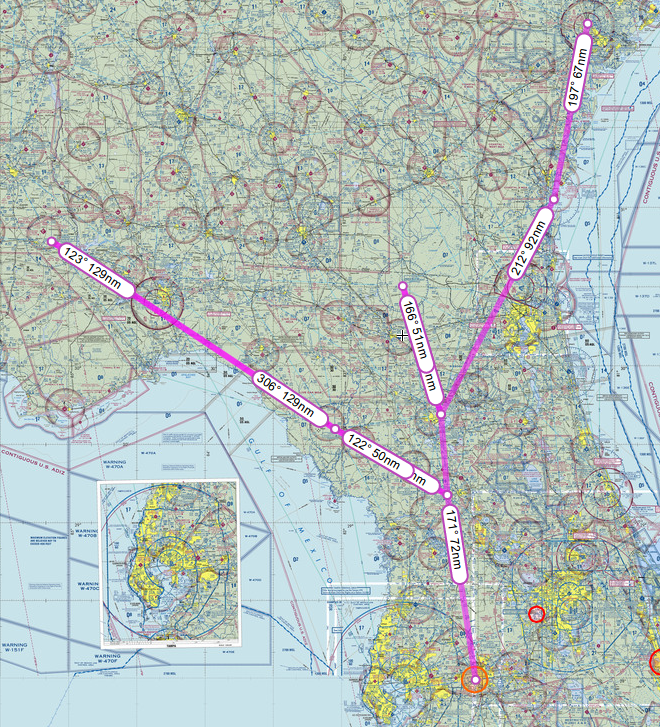
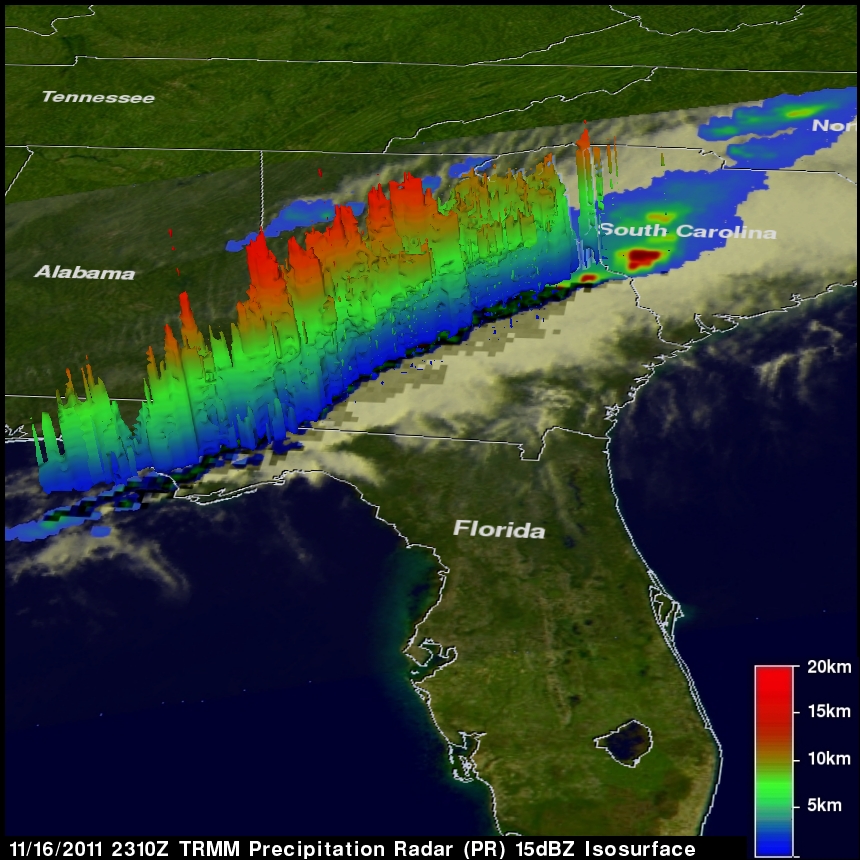
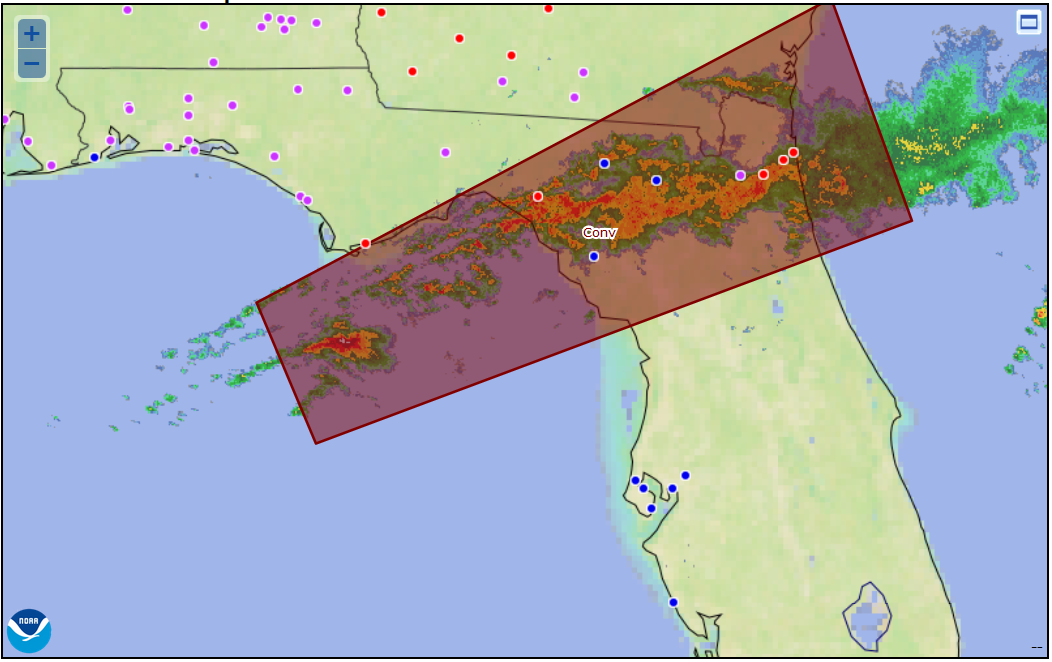
On April 4th of 2017 I was flying south from Ocala to Sarasota on an IFR plan with a buddy of mine to pick up some supplies. Going south the ride was bumpy and overcast at about 4000 feet and we bounced along in and out of the clouds. To the north was a storm system several miles across covering all of Florida; It was enormous and powerful. One might even call it a squall line, which is a line of powerful high winds and storms traveling in the same direction at a rapid pace. The on-board weather in my plane showed not only light (green) to moderate (yellow), but severe (red) to extreme (purple) precipitation. That cloud was tall and would contain some strong wind shear based on these color depictions.
N155CL Flight Path
I heard the pilot of N155CL talking to the Jacksonville Approach about the weather conditions. The pilot was asking about the storms ahead. The controller said that all she had was returns and could not see all the details. The pilot reported that he saw a hole and it thought it was clear. I knew exactly what he was doing. The pilot was attempting to penetrate the storm and find a hole between the storm cells.
This is very dangerous. As a Florida pilot I know how strong and deadly these storms can be. The tops of these storms can reach upward of 45,000 feet and can unleash a furious wind and rain storm with rain, hail and tornadoes. I hovered my finger over the push to talk button on the radio and debated making a quick radio transmission urging this pilot to turn around. I thought to myself that the pilot would be smart enough to see the extreme conditions and do so on his own. I talked myself out of saying something.
A few minutes later Jax replied with an altitude alert for N155CL. Then a contact/transponder signal lost call from Jax came a few minutes later. I turned to my buddy and said “That is not good, he just crashed”. We stared at each other in disbelief. I took a moment to write down the tail number and follow up once I got home.
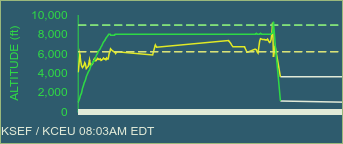
N155CL Airspeed Altitude
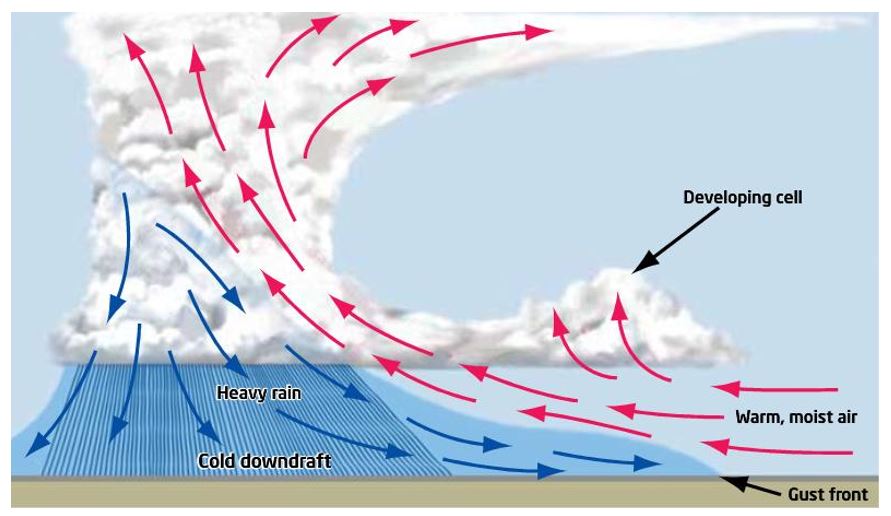
Looking at the flight data it seems that N155CL attempted to penetrate the storm in a flimsy little airplane. Looking at the altitude and airspeed plot his plane went from 8000 feet to almost 10,000 feet in less than a minute. That is 2000 feet per minute for the uninitiated. That is a really fast change of altitude, usually caused by sudden wind direction change. The pilot saw a clear hole because the wind was pushing upward at such a rate that the clouds were pushed out of the funnel. He entered an updraft of the building cumulonimbus storm and got thrown upward at an extreme rate of speed. This sudden updraft either damaged or completely ripped off the left wing of the plane.
Cumulonimbus Winds
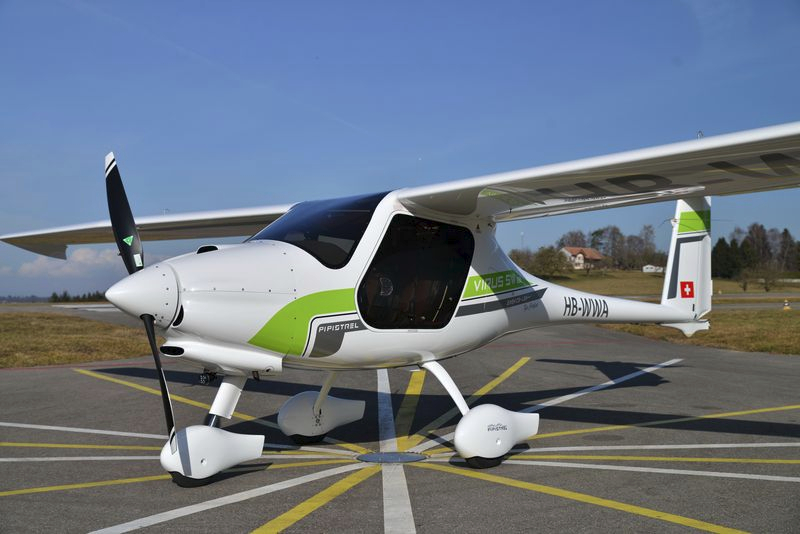
N155CL was a Pipstrel Virus SW. A small two-seat light sport aircraft with high wings. This aircraft was not designed for the extreme conditions the pilot encountered in that storm cloud. The instrumentation inside the plane would have included glass panels with weather and traffic that showed the conditions present in the storm ahead of the plane.
Pipistrel Virus SW
The pilot of this plane was not an amateur. According FAA records, the pilot held an airline transport pilot certificate with ratings for airplane single-engine land, multi-engine land, single engine sea and glider. His most recent FAA third-class medical certificate was issued October 28, 2013, at which time he reported 12,100 total hours of flight experience. A review of the pilot’s logbook revealed that he had accrued 92 total hours of flight experience in the accident airplane as of April 2, 2017. he knew better than to do what he did. I can only guess at what motivated such an experienced pilot to attempt such a risky flight.
This incident left me pondering why I did not say anything. I beat myself up mentally several times for keeping my mouth shut when a few second transmission on the radio could have changed the outcome. In the end I had to reconcile the facts. As the pilot in the left seat, I am responsible for knowing the weather conditions and the limitations of my aircraft. The pilot of N155CL was responsible for his own actions.
Many of you will be traveling soon to enjoy a week of plane fellowship at Lakeland Linder Regional airport for a popular event called Sun-N-Fun. I would like to offer some advice as a transplant who has tried to adapt to the unique experience that is flying in Florida.
First off use flight following. Get on with ATC as soon as you can and use it for your entire flight in. Expect that you might be dropped once you get 50 miles or so north of Lakeland as the traffic will be too tight for ATC to work you in. From this point on eyes outside and head on a swivel.
Getting Prepared
There are some essential items to bring on the trip. Bring plenty of sun screen SPF 30 or better and apply it several times throughout the day, or we will know you are a tourist by your bright red color and the glow you give off at night. Wear a hat with a brim, and maybe something to cover the back of your neck. Bring a rain poncho or pick one up at the AOPA or Jeppesen booth so you can stay dry during the sudden showers. Drink lots of water all day long. Our temperature and humidity are very high and you will get dehydrated rapidly while outside.
If you don’t have an adsb receiver and a tablet of some kind with compatible software this might be the time to get one. You can build a Stratux for about $120 and link it to an iPad or a Android pad for cheap. It is worth it for weather and traffic.
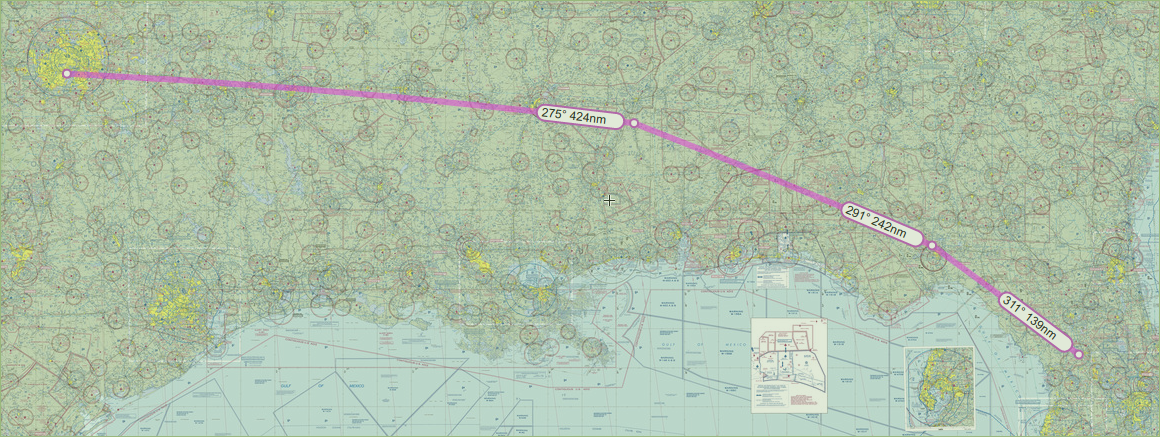
The Route
The air traffic is going to be a bit more busy than normal so I would like to offer some suggestions for flying towards the event. Coming from the west I would suggest using a route such as MAI->CTY->OCF->KLAL. If you are coming from the north I would suggest using a route such as TAY->GNV->OCF->KLAL. Coming from the north east I might suggest SAV->SSI->GNV->OCF->KLAL I do not recommend flying the east coast of Florida as there tends to be enormous amount of traffic and training along the east coast and ATC will be very busy. Also there are several restricted areas around Jacksonville which make can make for some extra challenges.
Flying the inland route has a couple of advantages. First it keeps you out of the Tampa and Orlando class bravo airspace. They are both going to be really busy already and the added stress of passing through either bravo airspace might make the trip more difficult than it needs to be. Second there are some good places to stop along the way here and take a break, get fuel or spend the night.
According to airnav.com Williston Municipal Airport X60 has the historically lowest price on 100LL fuel in the north central Florida area. and they also have a diner. If you are looking for an overnight stay, Ocala KOCF, has several hotels in the area and overnight parking is inexpensive.
About the Weather
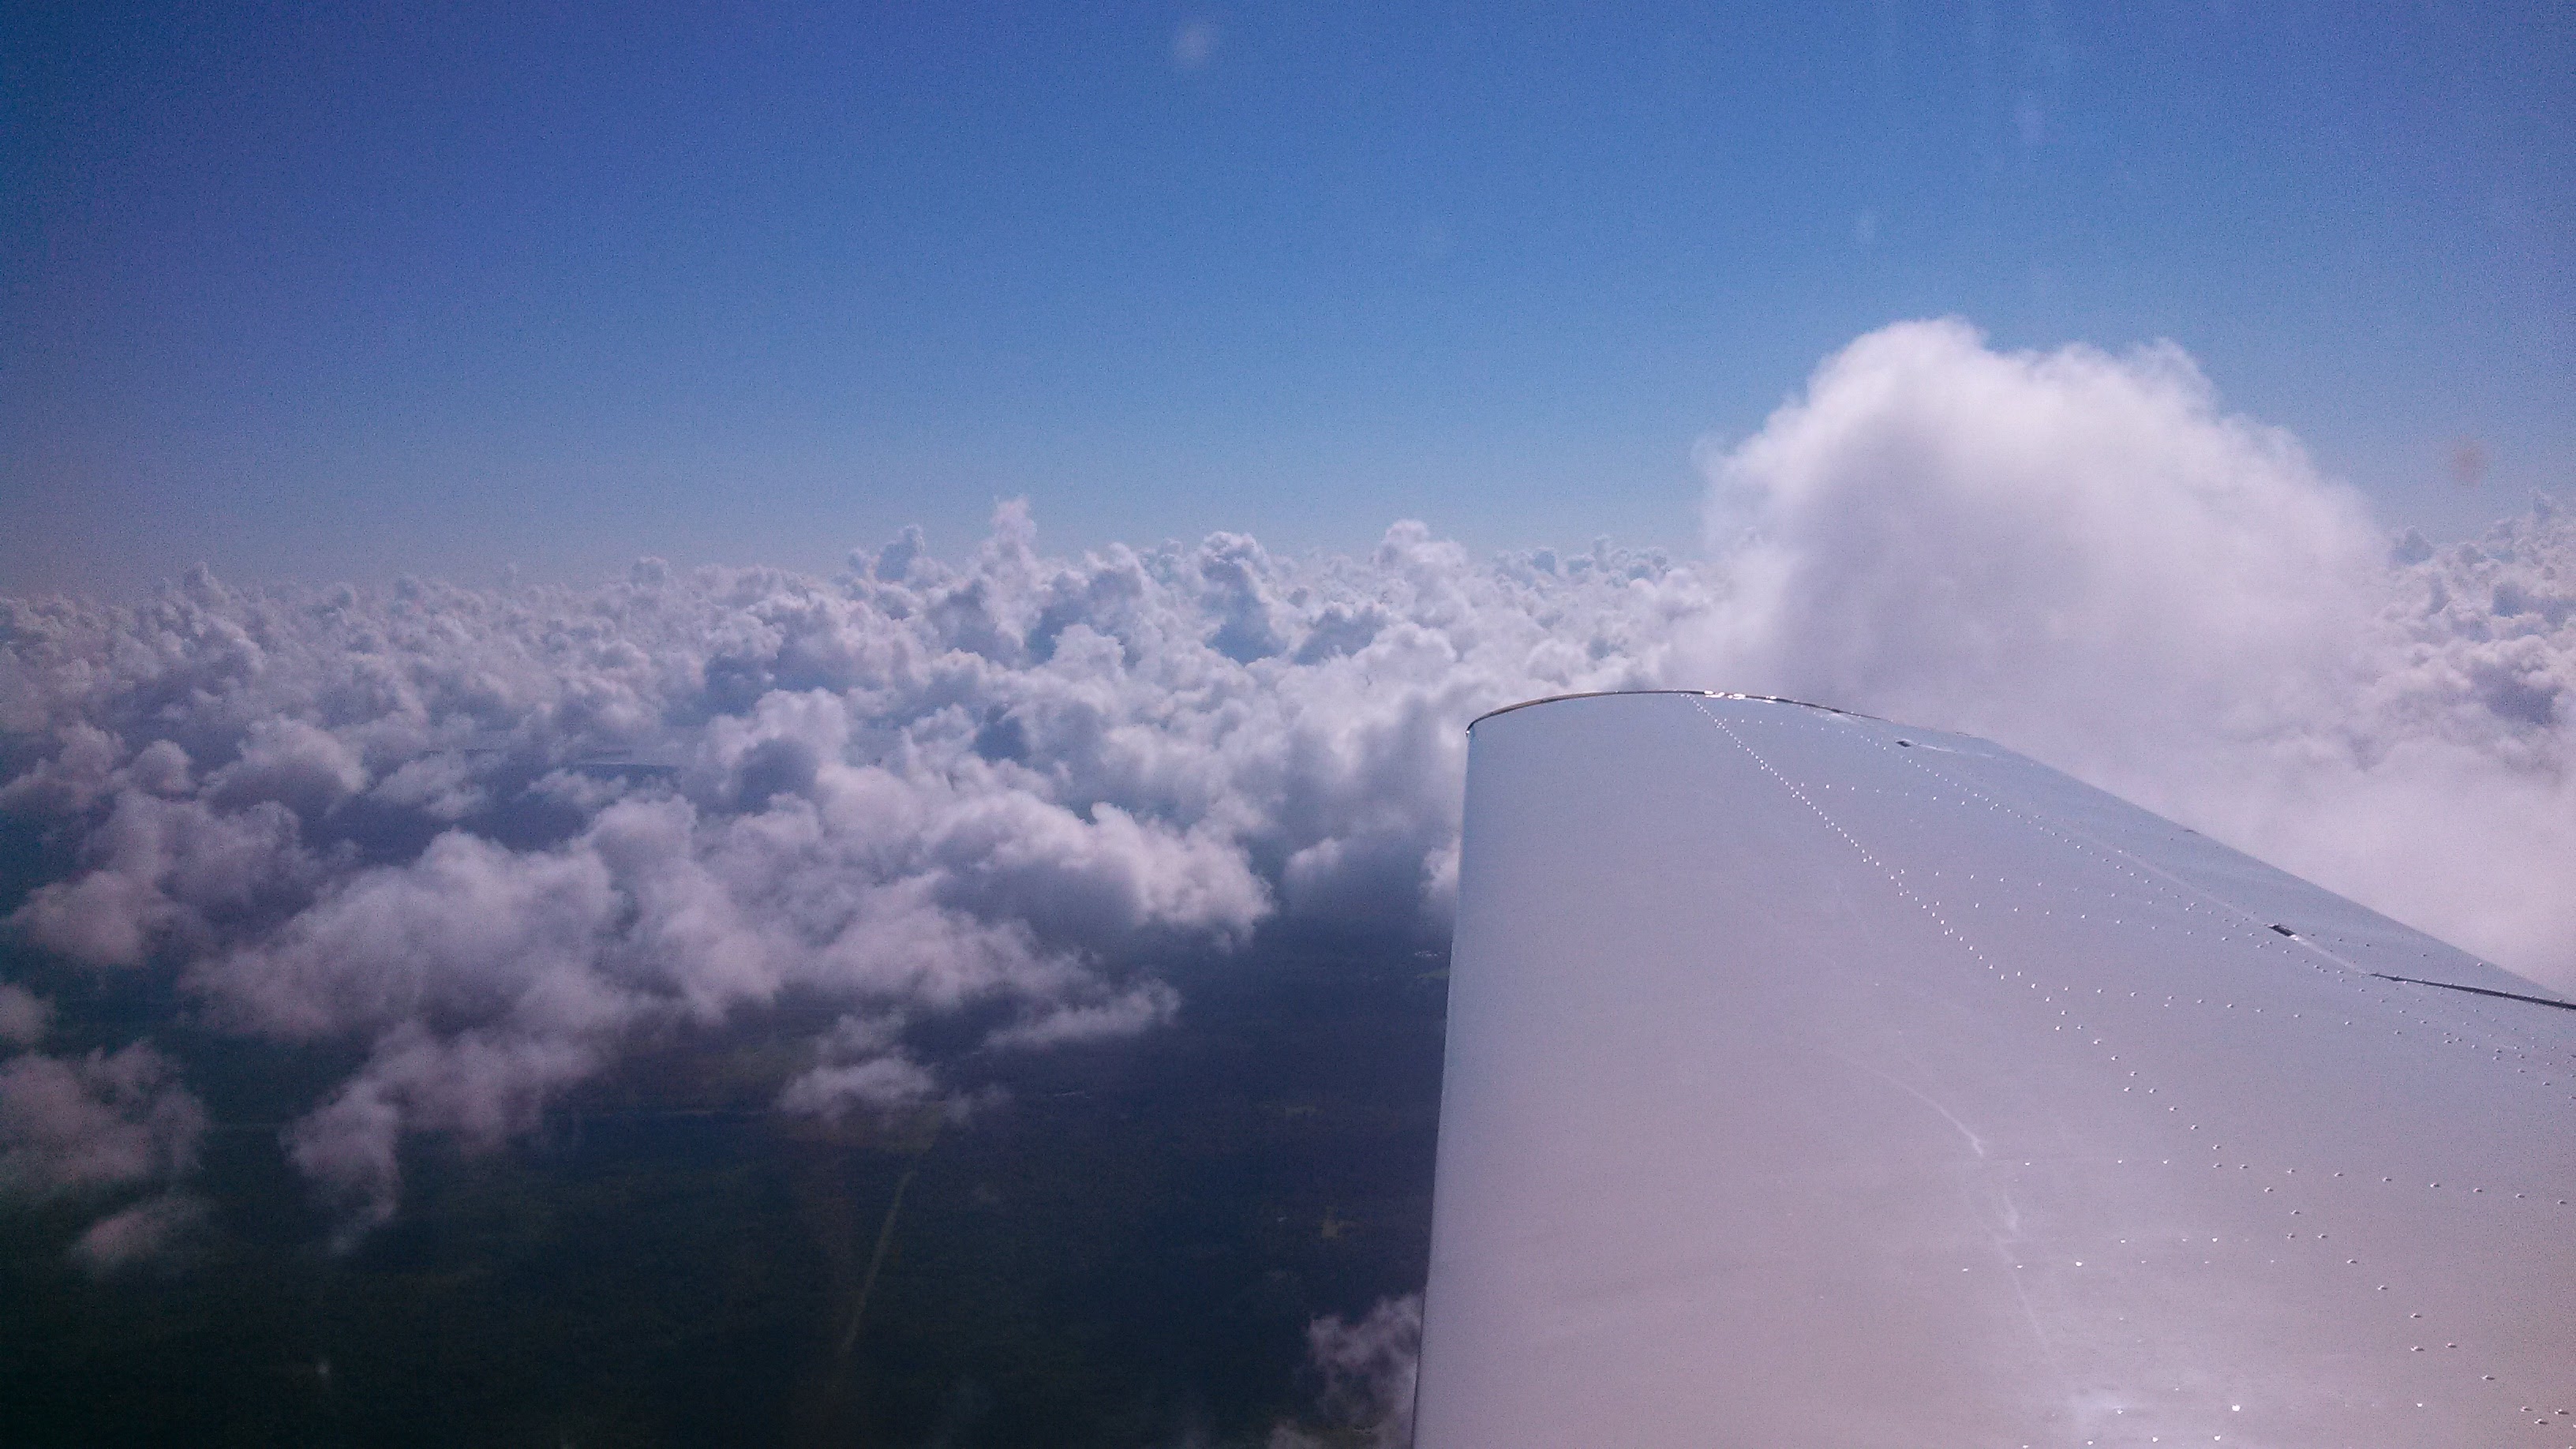
Clear Skies? So the weather forecast is going to say something like clear skies, sunny and warm. Usually that means a scattered layer of cumulus clouds somewhere between 3000 and 5000 feet. Even if it does not rain we have a lot of moisture in the air and these clouds show up pretty much every day. The ride will be bumpy below 5000 during the day and closer you are to this cloud layer the worse it will be.
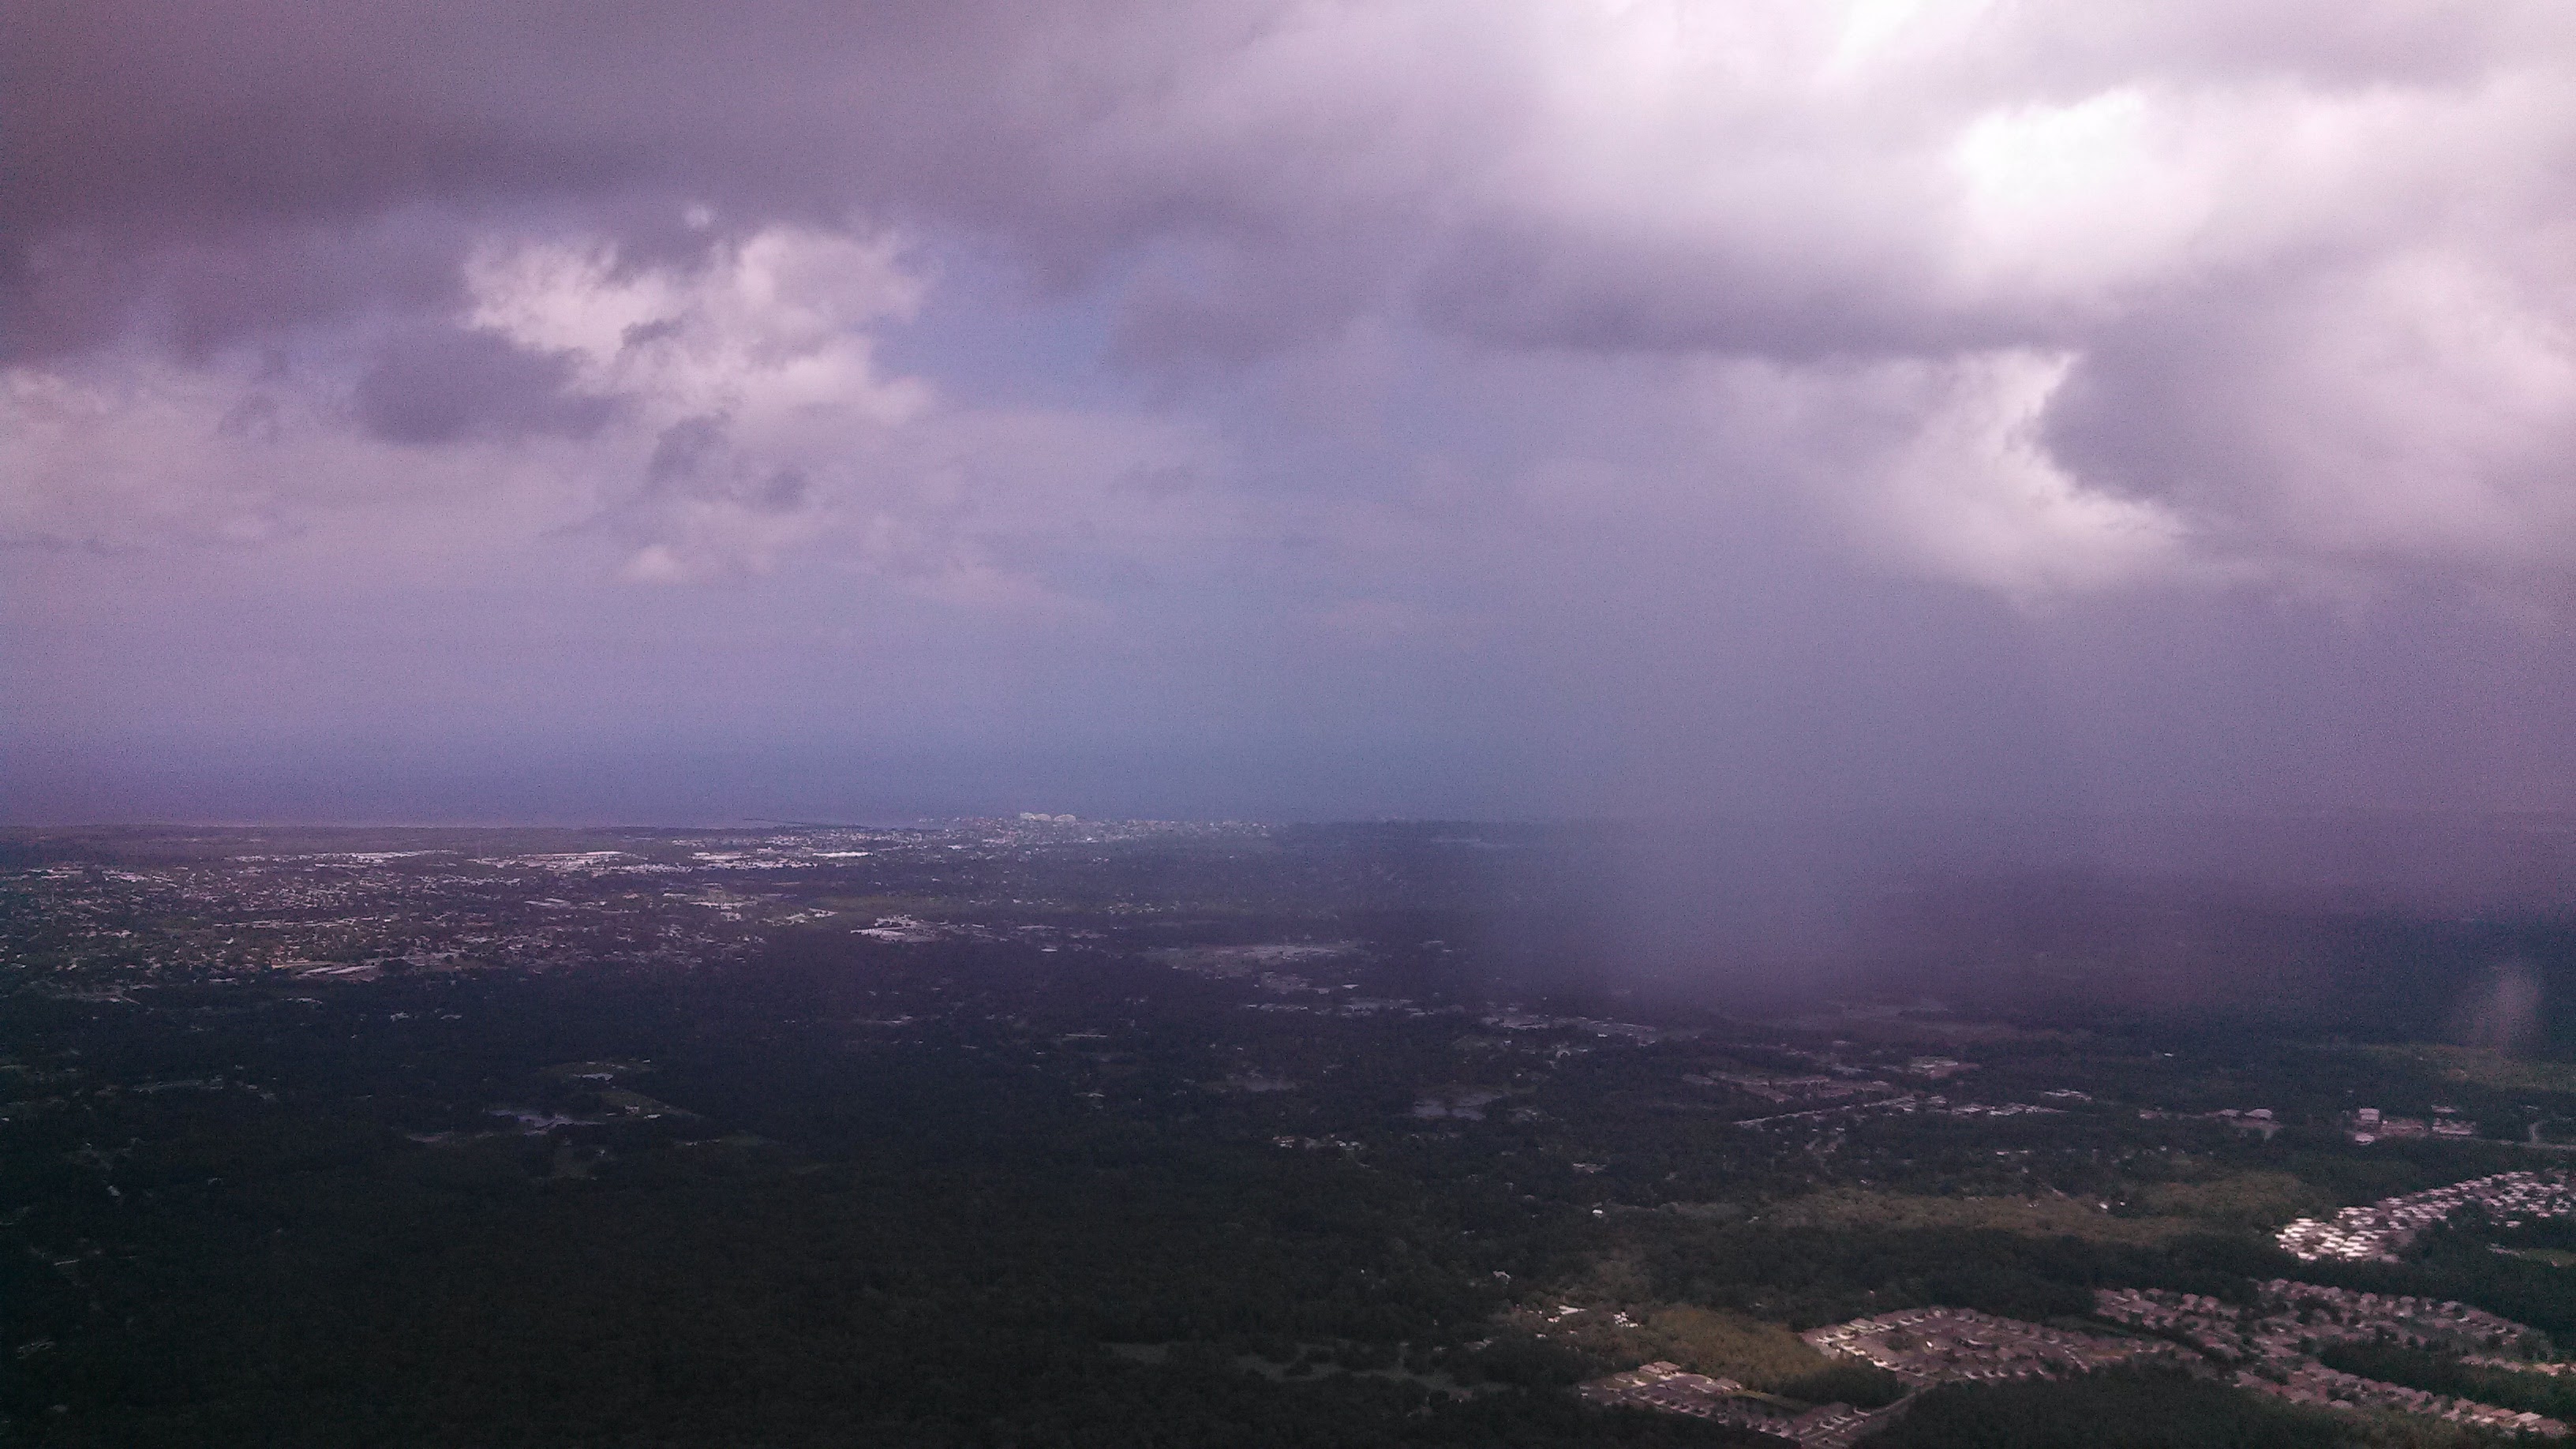
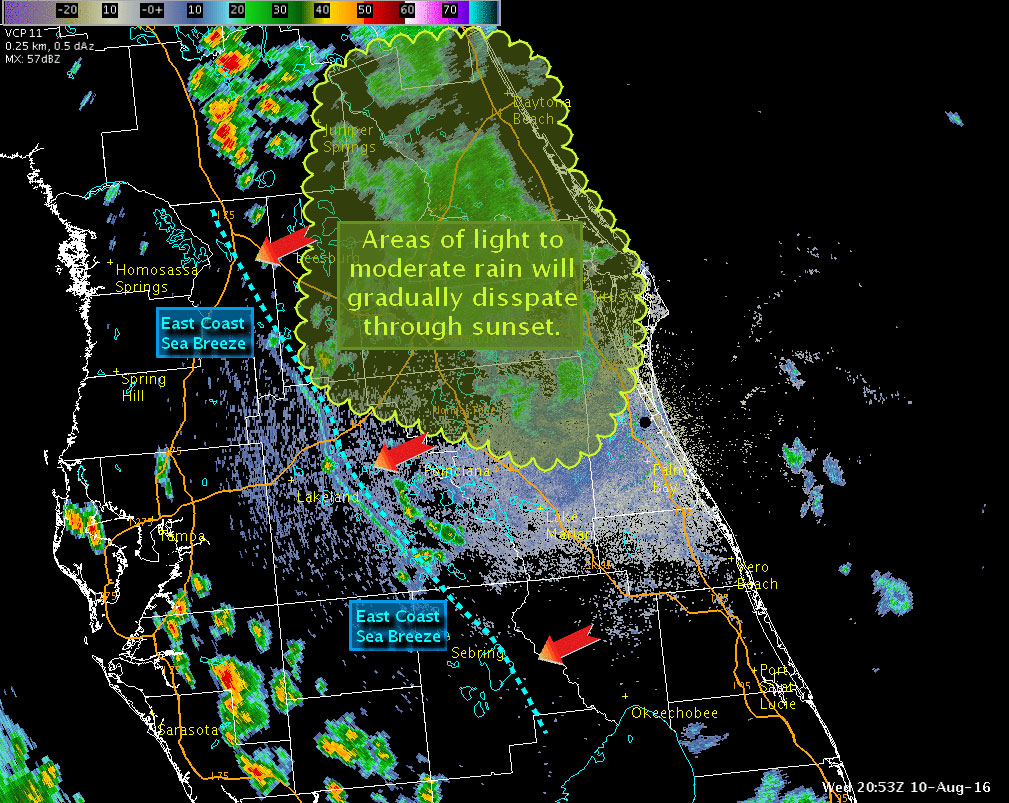
Afternoon Storms This wonderful aviation event usually marks the transition in Florida weather to the time when we start getting thunderstorms. This unique weather phenomenon tends to happen in the in afternoon in Florida. Now don’t get too worried as they tend to be localized and intense for a short time and then die out almost as rapidly as they form. They are not usually a line of storms, more on that in a minute, and instead tend to be isolated rain heads that can easily be avoided by flying around them. When you fly around a Florida storm, give it a wide berth. Stay well away from the falling rain as there is also a really strong downdraft right outside that rain head. A good tip I learned: If you cannot see through the rain, go around it.
This afternoon thunderstorm weather happens for a couple of reasons. I am going to possibly oversimplify but here goes. The wind starts in the morning coming out of the west gently blowing eastward and slowly bringing moist, warm air off the Gulf of Mexico. Then as the day progresses, sometime around 2pm, the winds shifts and starts coming from the east. The very hot easterly wind brings even more moisture from the Atlantic and pushes rapidly across the state like a mini storm front, plowing it’s way across and creating many small and intense thunderstorms, which die out after the sun sets.
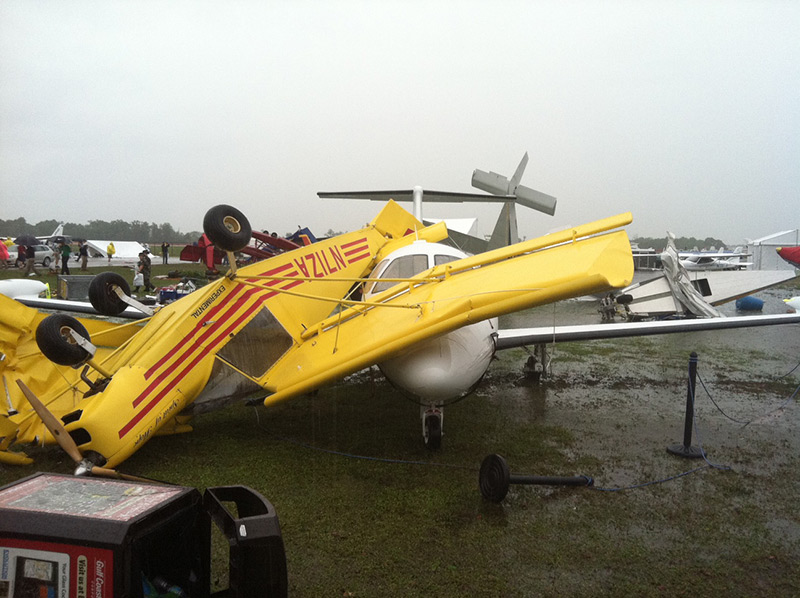
Bring Good Tie-Downs Bring really good tie-downs for your plane, not the cheap stake your dog out on the lawn kind. These intense, short-lived storms can pick up and throw your plane around. What a lousy way to lose your airplane to a thunderstorm at Sun-N-Fun. Many plane owners have lamented not securing their craft properly and having it flipped over onto another plane at this event. It happens so be prepared and don’t end up a statistic.
Fronts When flying into Florida, there are some locations that tend to form large lines of thunderstorms that can be very treacherous. The most common place is diagonally from Tallahassee , across the state of Georgia, to the edge of South Carolina. Sometimes it will be a bit south of that point, coming across Cross City to Jacksonville, but they very often form north and work their way south. Make sure you have a good eye on current weather when transitioning this space. Do not attempt to penetrate these storm lines unless you really know what you are doing. Conditions around these storms will easily rip off your wings.
Morning Fog Sometimes we get a low layer of clouds about two hundred feet above the ground that will cover whole sections of the state. The good news is that this layer will rise quickly or burn off. However, this does create low IFR conditions over large parts of the state so be prepared to wait it out somewhere a bit north until it is clear.
The Arrival
Read the NOTAM Flying into the event can be challenging for a first timer, but is relatively safe and rewarding. I cannot stress enough to read the NOTAM published for this event. You can find the NOTAM here. Early morning arrivals are better than later as the traffic tends to be less first thing in the morning. Best advice I can give is know the NOTAM, keep your eyes outside, relax and enjoy the ride.
Here is a great example of the approach and landing at Sun-n-Fun.
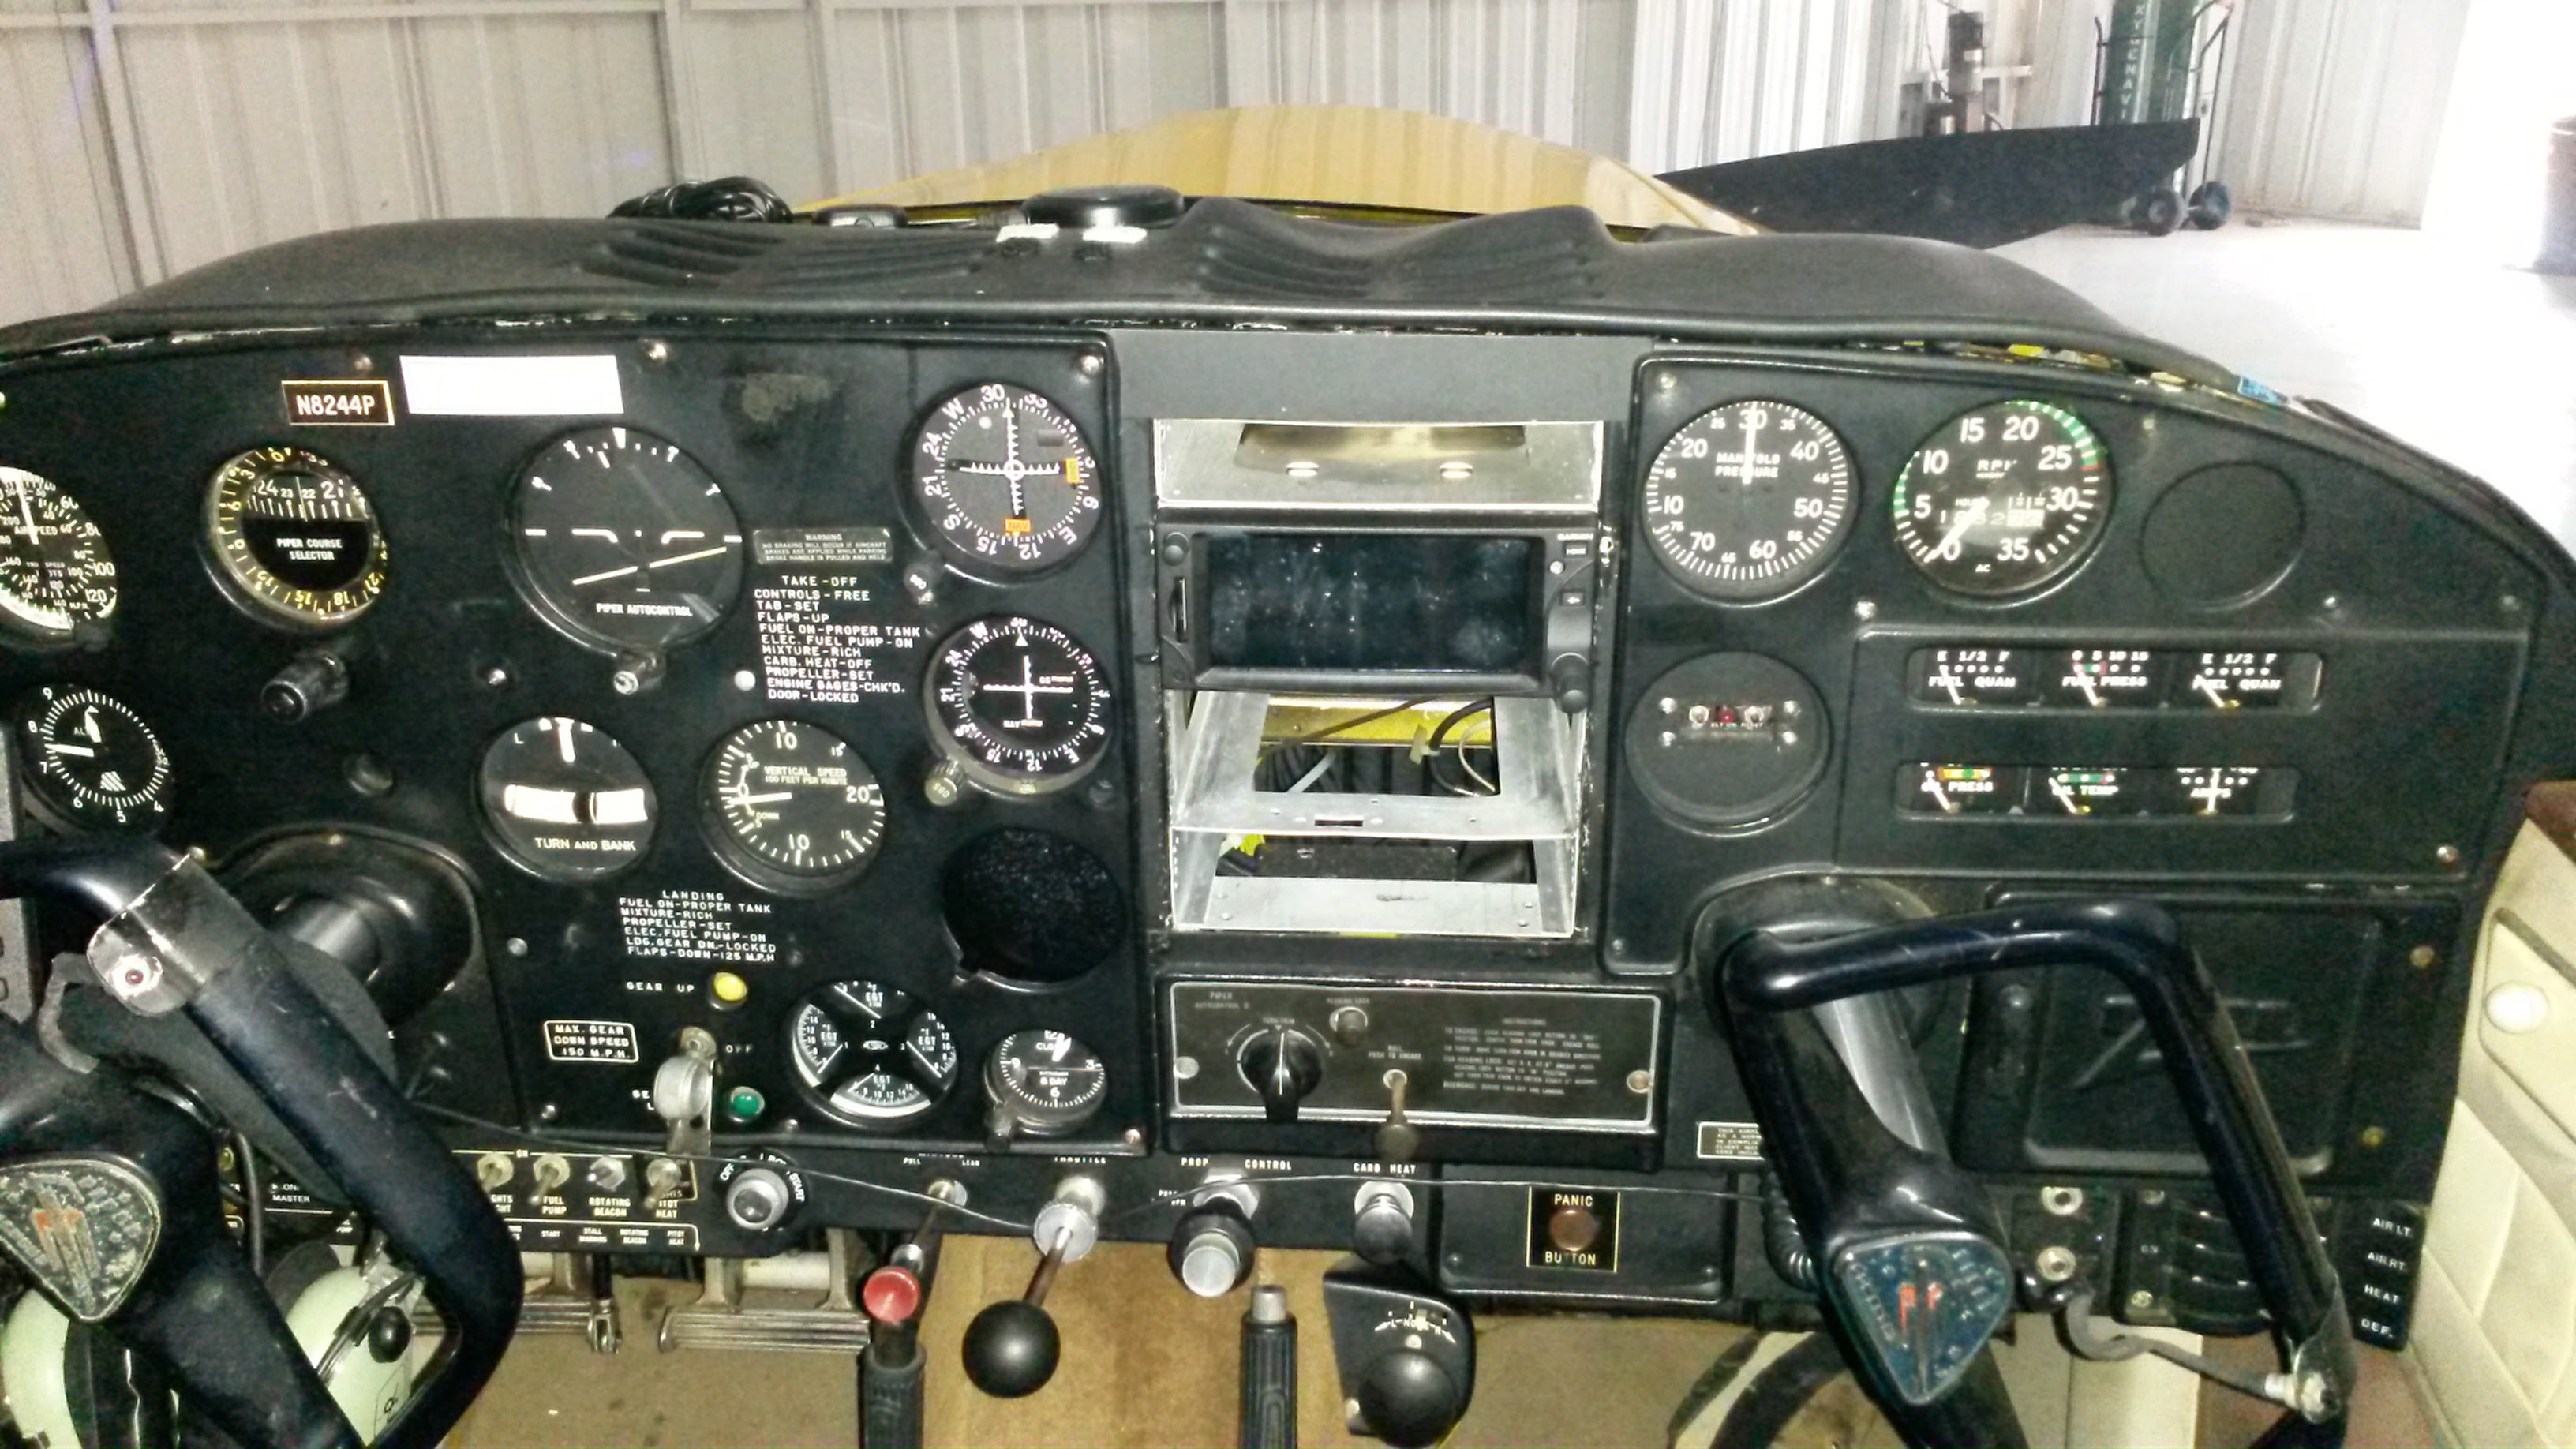
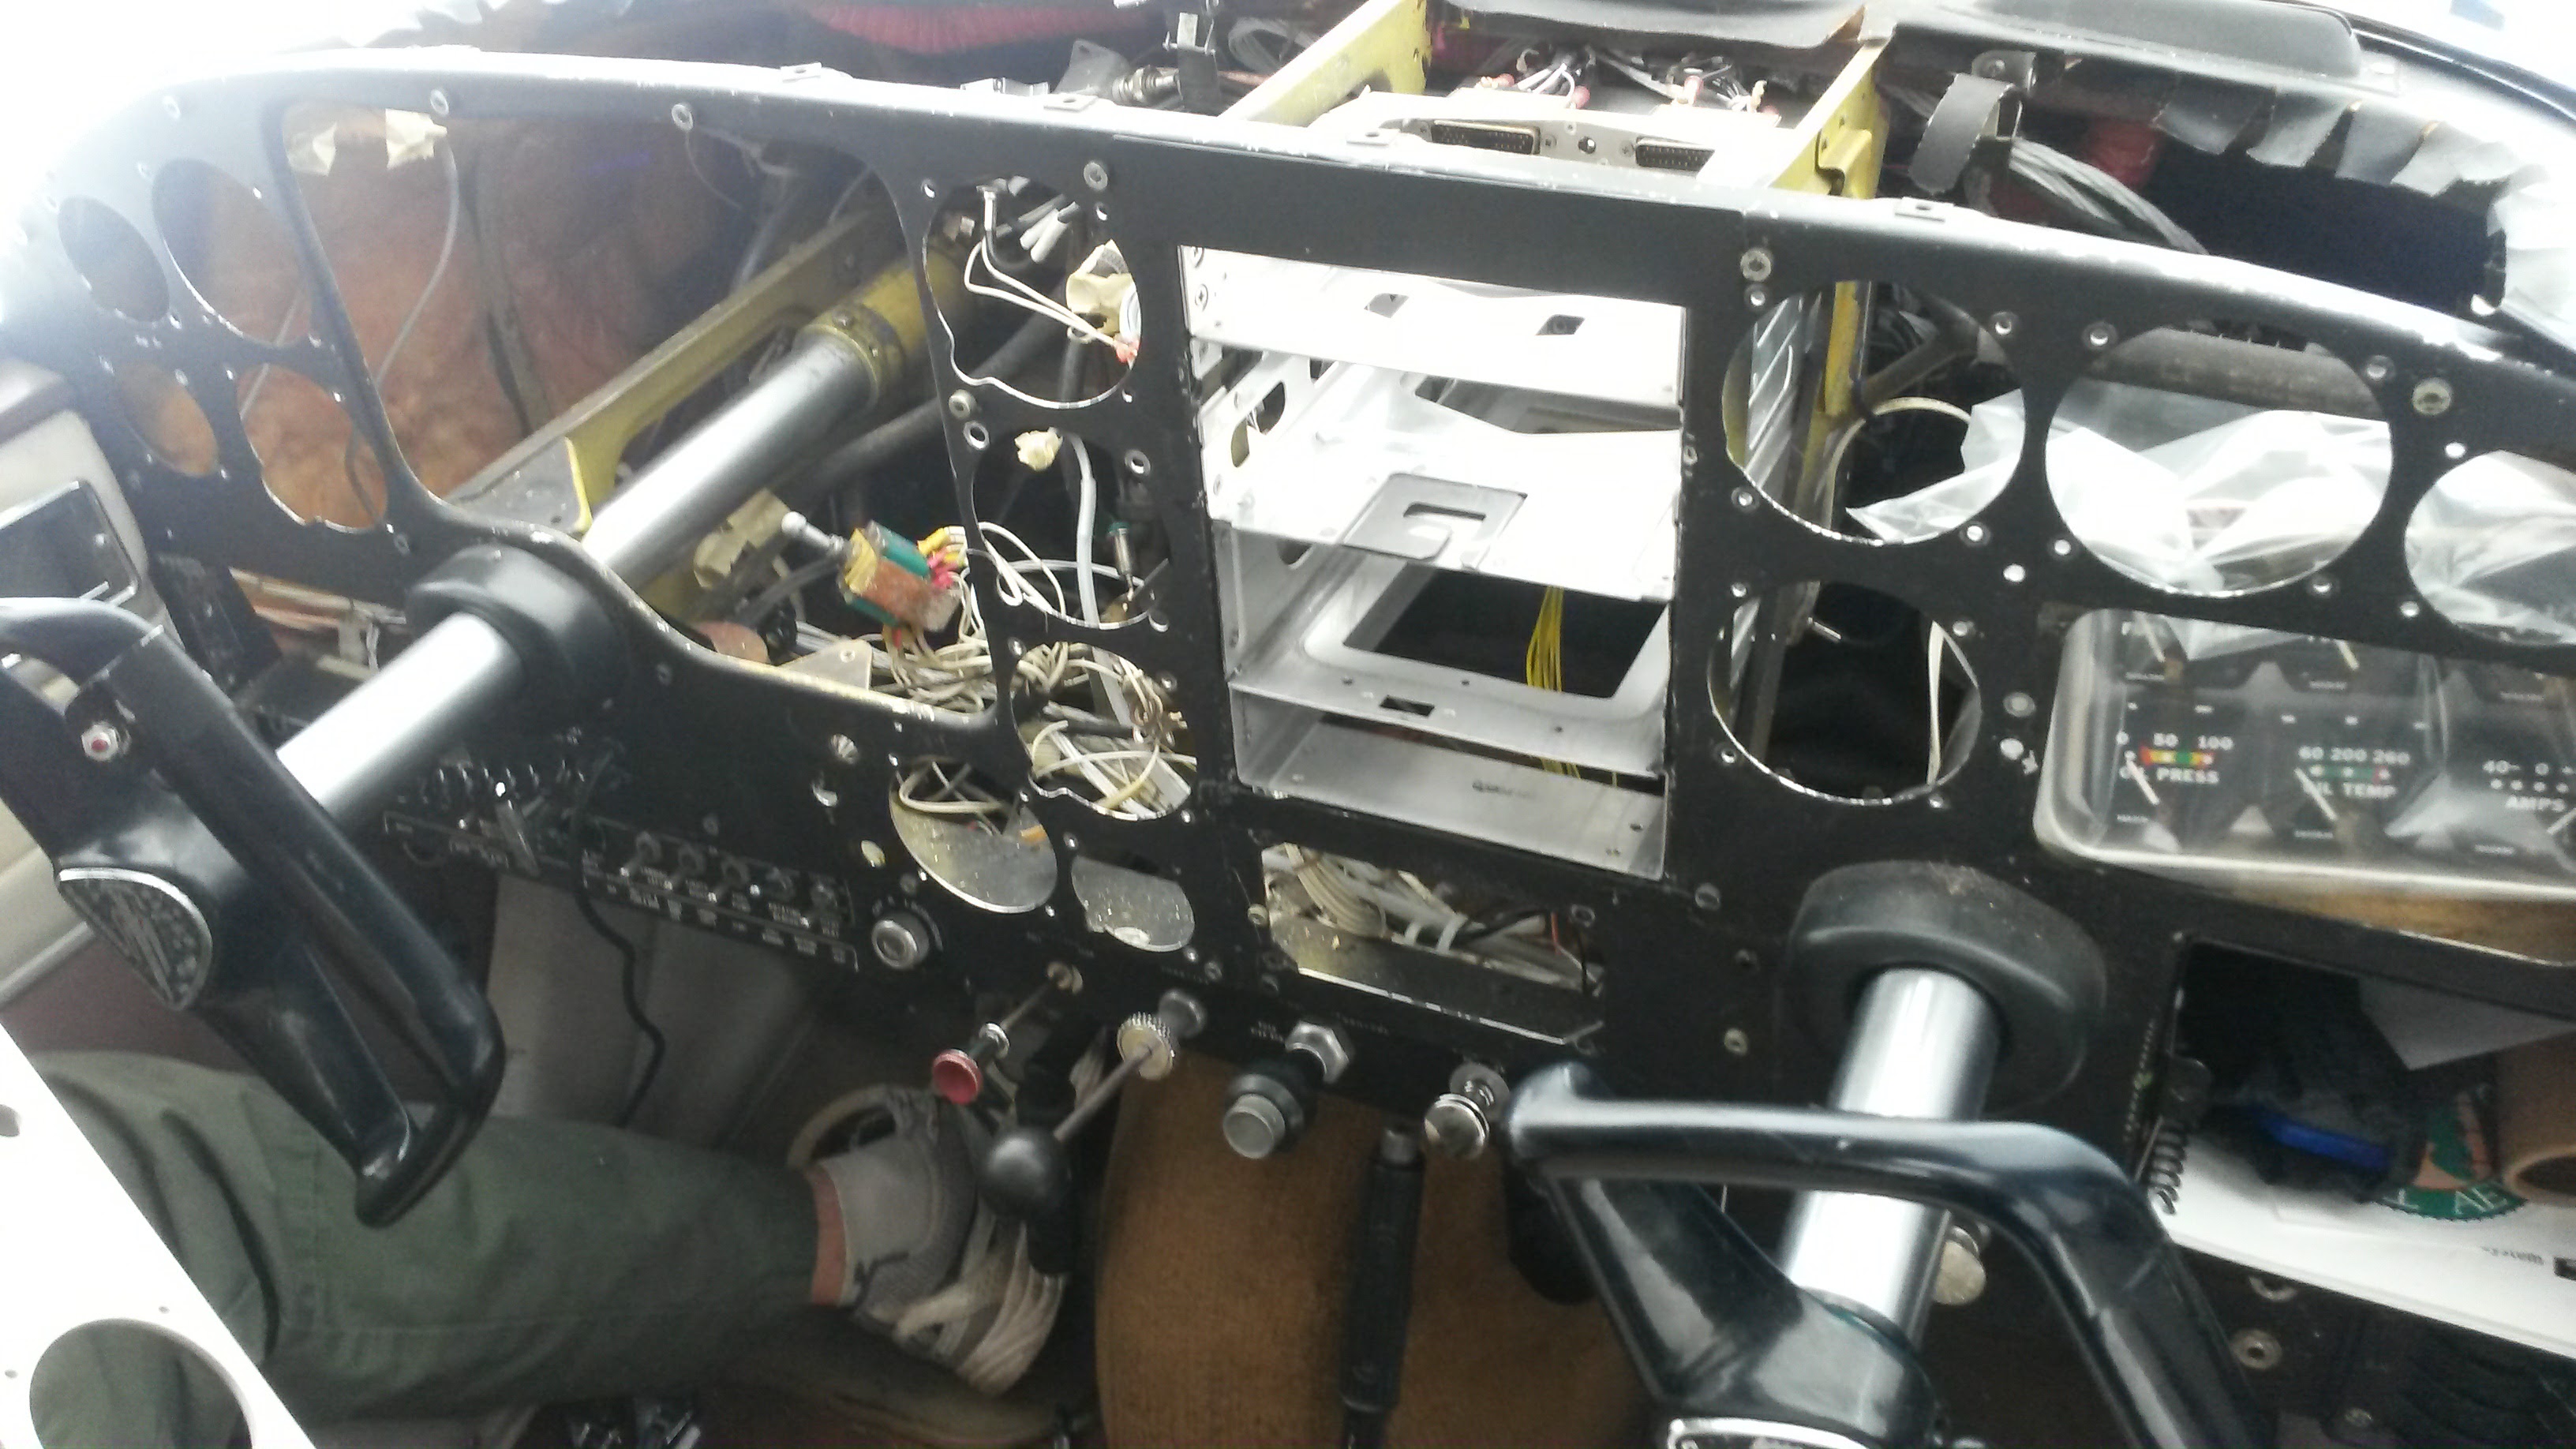
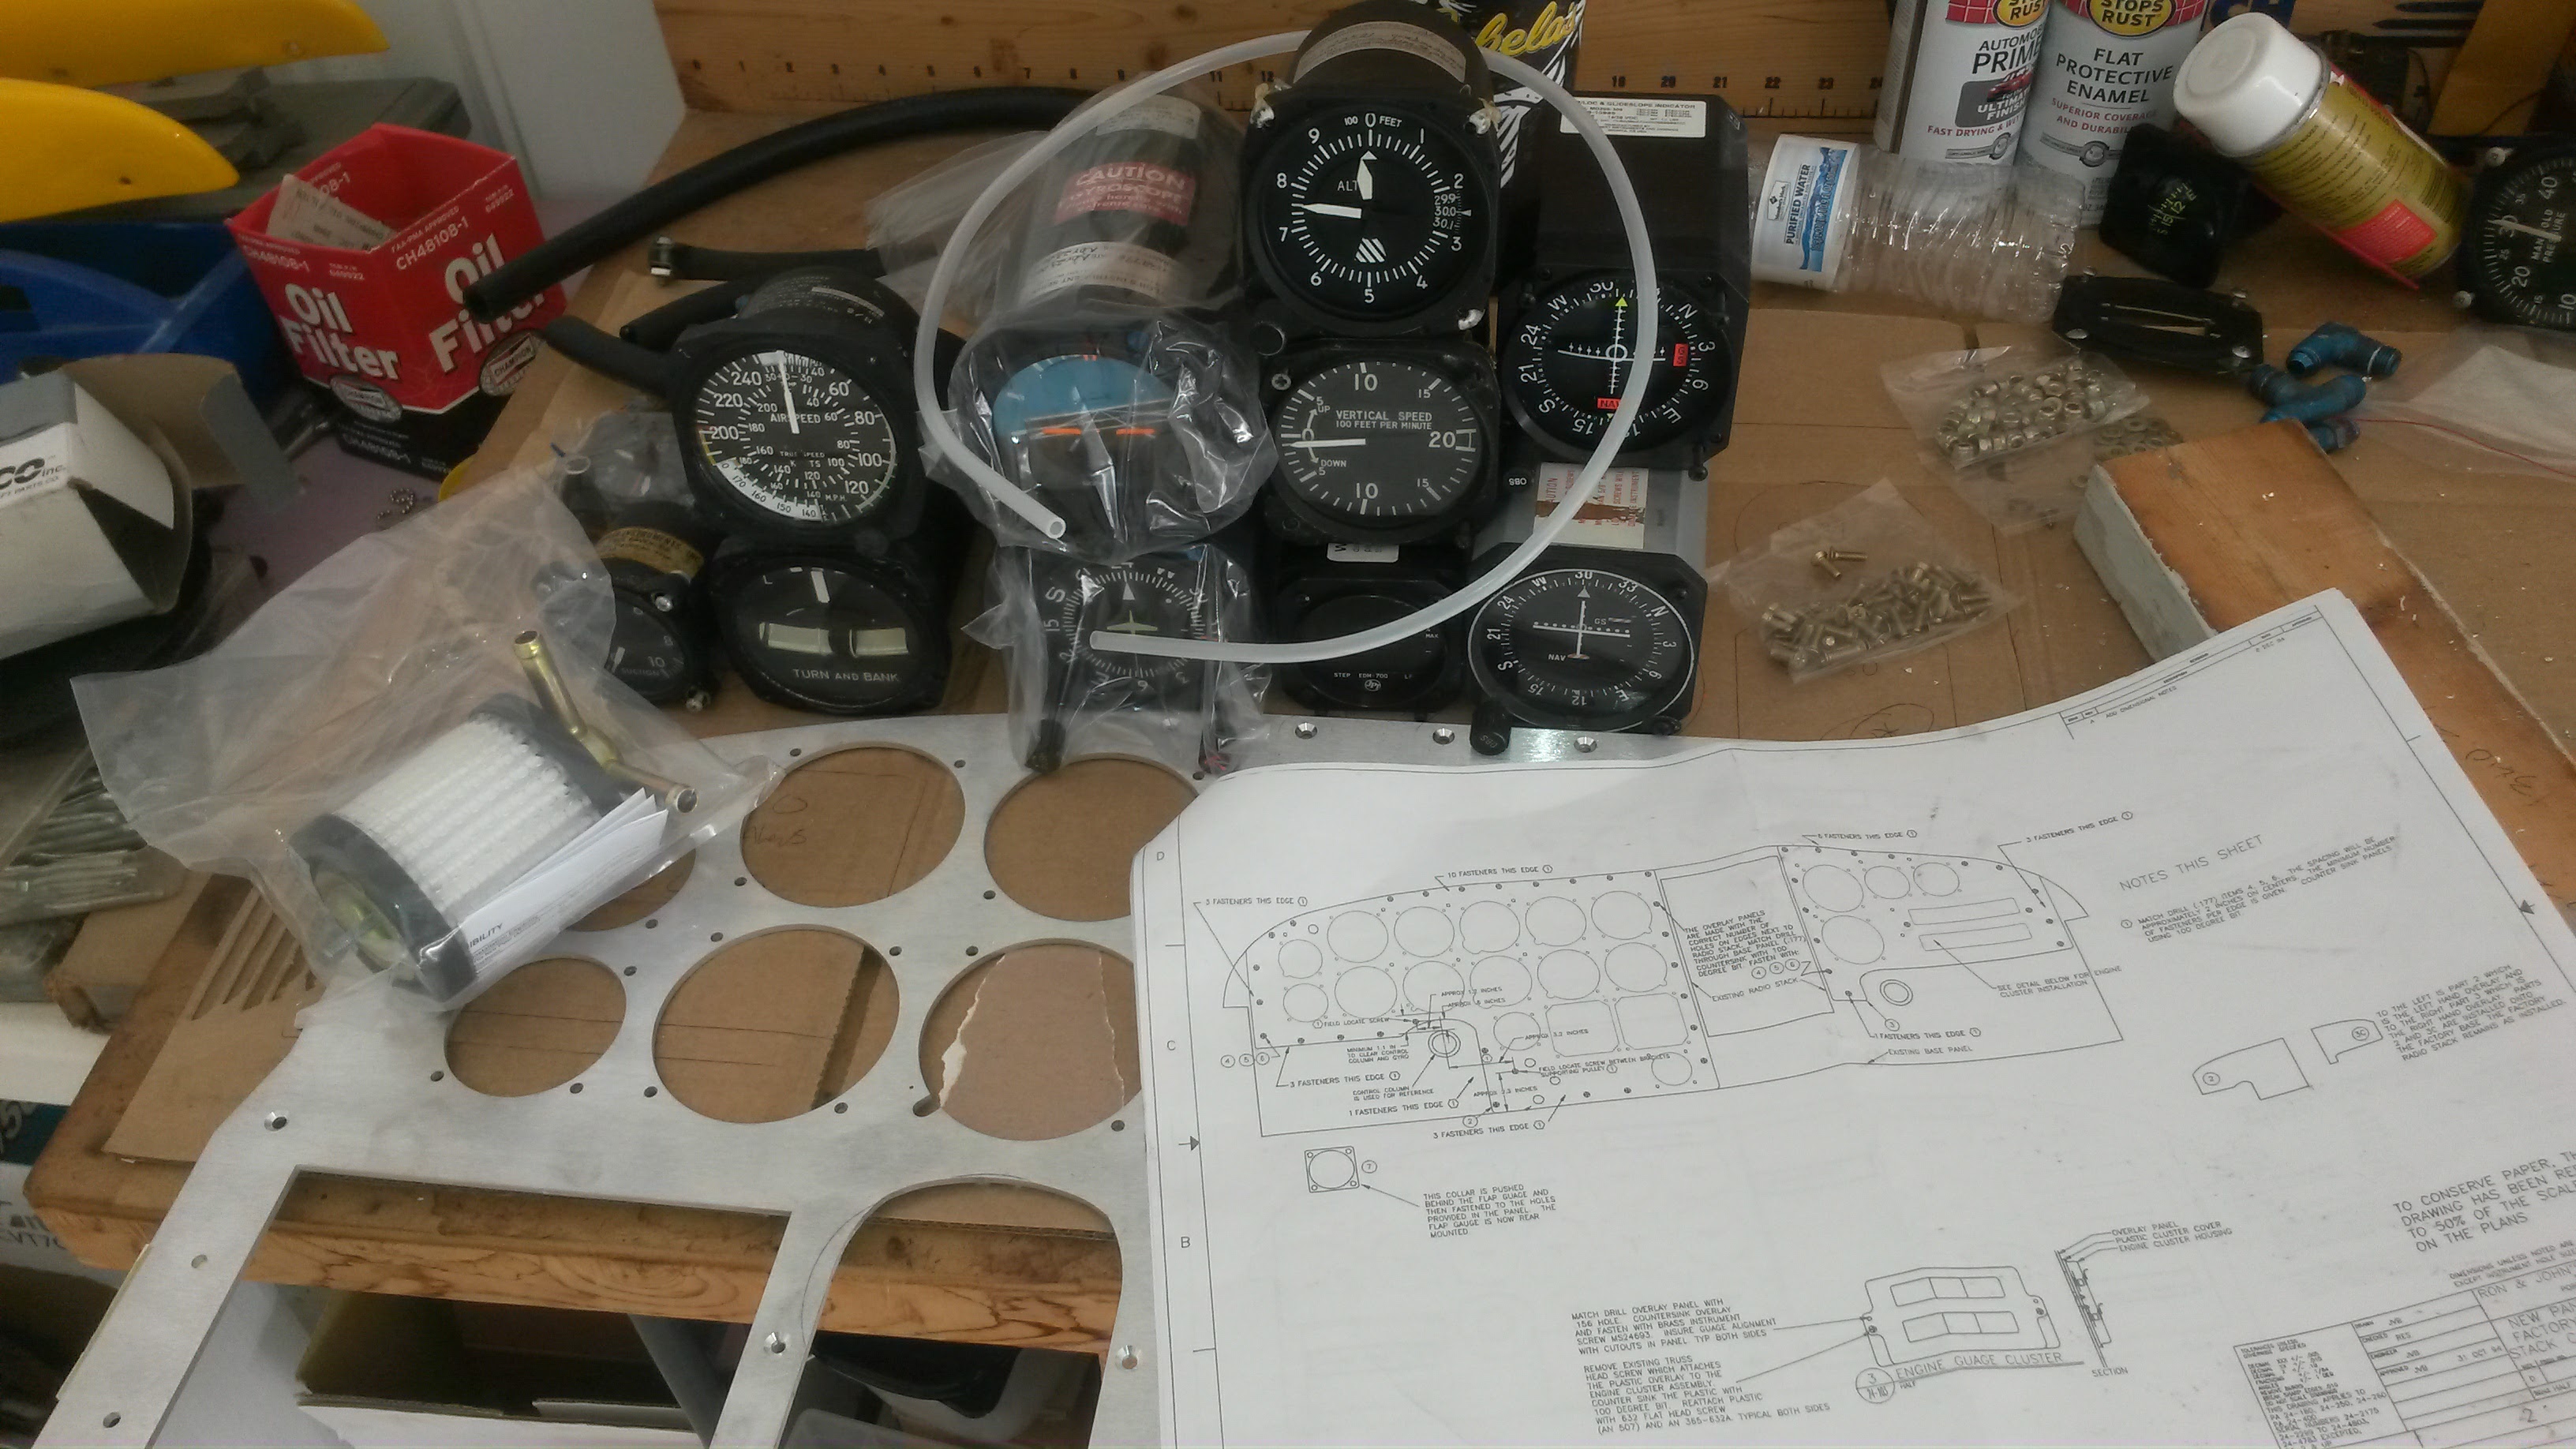
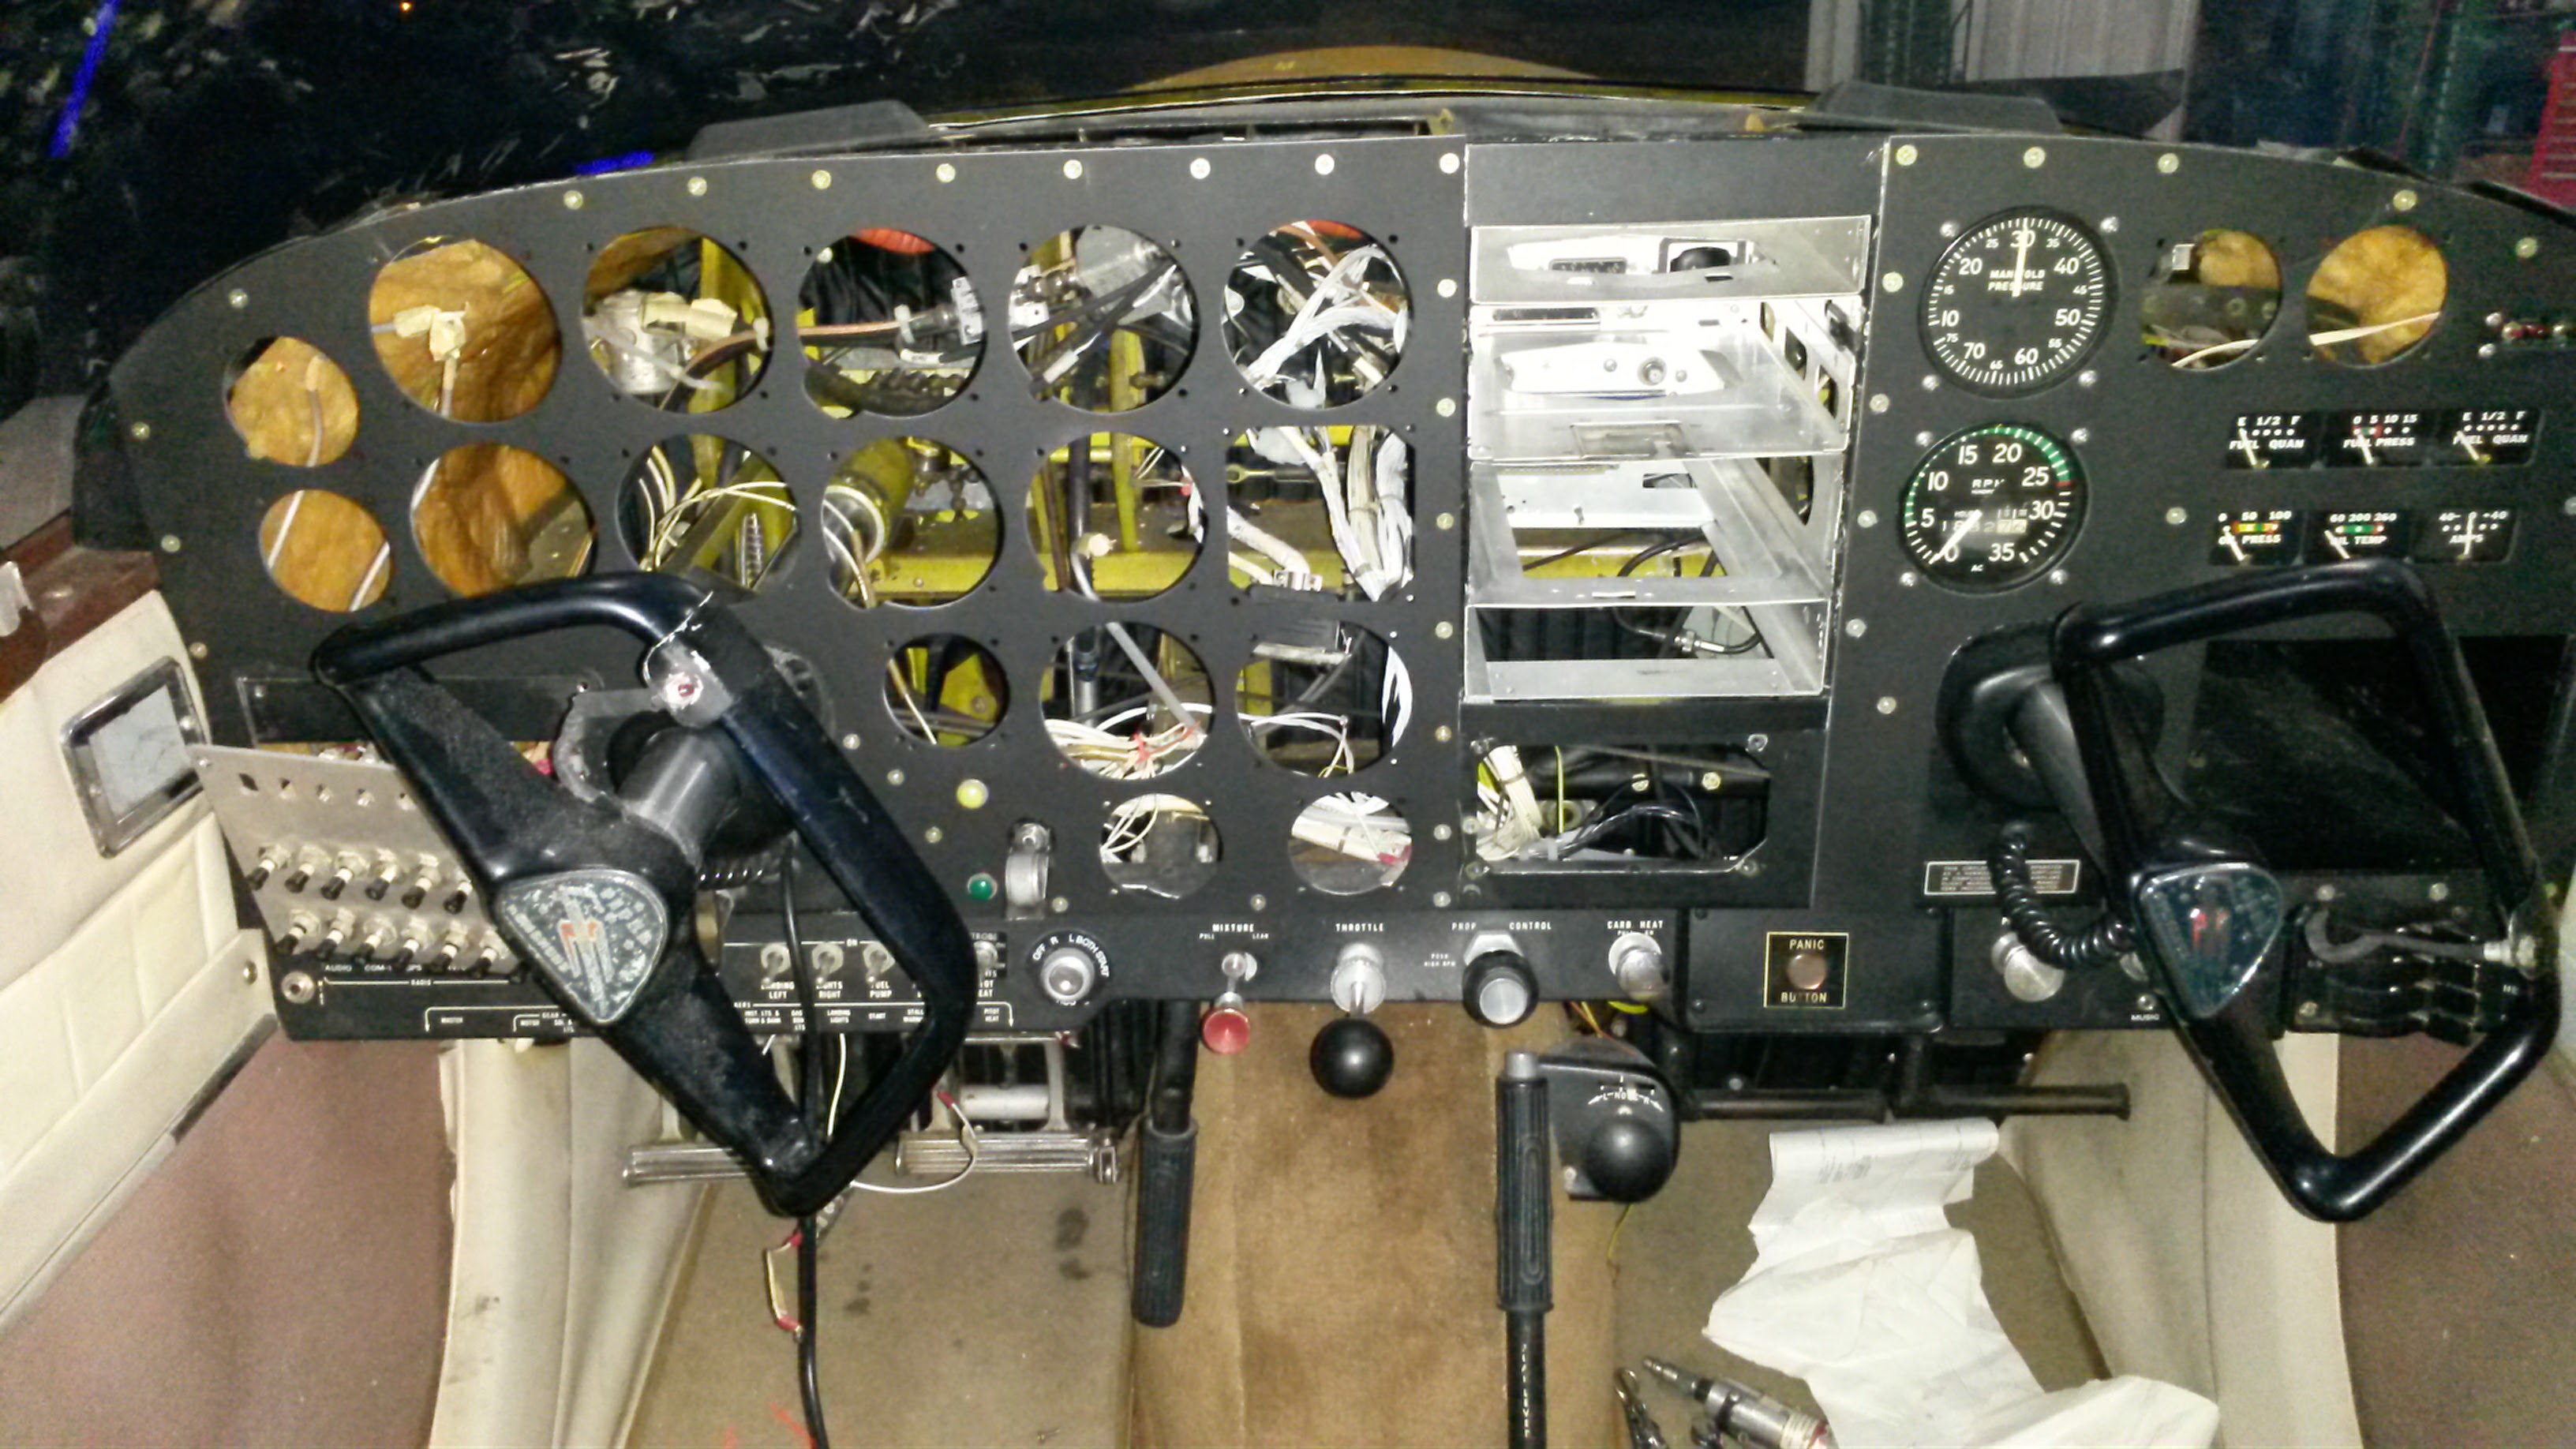
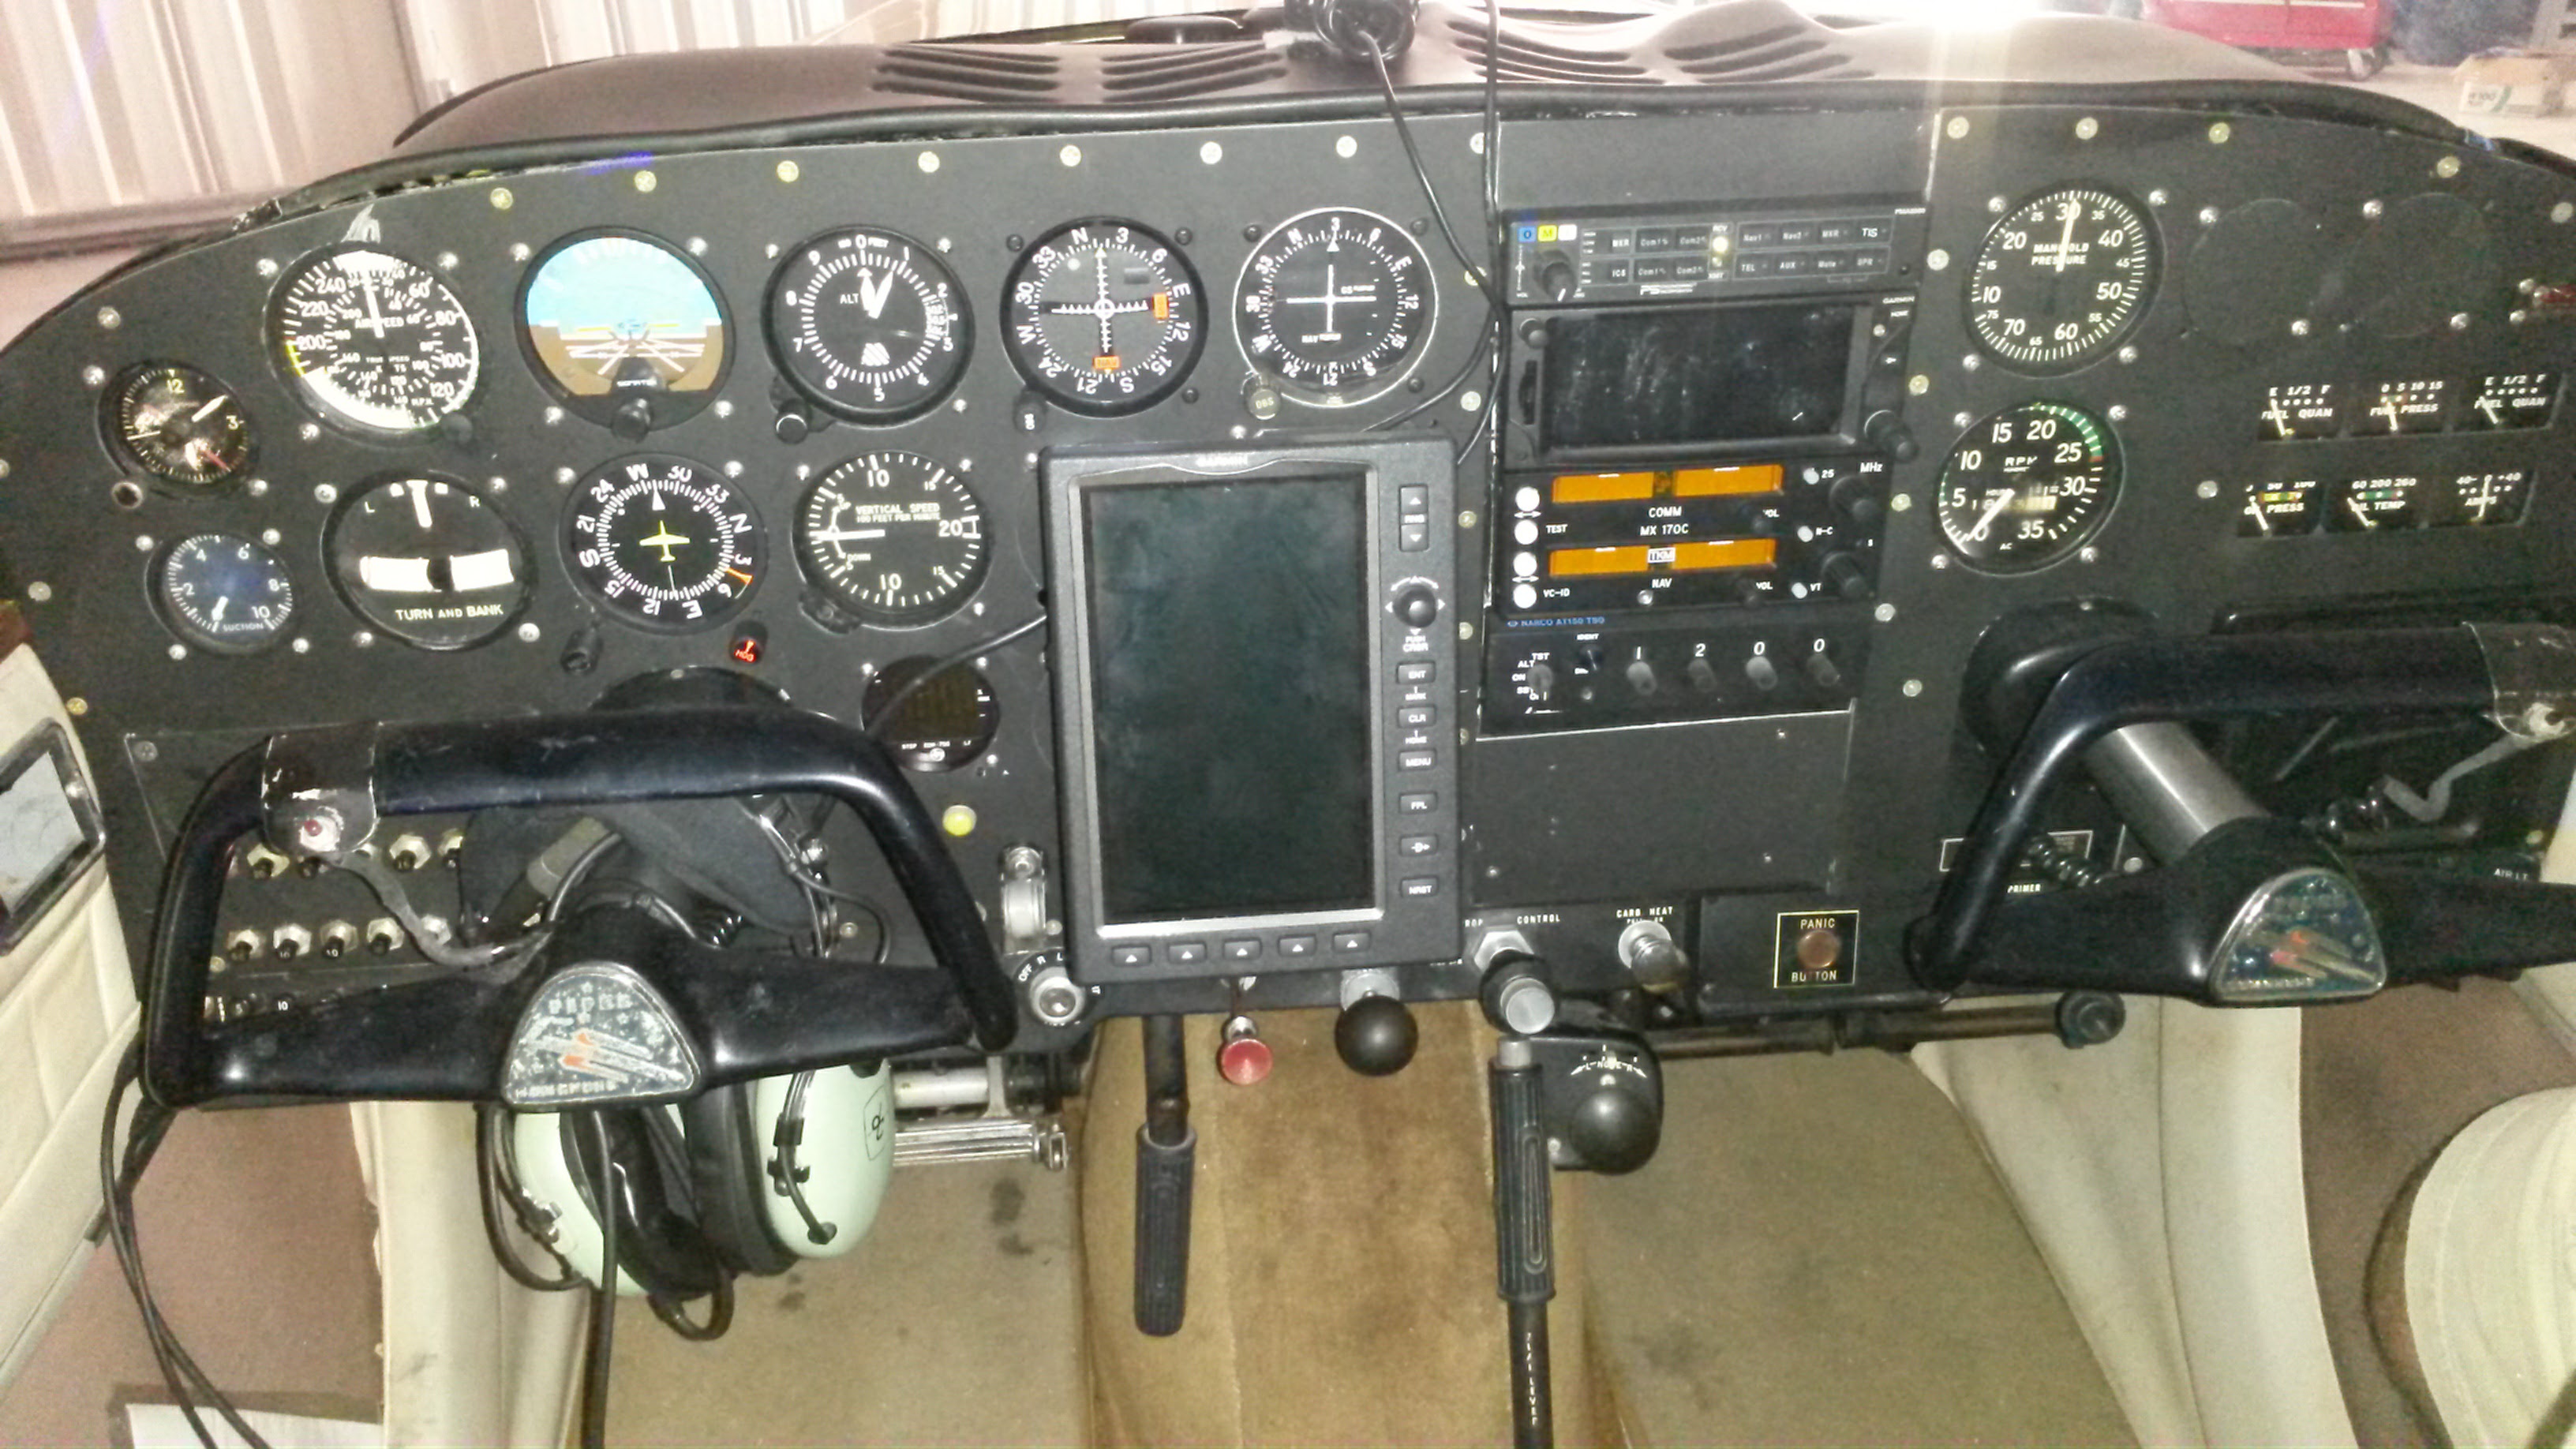
The worlds greatest Comanche 180 – Sunny Side Up is in the process of getting a new instrument panel. The original “Scatter dash” as we call it included some antiquated and slightly out of adjustment instruments. It was time for an upgrade.
The original panel
Getting all the old instruments out was not too difficult. The attitude indicator and the directional gyro were enormous. These two instruments took up a good portion of the space behind the dashboard.
Starting to remove to old panel
The old autopilot a Piper Autocontrol 2 was a marvel of mechanical engineering. Almost fully mechanical with a mix of simple electronics to make a wing leveler that will follow a heading bug. The problem was that it would occasionally malfunction and try to put me in a hard right turn which almost resulted in a wing over. It was time for this very old technology to go.
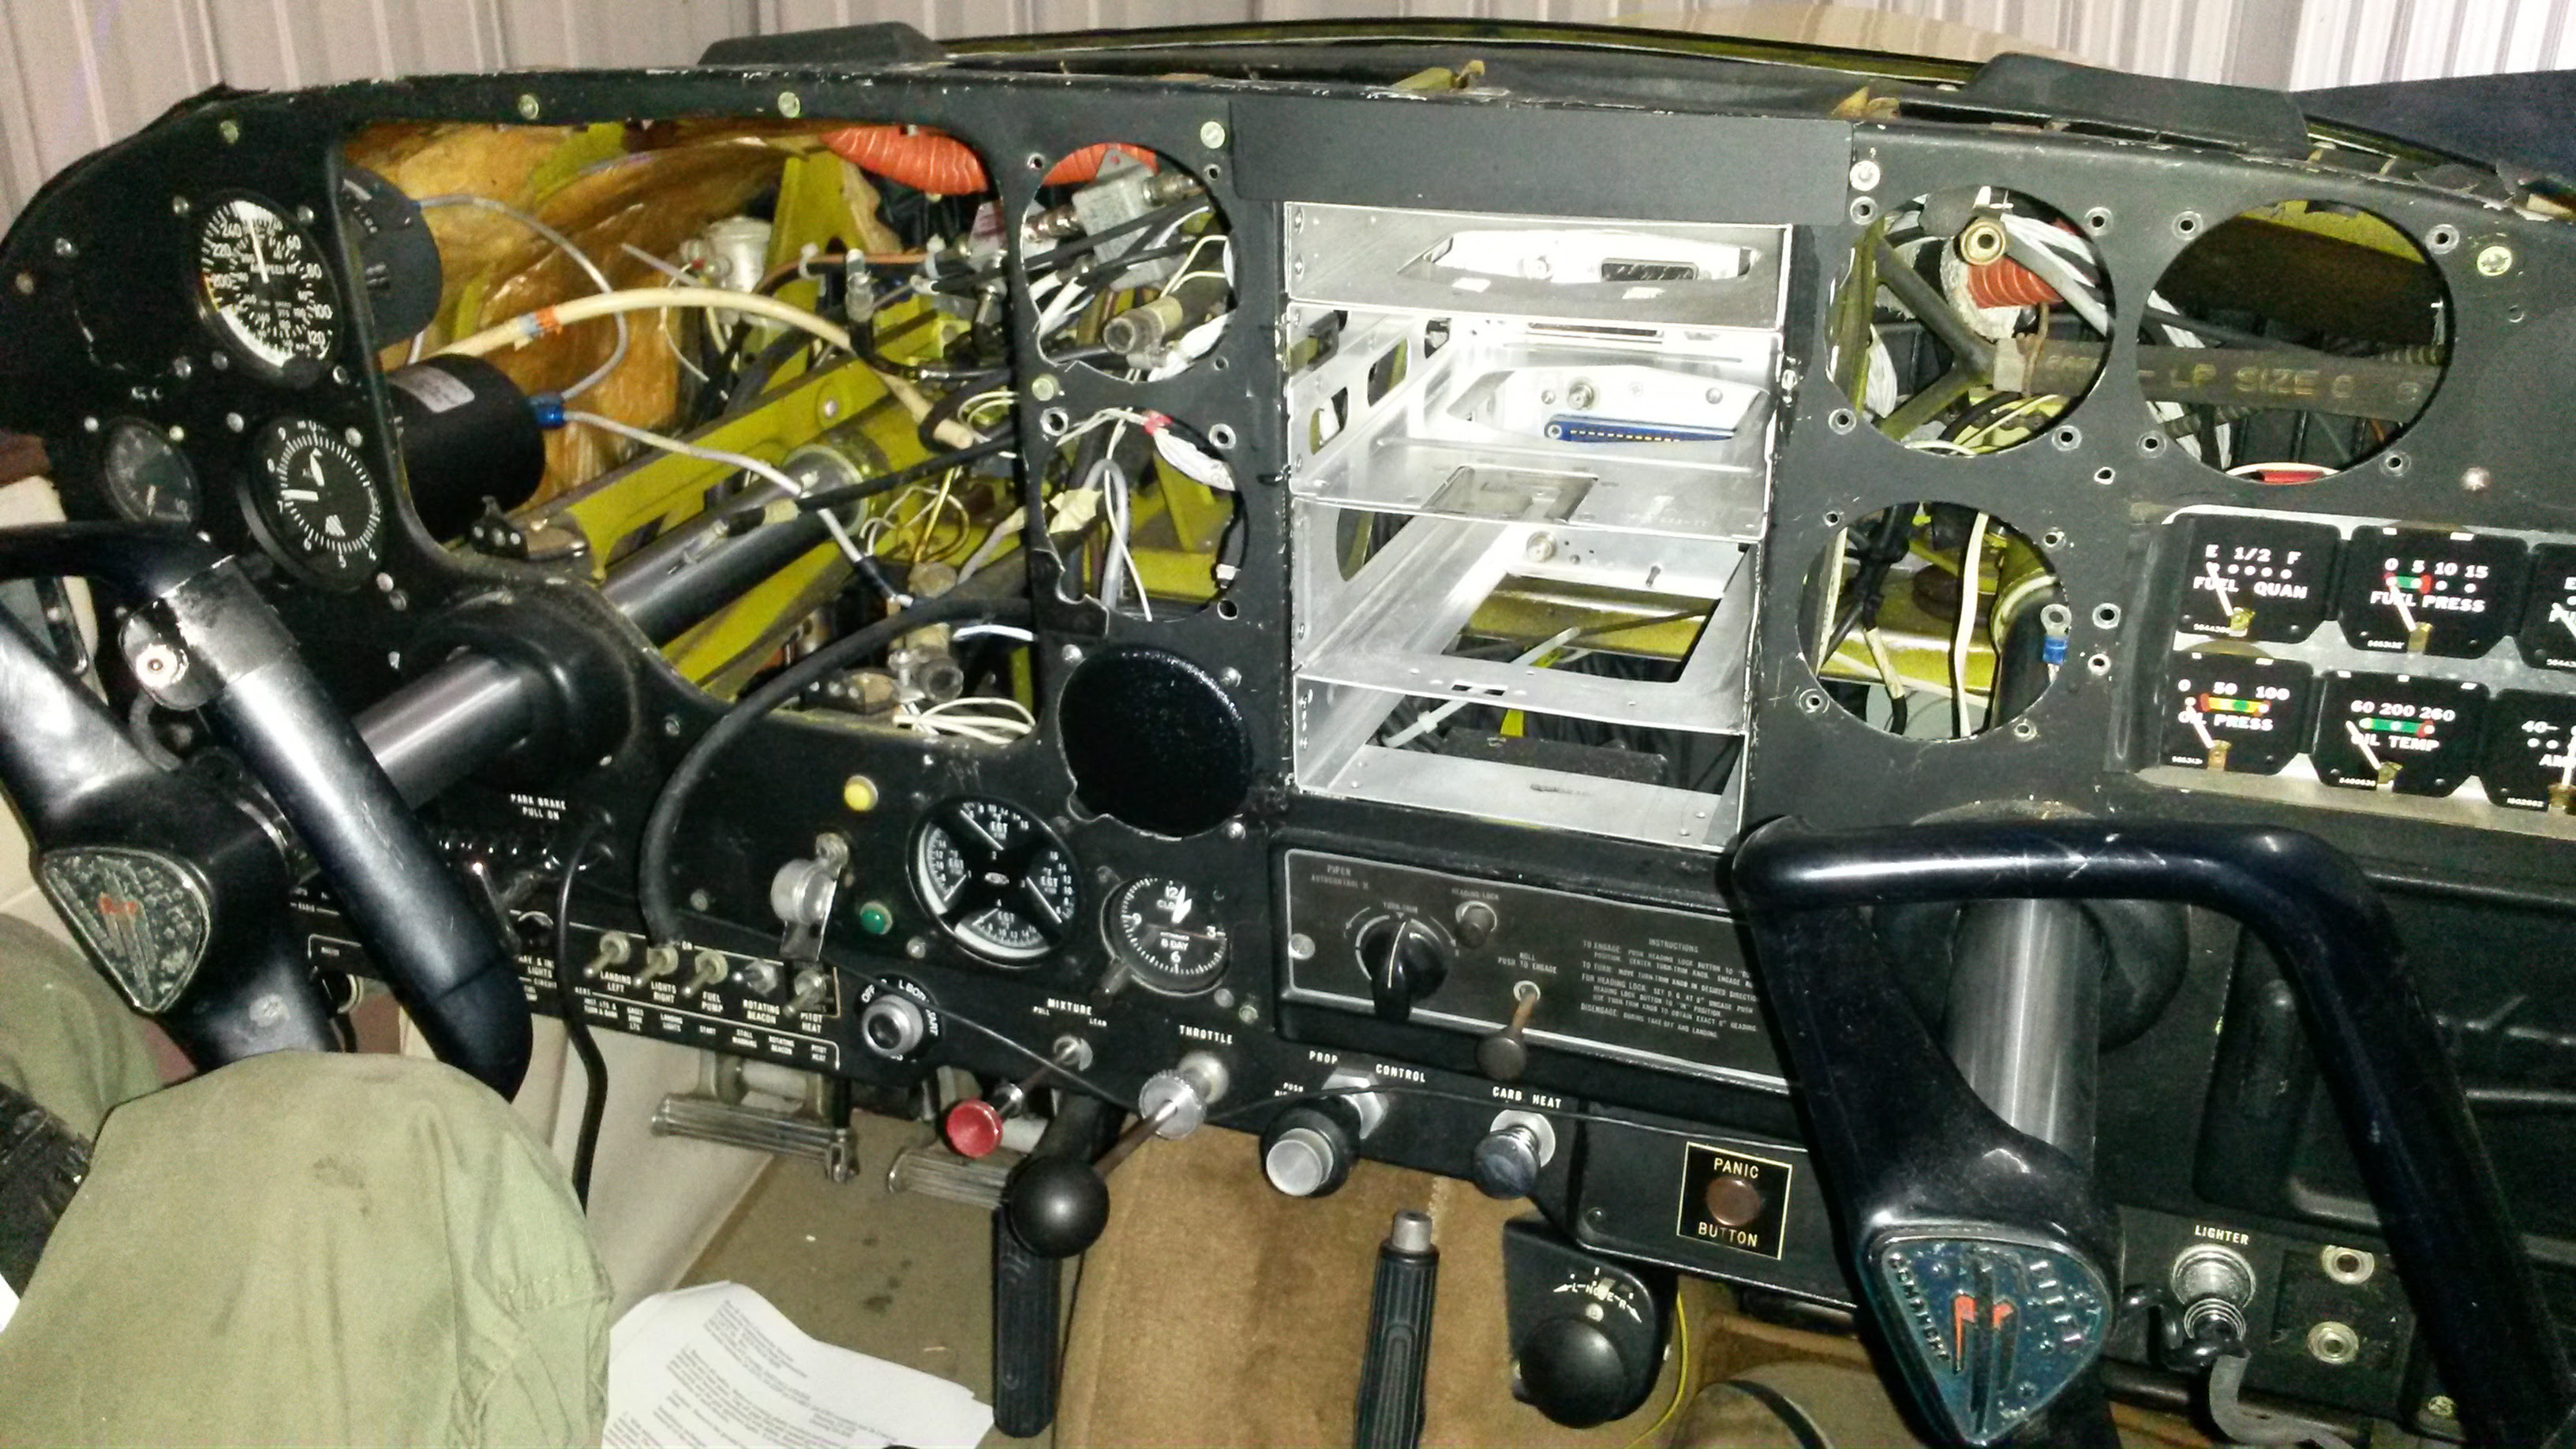
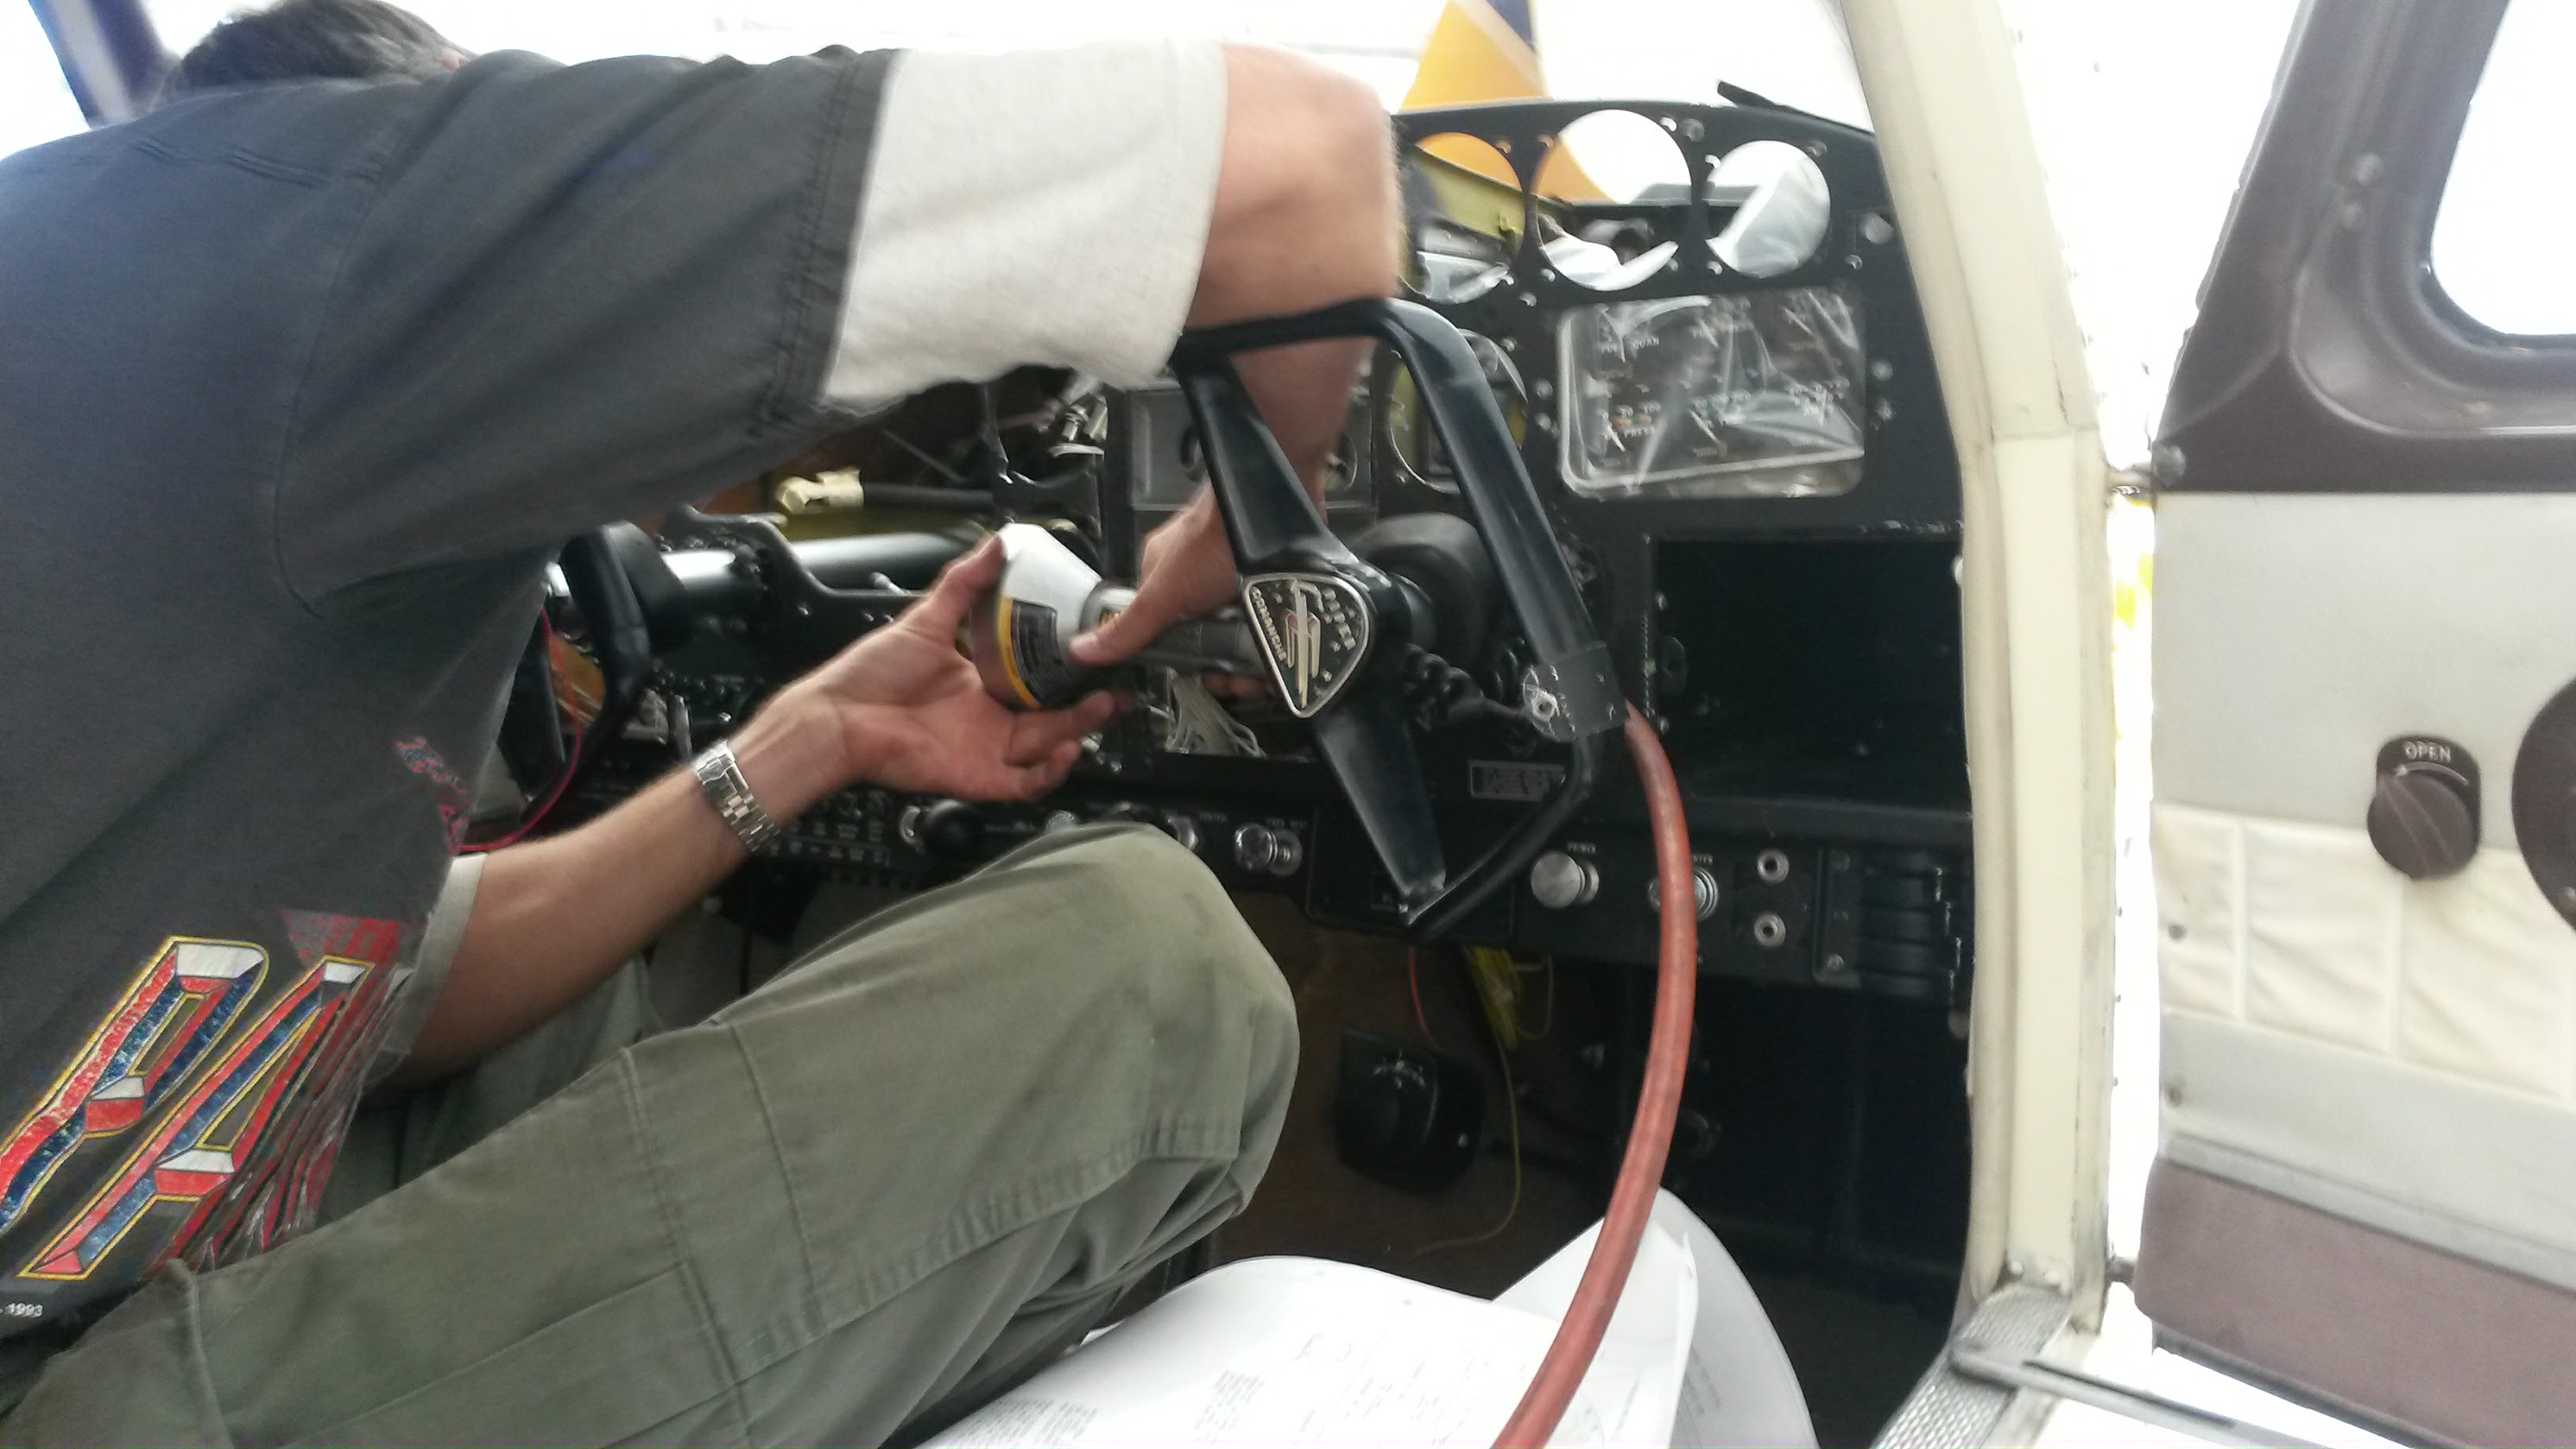
All the instruments out
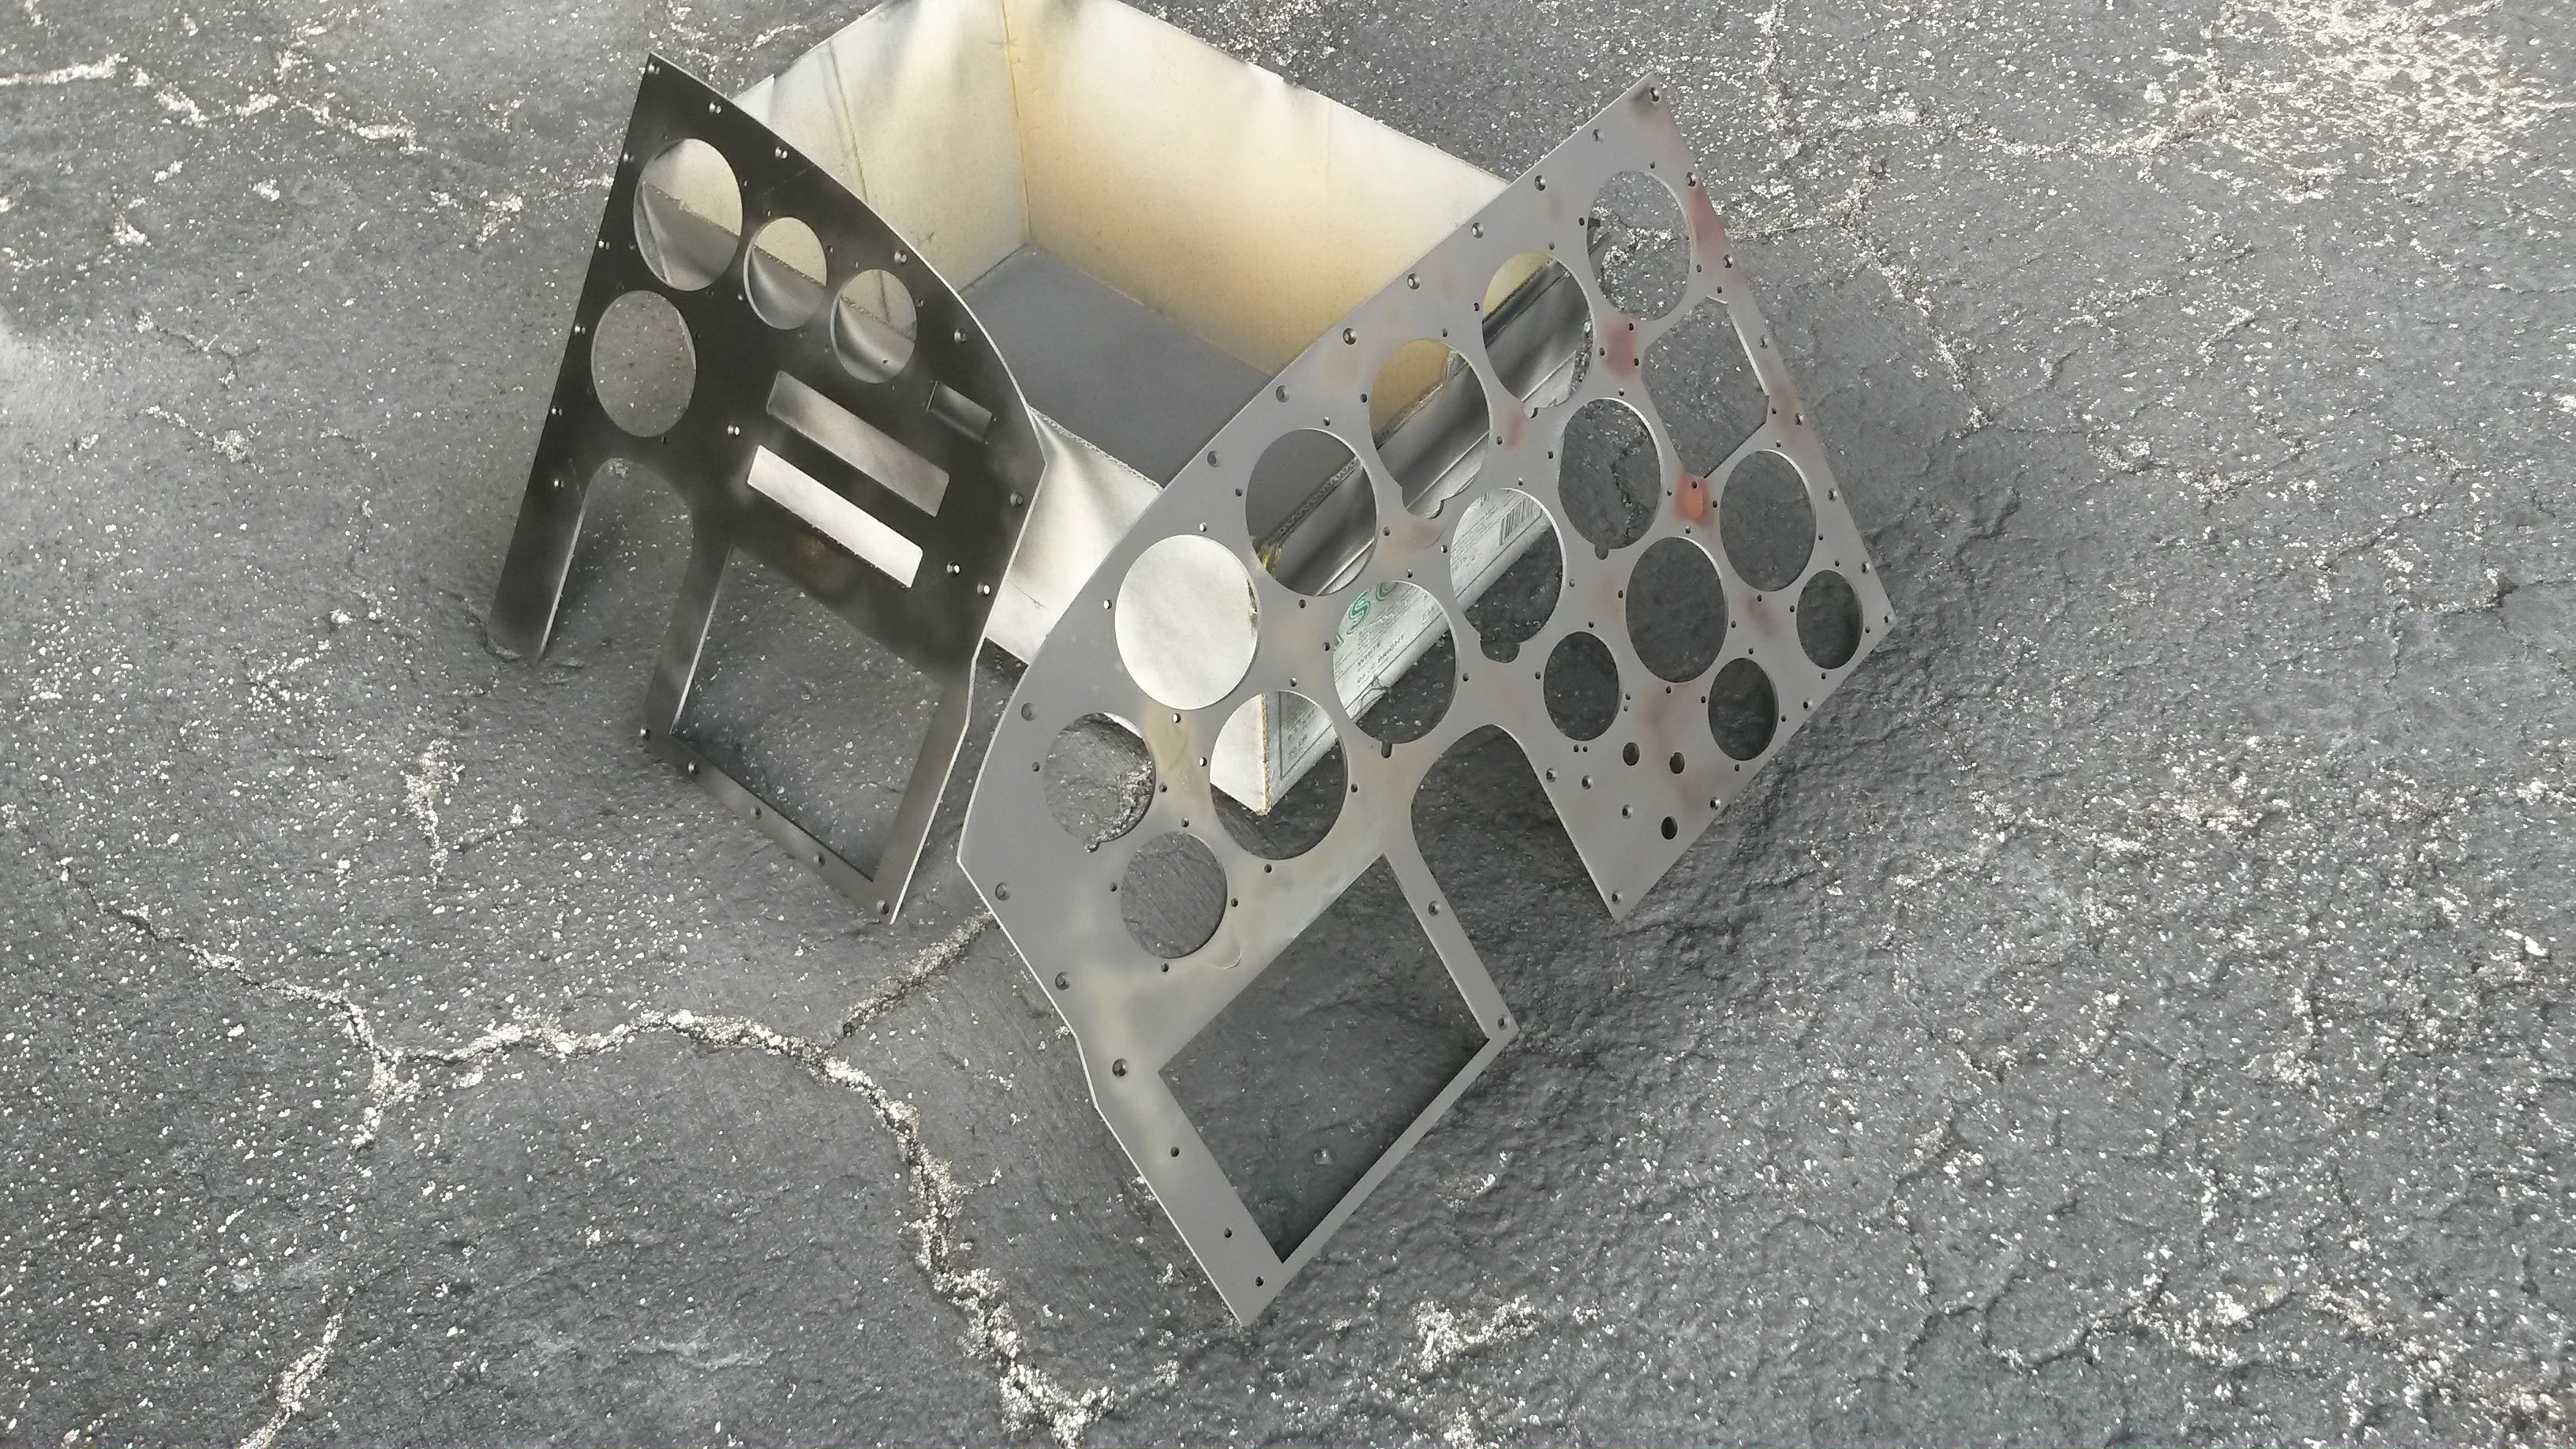
Cutting the original panel was a bit nerve wracking. Once the cutting wheel spun up and was put to the metal there was no going back. I was not committed to the change. Much planning went into the cutting to make sure we did it right.
Starting to cut the old panel
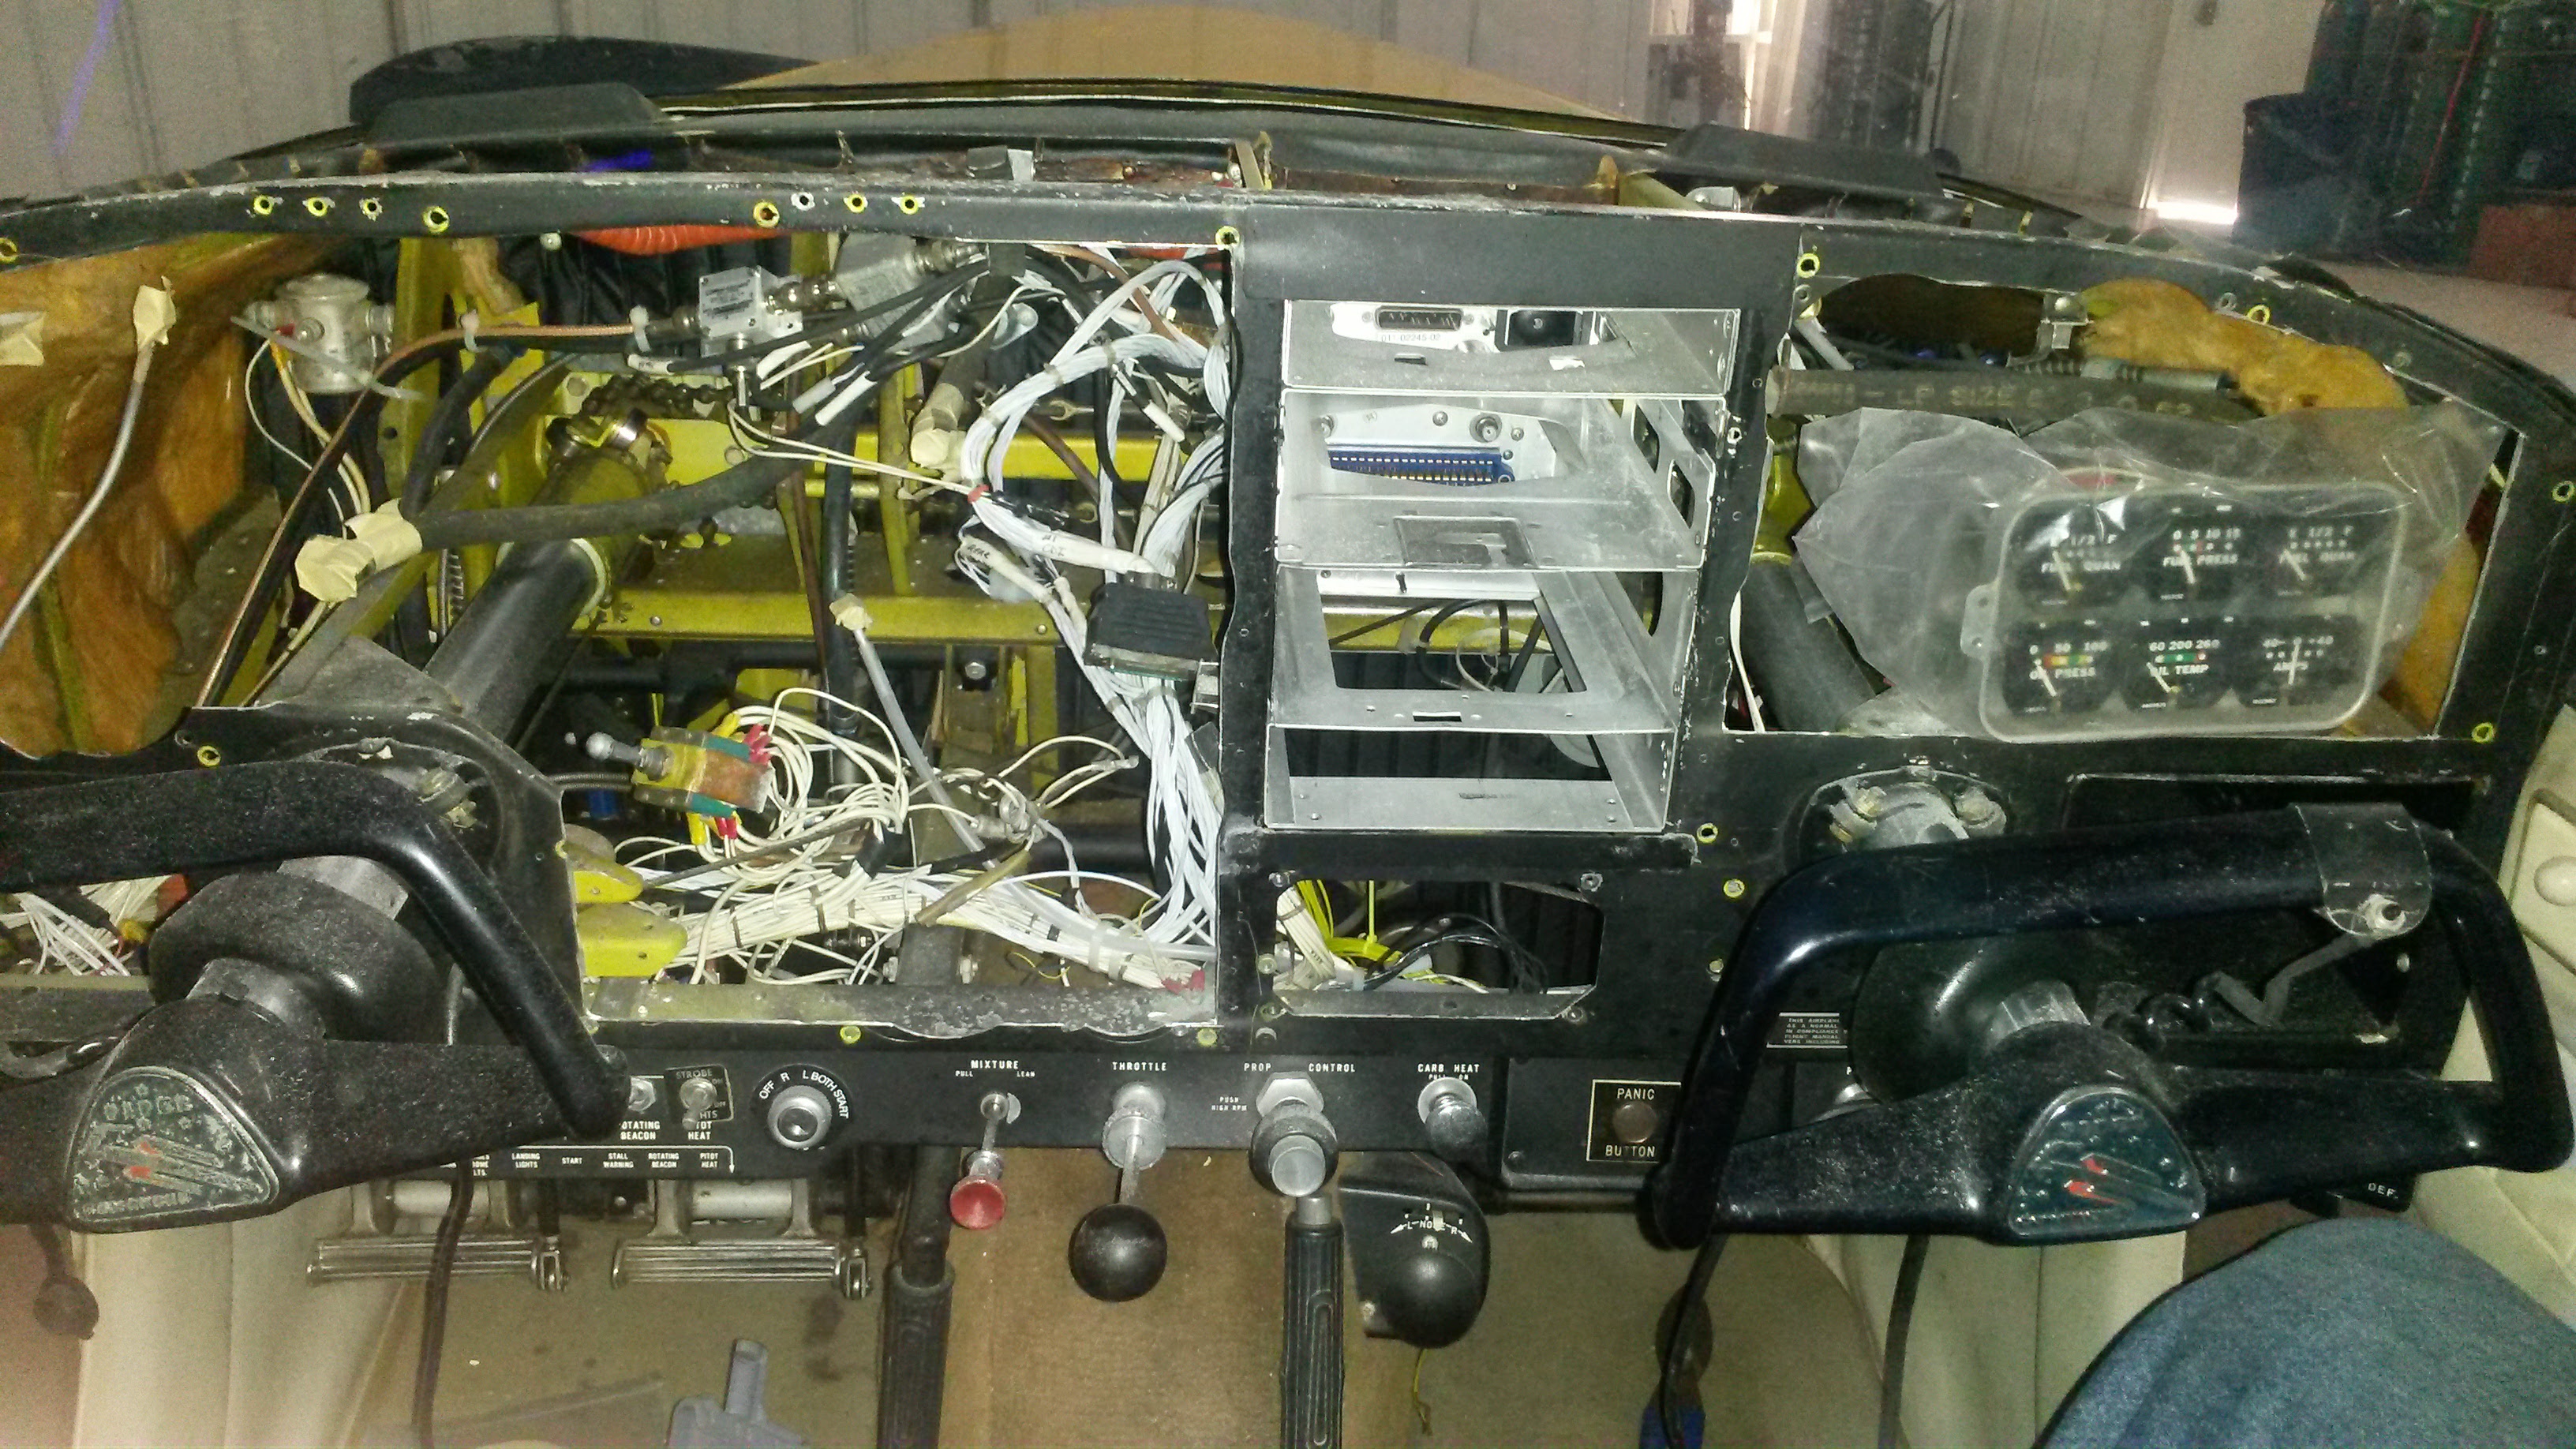
Cutting the panel sprayed aluminum dust everywhere. What a mess it made. Following the directions in the STC paperwork, we cut away every bit required. I was aware we would have to tweak, but just not how much more lay in store.
All the old panel cut away
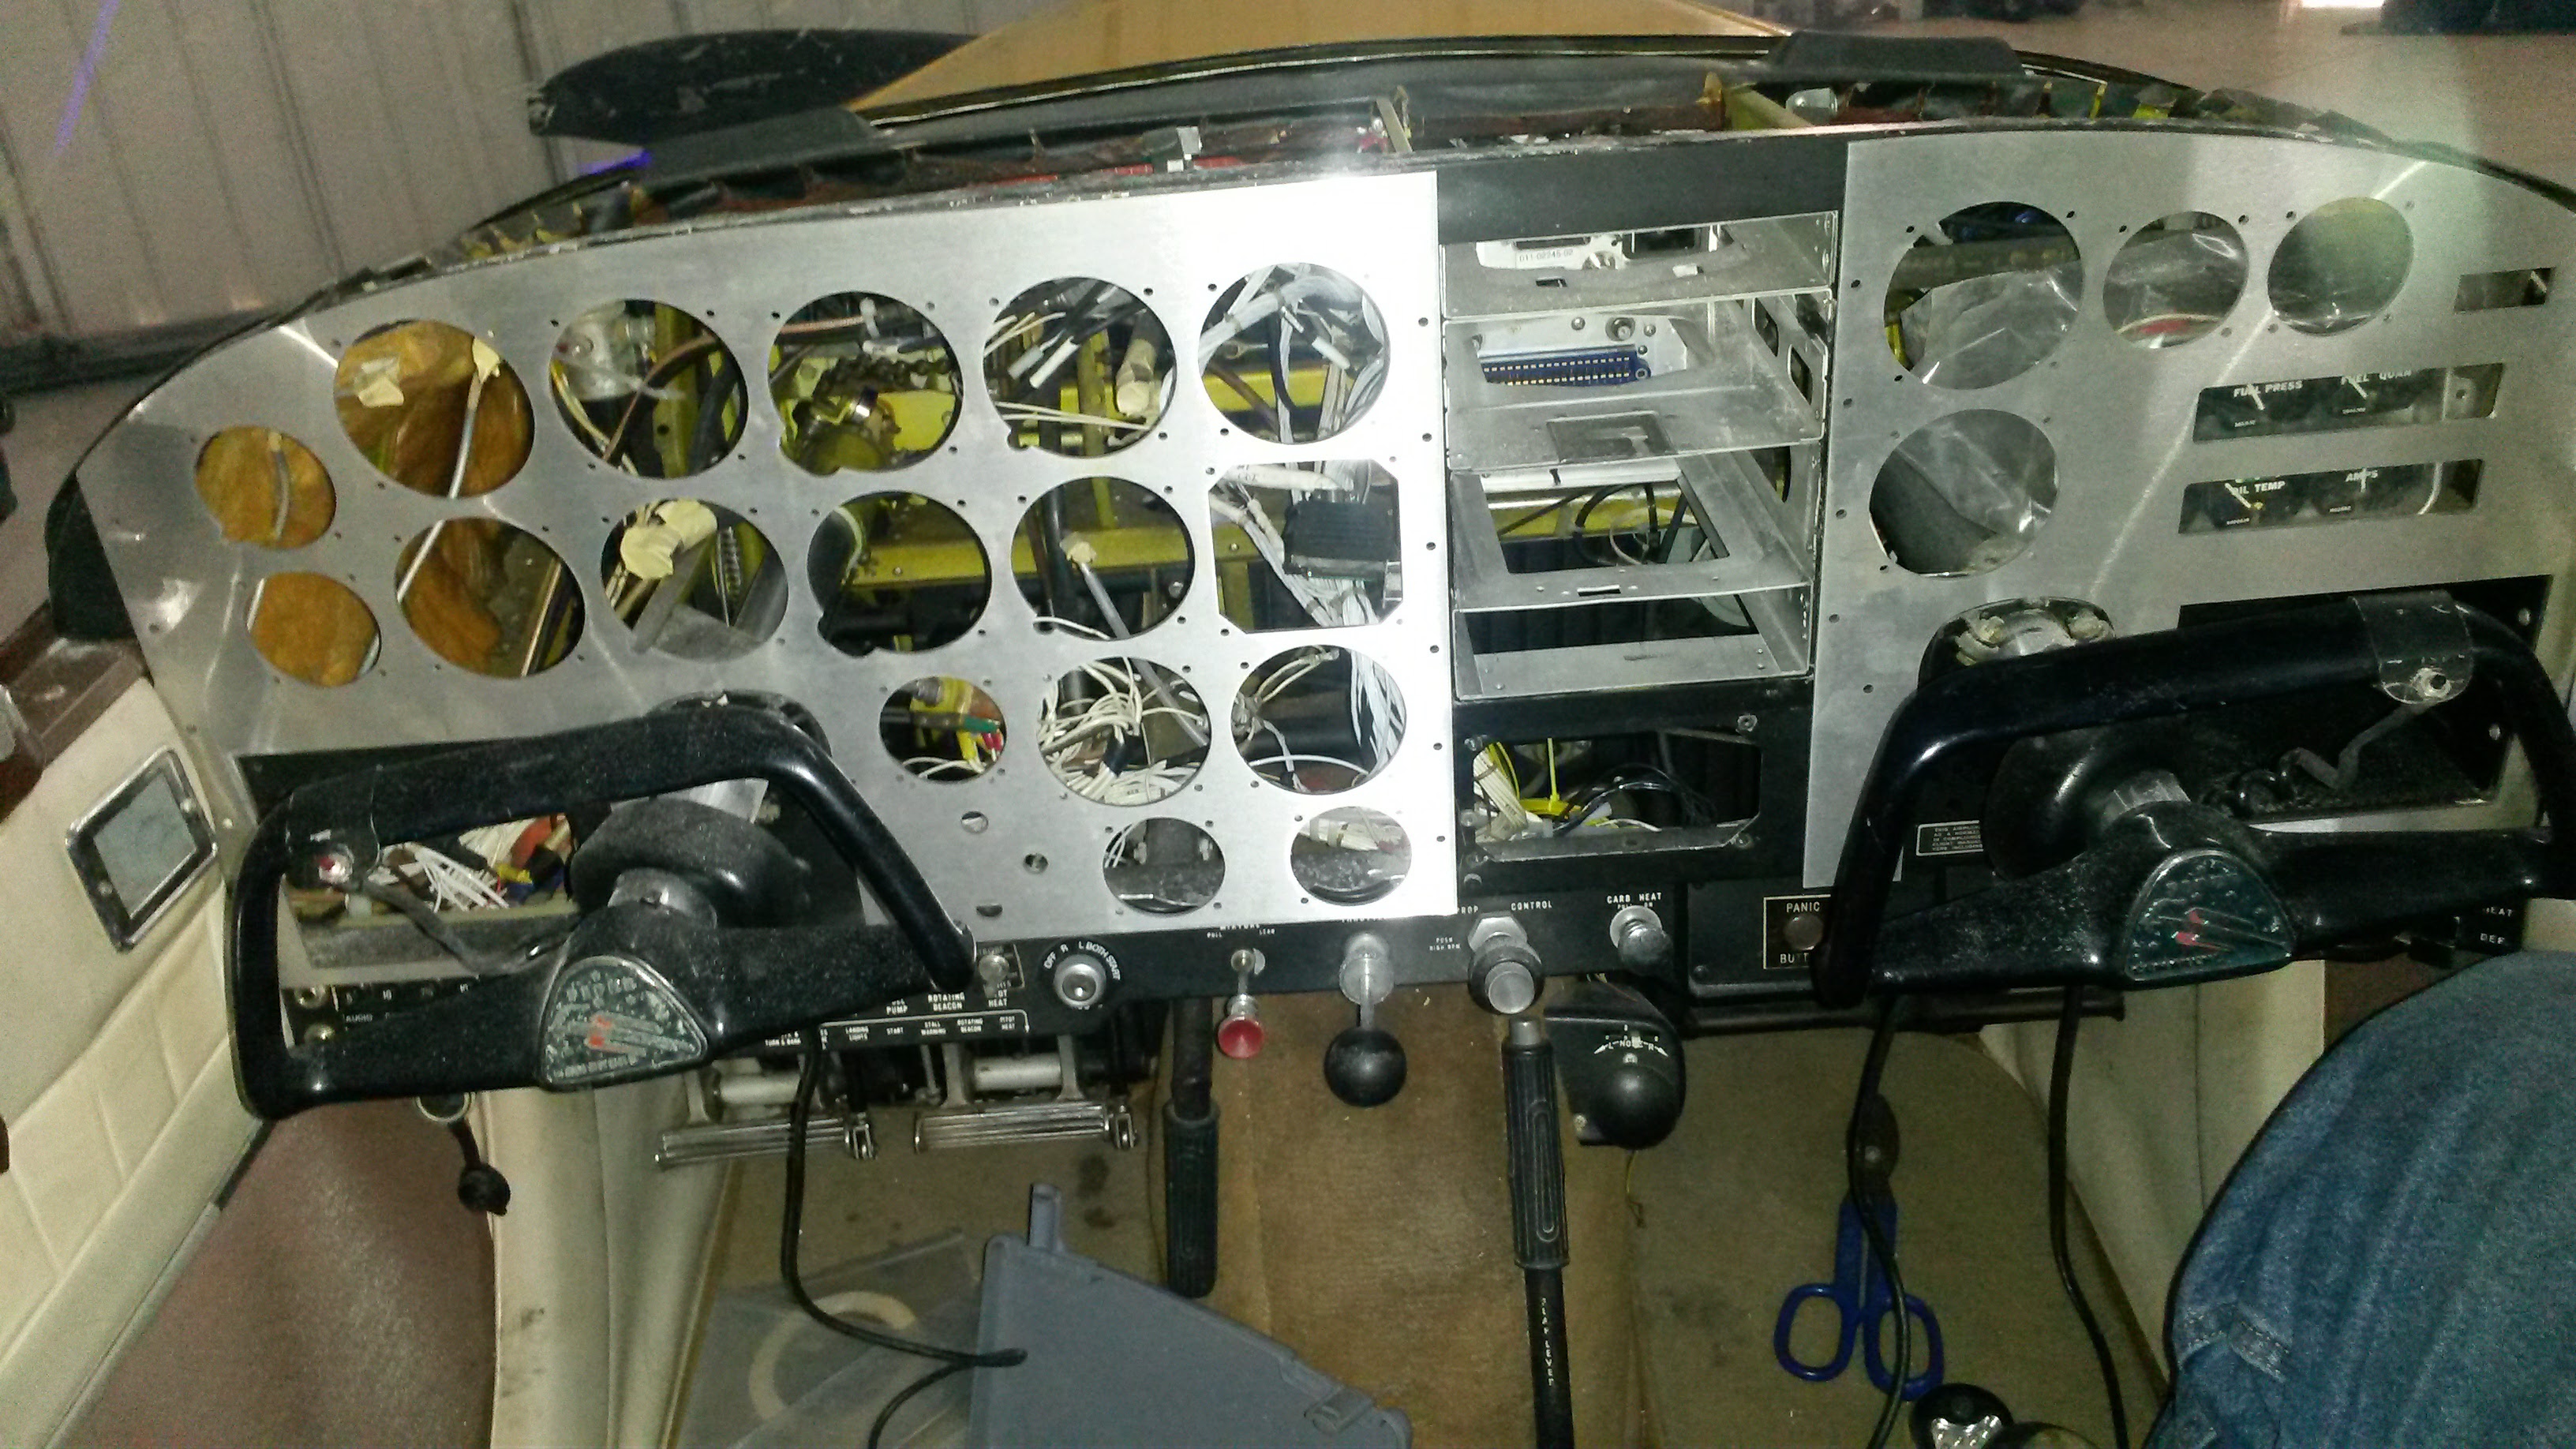
Setting the new panels in place to check the fit gave me a false sense of completion. I began to get hopeful and think that there was not much left to do. That was a bad way to think as there were many slow and tedious tasks ahead.
Checking the fit of the new panel
Day 2
Today was a day of little visible progress although much was done.
The fine tuning of the fit of the panel was done. This required a lot of re-trimming of the cut areas and tweaking some drill points. Once we got that all set, we had to drill several holes in the new panel and into the meat of the remaining frame. Then countersinking every hole and confirming fit.
One of the unforeseen issues is that there is no standard design for all the plumbing behind the instruments. The Comanche had a “scatter panel” until near the end of production and we are putting in instruments that were never in the plane before so we have to kind of make it up as we go. Well not entirely, we have looked at later models and are trying to mimic that plumbing as best we can and apply some common sense.
Checking the instructions, measuring the panel again and designing the plumbing for all the instruments.
Hours went into confirming the alignment of every screw hole. Notice the vacuum filter in the picture above? No such thing ever existed on this plane. Nope none. Had to make up our own plumbing to add it in as the new DG and AI require one.
Painted the panel a classic flat black.
Day 3
More work on the panel today.
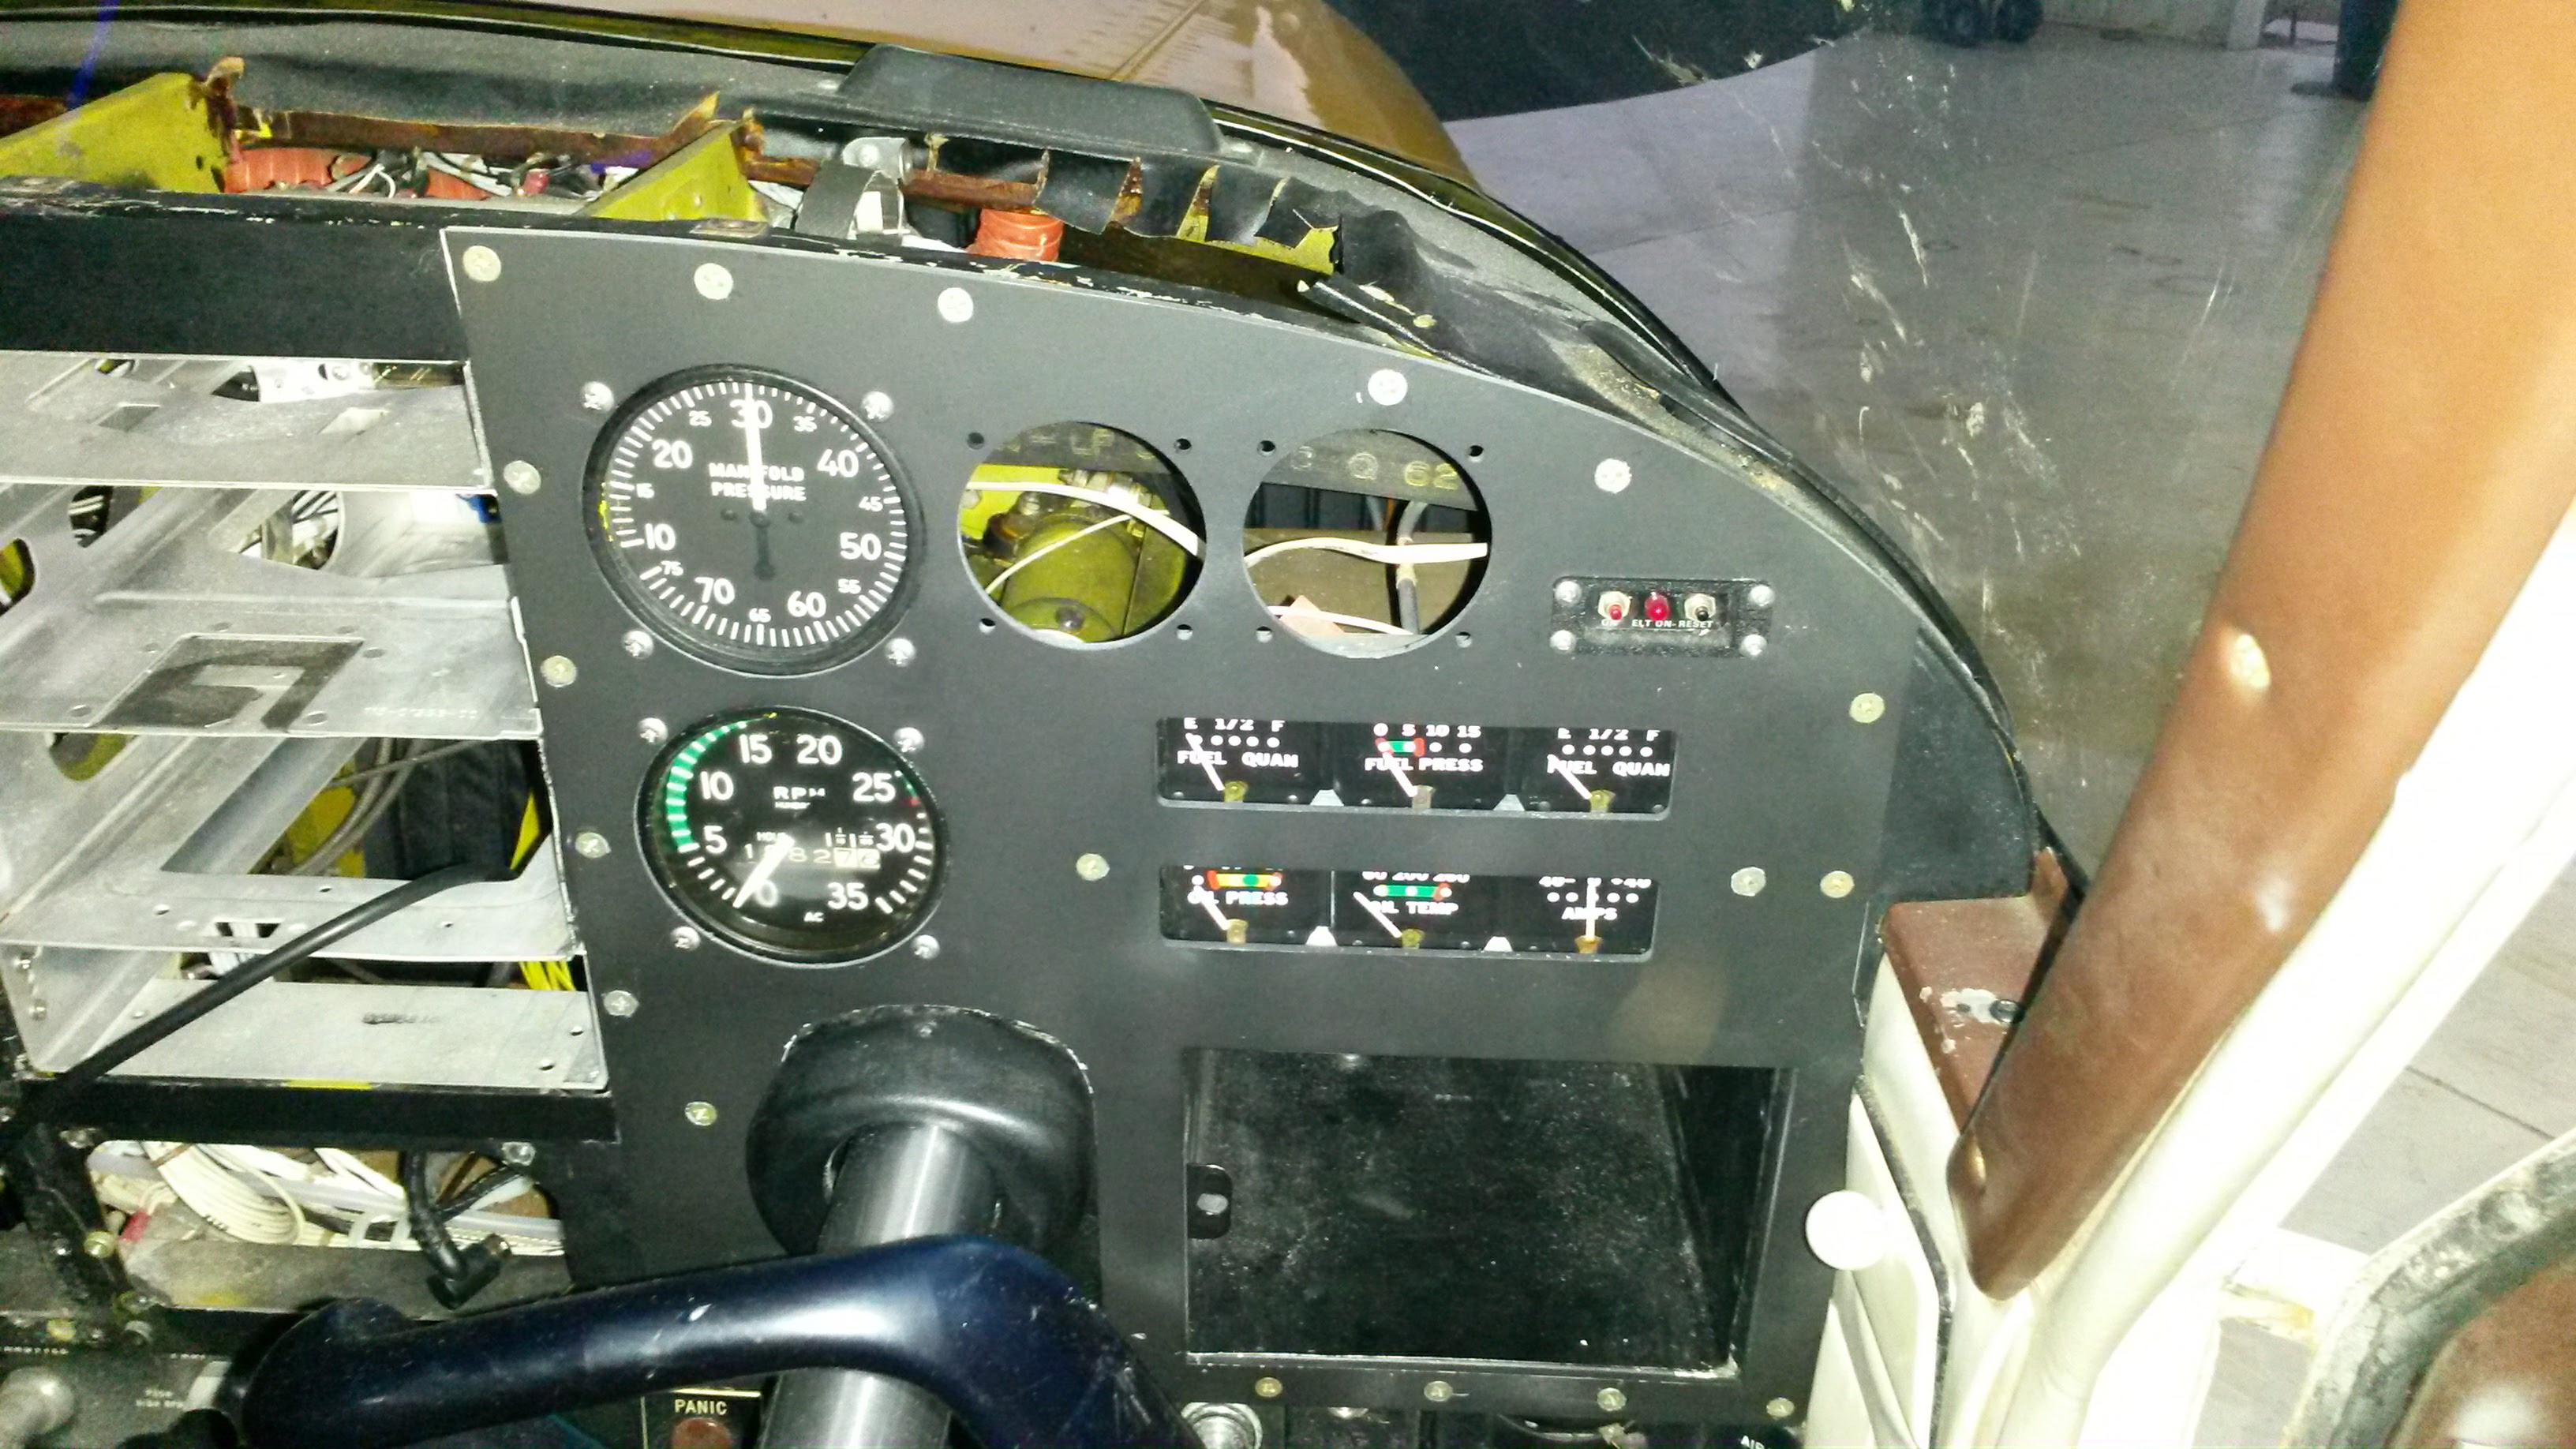
I spent three hours getting the right side panel finished up. There were lots of little details to get exactly right. Getting some of the screws into the ELT was an exercise in contortion. Those little holes were way up in the corner and reaching them was a challenge.
Right side is in
The two smaller holes are for some future updates.
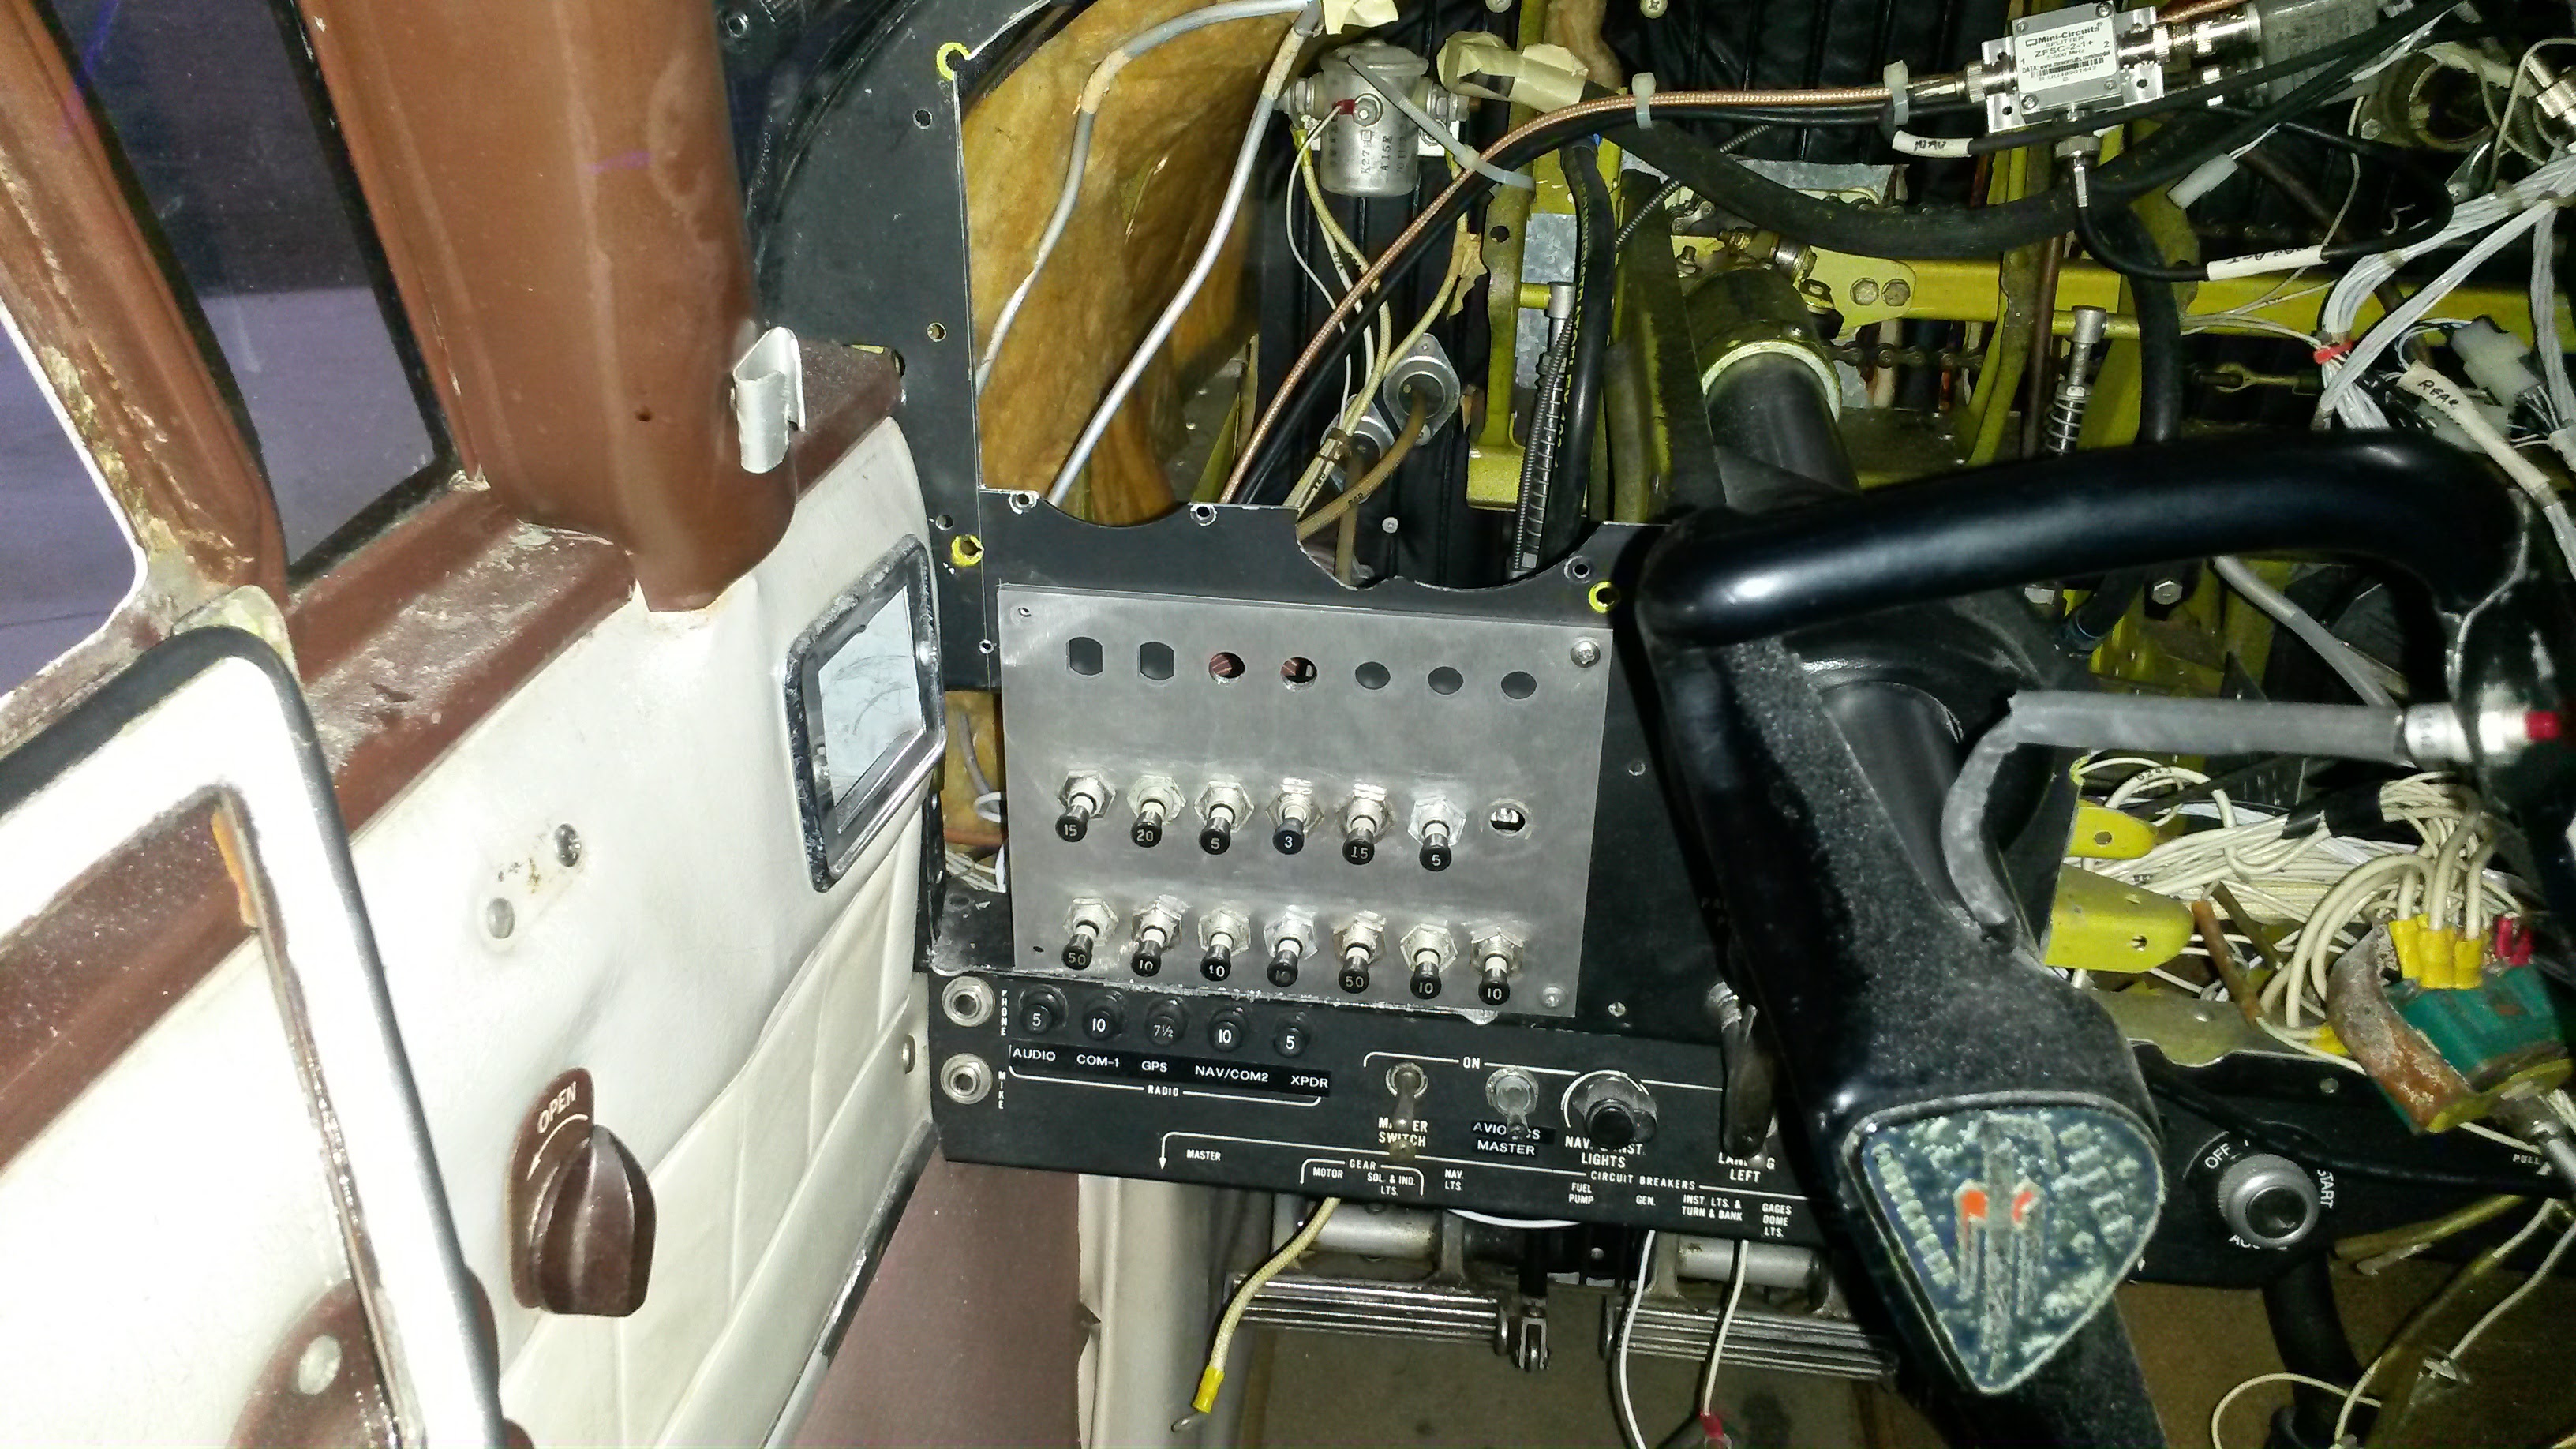
The next biggest time suck was the breaker panel. Moving the breakers from underneath the panel, to the right side took a lot of concentration. Each breaker had to be removed individually from the bottom bus bar, rotated 180 degrees and then all the wires reattached and a new bus bar installed. Of course, there were those mystery wires the went to nowhere and a couple of the breakers were completely empty. Woof!
The breaker panel.
Left and right panel installed
Already tired, we finished up for the night by securing the left panel in place. The fit and finish was good, but it still needs a bit of trimming.
The next three steps
1. Secure all the wires behind the panel
2. Install the pitot system gages
3. Install the vacuum system
Day 4
Progress is measured in hours and inches right now. So many little tasks each requiring many small steps to achieve.
For example, We have this wire – not sure what it does. It has a 15 amp fuse that was blown plugged into it. Not sure how long it has been blown or what it does. Tracing it out has been a challenge.
I spent the better part of 6 hours running all the plumbing for the gauges. The airspeed is connected to the altimeter, the altimeter is connected to the VSI. The airspeed also has the ram air from the pitot tube and the VSI is connected to the static port all the way in the tail of the plane.
As I shared earlier the plumbing for the vacuum gauges was all new too. Each and every pipe and connection was new.
An interesting solution for the empty holes. The manufacturer sent all the holes cut from the panel. I took some strips of 40 gauge aluminum and made some strips long enough to go across the holes diagonally. Then I drilled and tapped them and secured them across the holes with #6 screws. Then I applied a glop of silicone and pressed the blank into the hole I then taped them in place to secure them until the silicone cures.
Tomorrow we have some final items to complete.
attach power to the EDM700
find the wire for the pitot heat (F2C)
test all the circuits
swing the gear
install all the panel labels
test the vacuum system
test the pitot system
Day 5
Attaching the EDM700
We put the panel all back together and started testing. Some initial issues were the EDM700 kept reporting low voltage. We tried lots of things, and finally solved it by cleaning and adjusting the bus bar that connected the circuit breaker. Seems there was some film on the metal that was creating resistance and reducing voltage to the unit.
Finding the Pitot Heat Wire
Chasing the pitot heat wire has proven an exercise in futility. Even with a wire chaser, we were unable to find the end of the wire in the cabin. It seems we are going to have to run a new wire from the cabin, through the wing and out to the pitot tube heating element
Test all the Circuits
The gauges were also an issue. The amp meter read a constant discharge. A test with another amp meter showed no such thing. With a bit of adjustment we were able to get proper reading. All the instrument gauges read slightly differently and I thought maybe it was a grounding issue. I ran a new ground cable and it seemed to make it better, but not exactly the same as it was before.
Swing the Gear
One of the most important test we did, at least for my peace of mind, was a gear swing. My reasoning was that we moved and touched every single wire that connected the switches and lights that controlled the gear. I wanted t make sure it was all working properly. I am glad we did. The gear lights did not work and had to be replaced.
Test the Vacuum System
This was pretty easy. We pulled the plane out of the hangar and started it up. Within a few seconds the instruments began to spin up and I heard what can only be described as “kissy noises” coming from the panel. I felt around behind each instrument and found the loose connections and tightened the hose clamps a bit more to make them stay stable.
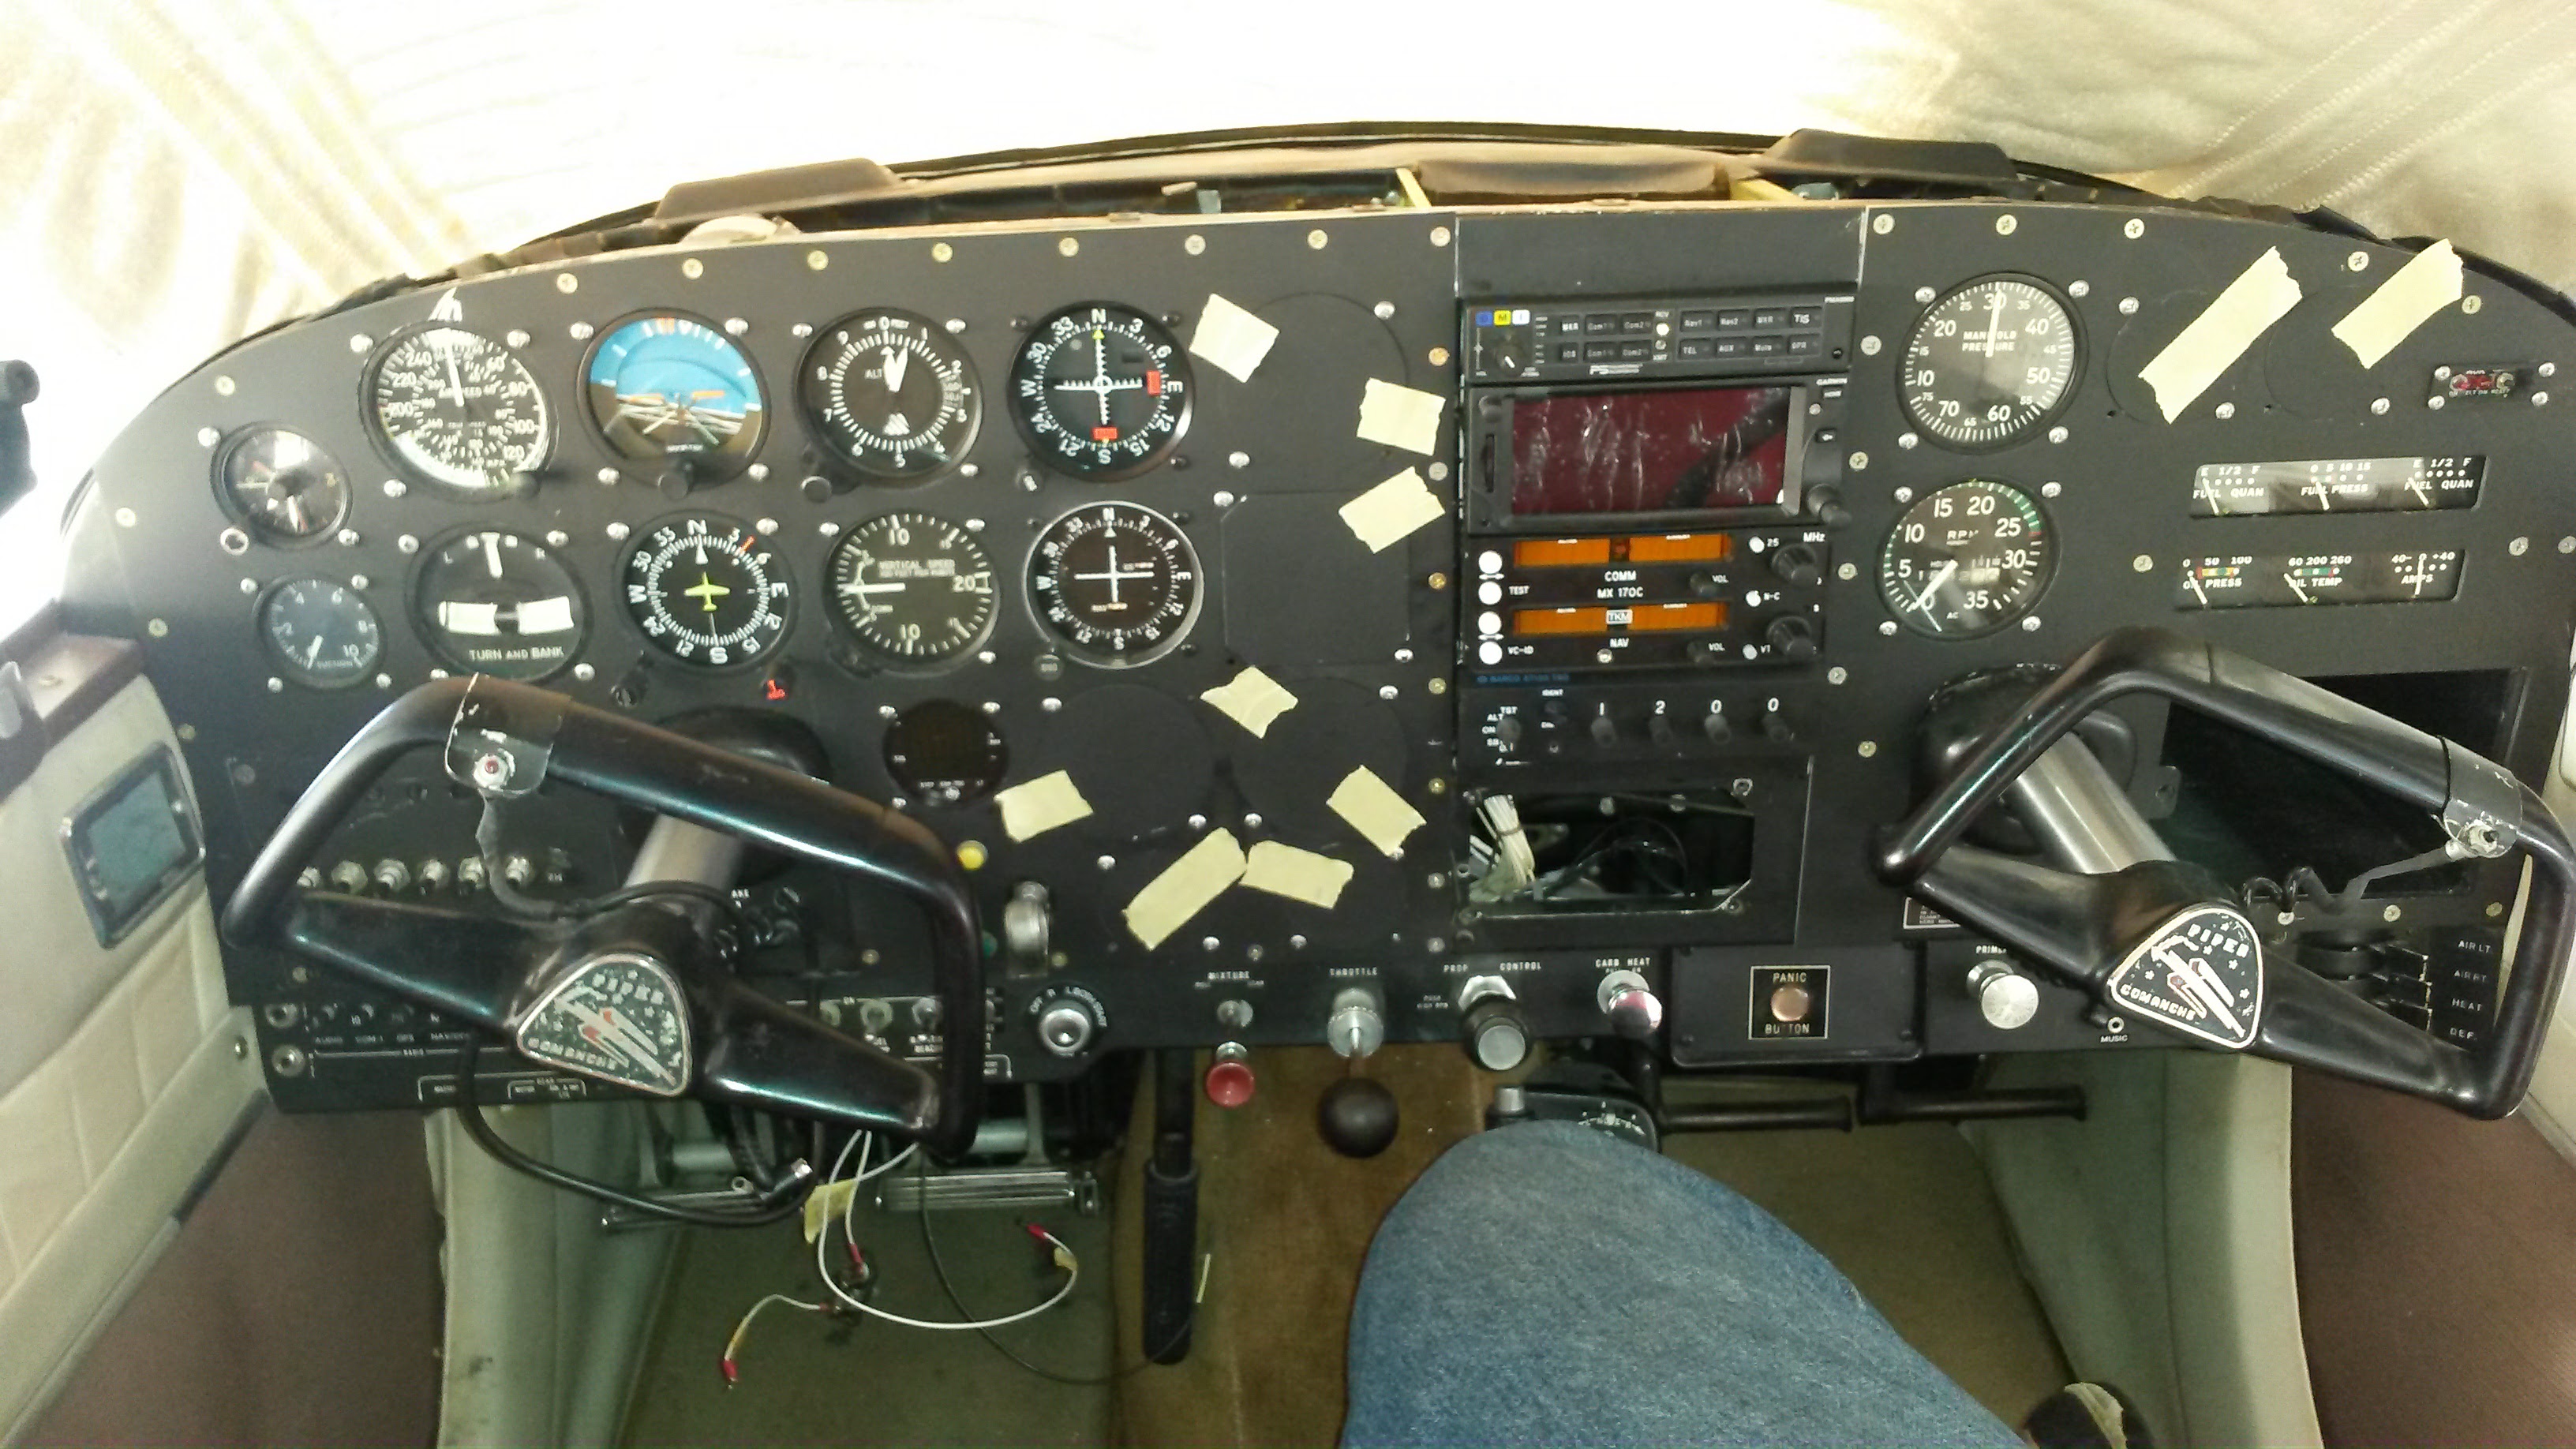
After many more hours we arrived at a functional product. Sure there are still a few things to do, including touching up my scrape at the top of the airspeed indicator and adding all the labels. For now it is looking good and then final touches will happen over the next few weeks.